Jira Product Discovery fields overview
What are fields in Jira Product Discovery?
Fields are granular sets of criteria to compare, categorize, sort, and prioritize ideas. Fields can be anything from goals, effort level, business impact, and more. There are two categories of fields:
- Built-in fields - System fields like Assignee, Comments, Updated, and Delivery progress which cannot be modified or deleted
-
Project custom fields - All other fields that you can create, modify, and delete. Discovery projects include custom fields out of the box, like Effort, Impact, Goals, and Confidence
Built-in and custom fields also have field types, which refers to the format of the field option, like a number, checkbox, multi-select values, rating, or a custom formula. Custom formulas are best used if you have your own prioritization methodology or criteria for categorizing ideas.

The use cases for custom fields are endless. Find inspiration in some examples of custom fields below:
- Use a custom checkbox field named “Triage” so PMs can easily control and track when new ideas are submitted
- Create a custom formula field named “Impact vs Effort” with a simple formula, {Impact}/{Effort} , to help prioritize a list of ideas
- Use a custom select field to create a parent/child or opportunity/solution relationship among ideas. See an example or watch a demo on how to recreate it.
-
Create custom fields and a custom formula to leverage the RICE scoring method for prioritizing a list of ideas based on Reach, Impact, Confidence, and Effort. See demo on using RICE to prioritize ideas and Mastering prioritization with RICE (Guide).
Visit our documentation to learn more about fields and field types.
How do I create and edit fields?
All fields are easily customizable, whether it’s changing the name of the field or modifying the field options. Note that only Creators can create and edit fields. To create a new field:
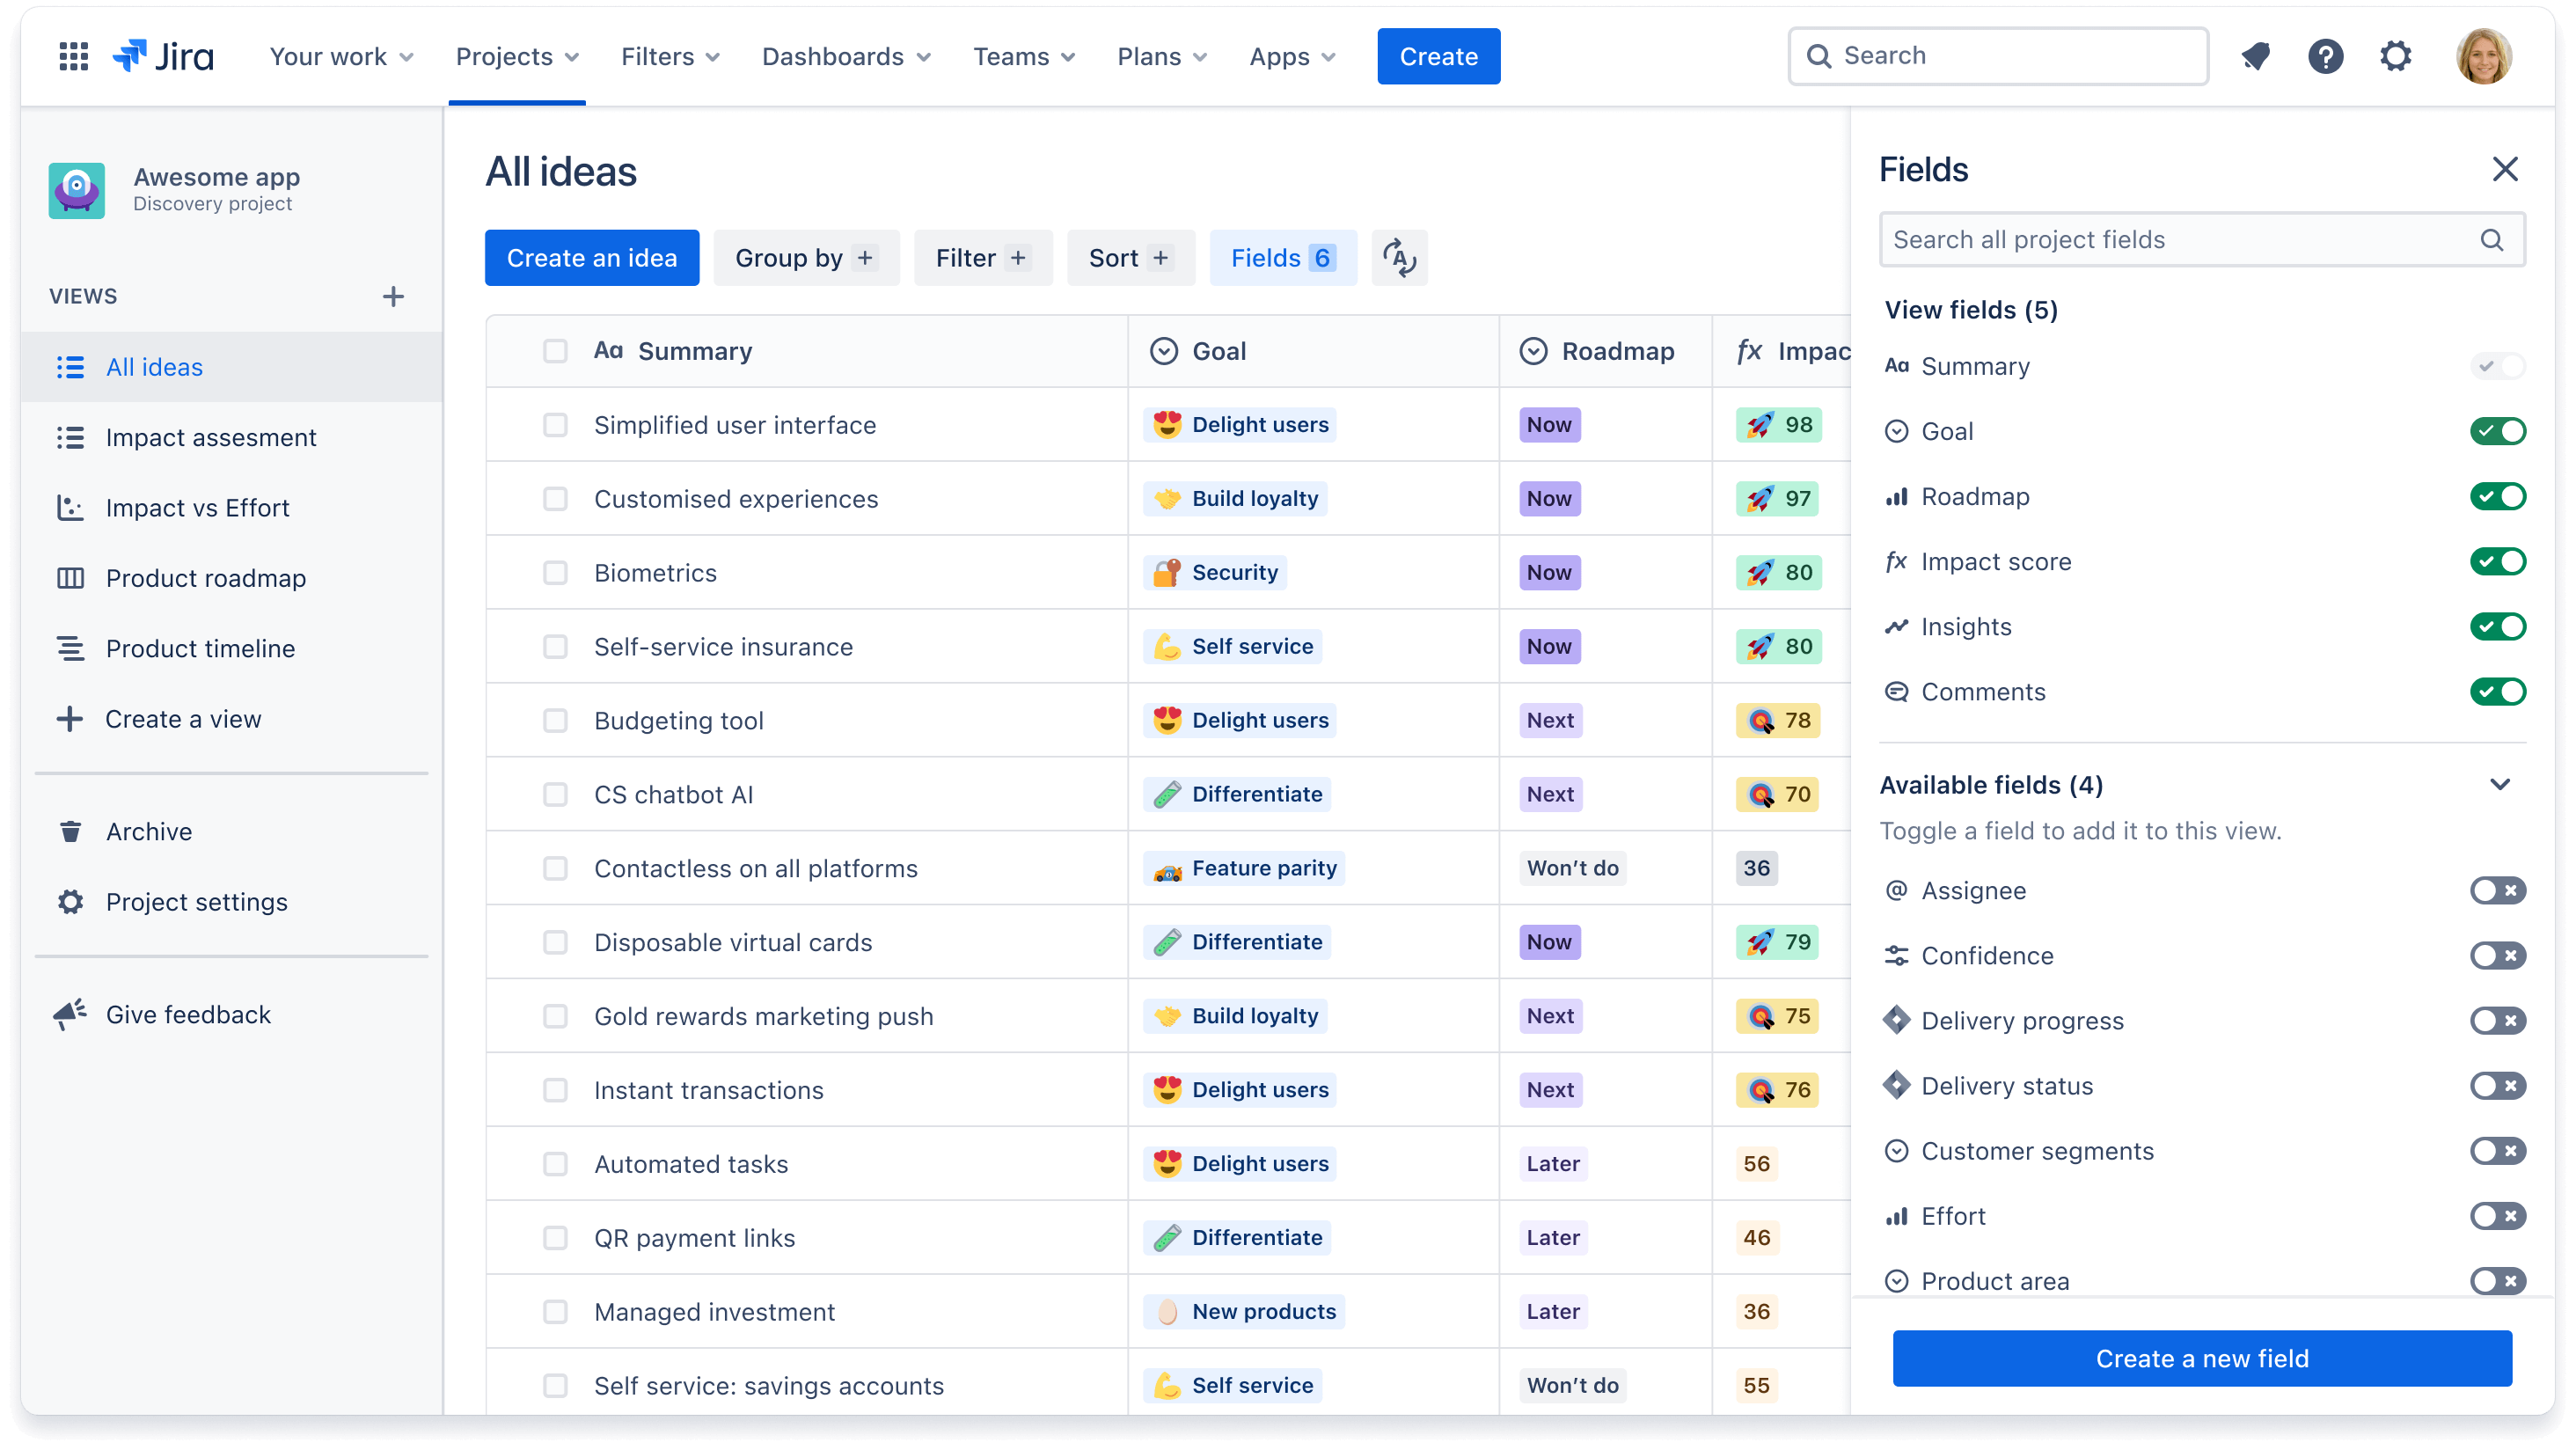
- Navigate to any view and click on the Fields button
- In the righthand panel that appears, click on the blue Create a new field button.
- Add a field name and select a field type
To edit a field:
- Navigate to any view and click on the Fields button
- In the righthand panel that appears, hover over any field and click the gear icon to edit the field name or values
Formatting beautiful fields
Managing and viewing a project is much easier to navigate when you add formatting like colors and emojis - plus it’s visually pleasing! To add formatting to a field:
- Navigate to any view and click on the Fields button
- In the righthand panel that appears, hover over any field and click the gear icon to edit
- Above the space to write a description, click the emoji icon to add an emoji next to the field name
- In the Options section below, hover over any field option, click the three dots, and select Edit options
- For each field option, you can add an emoji, associate it with a color, and toggle on row highlighting
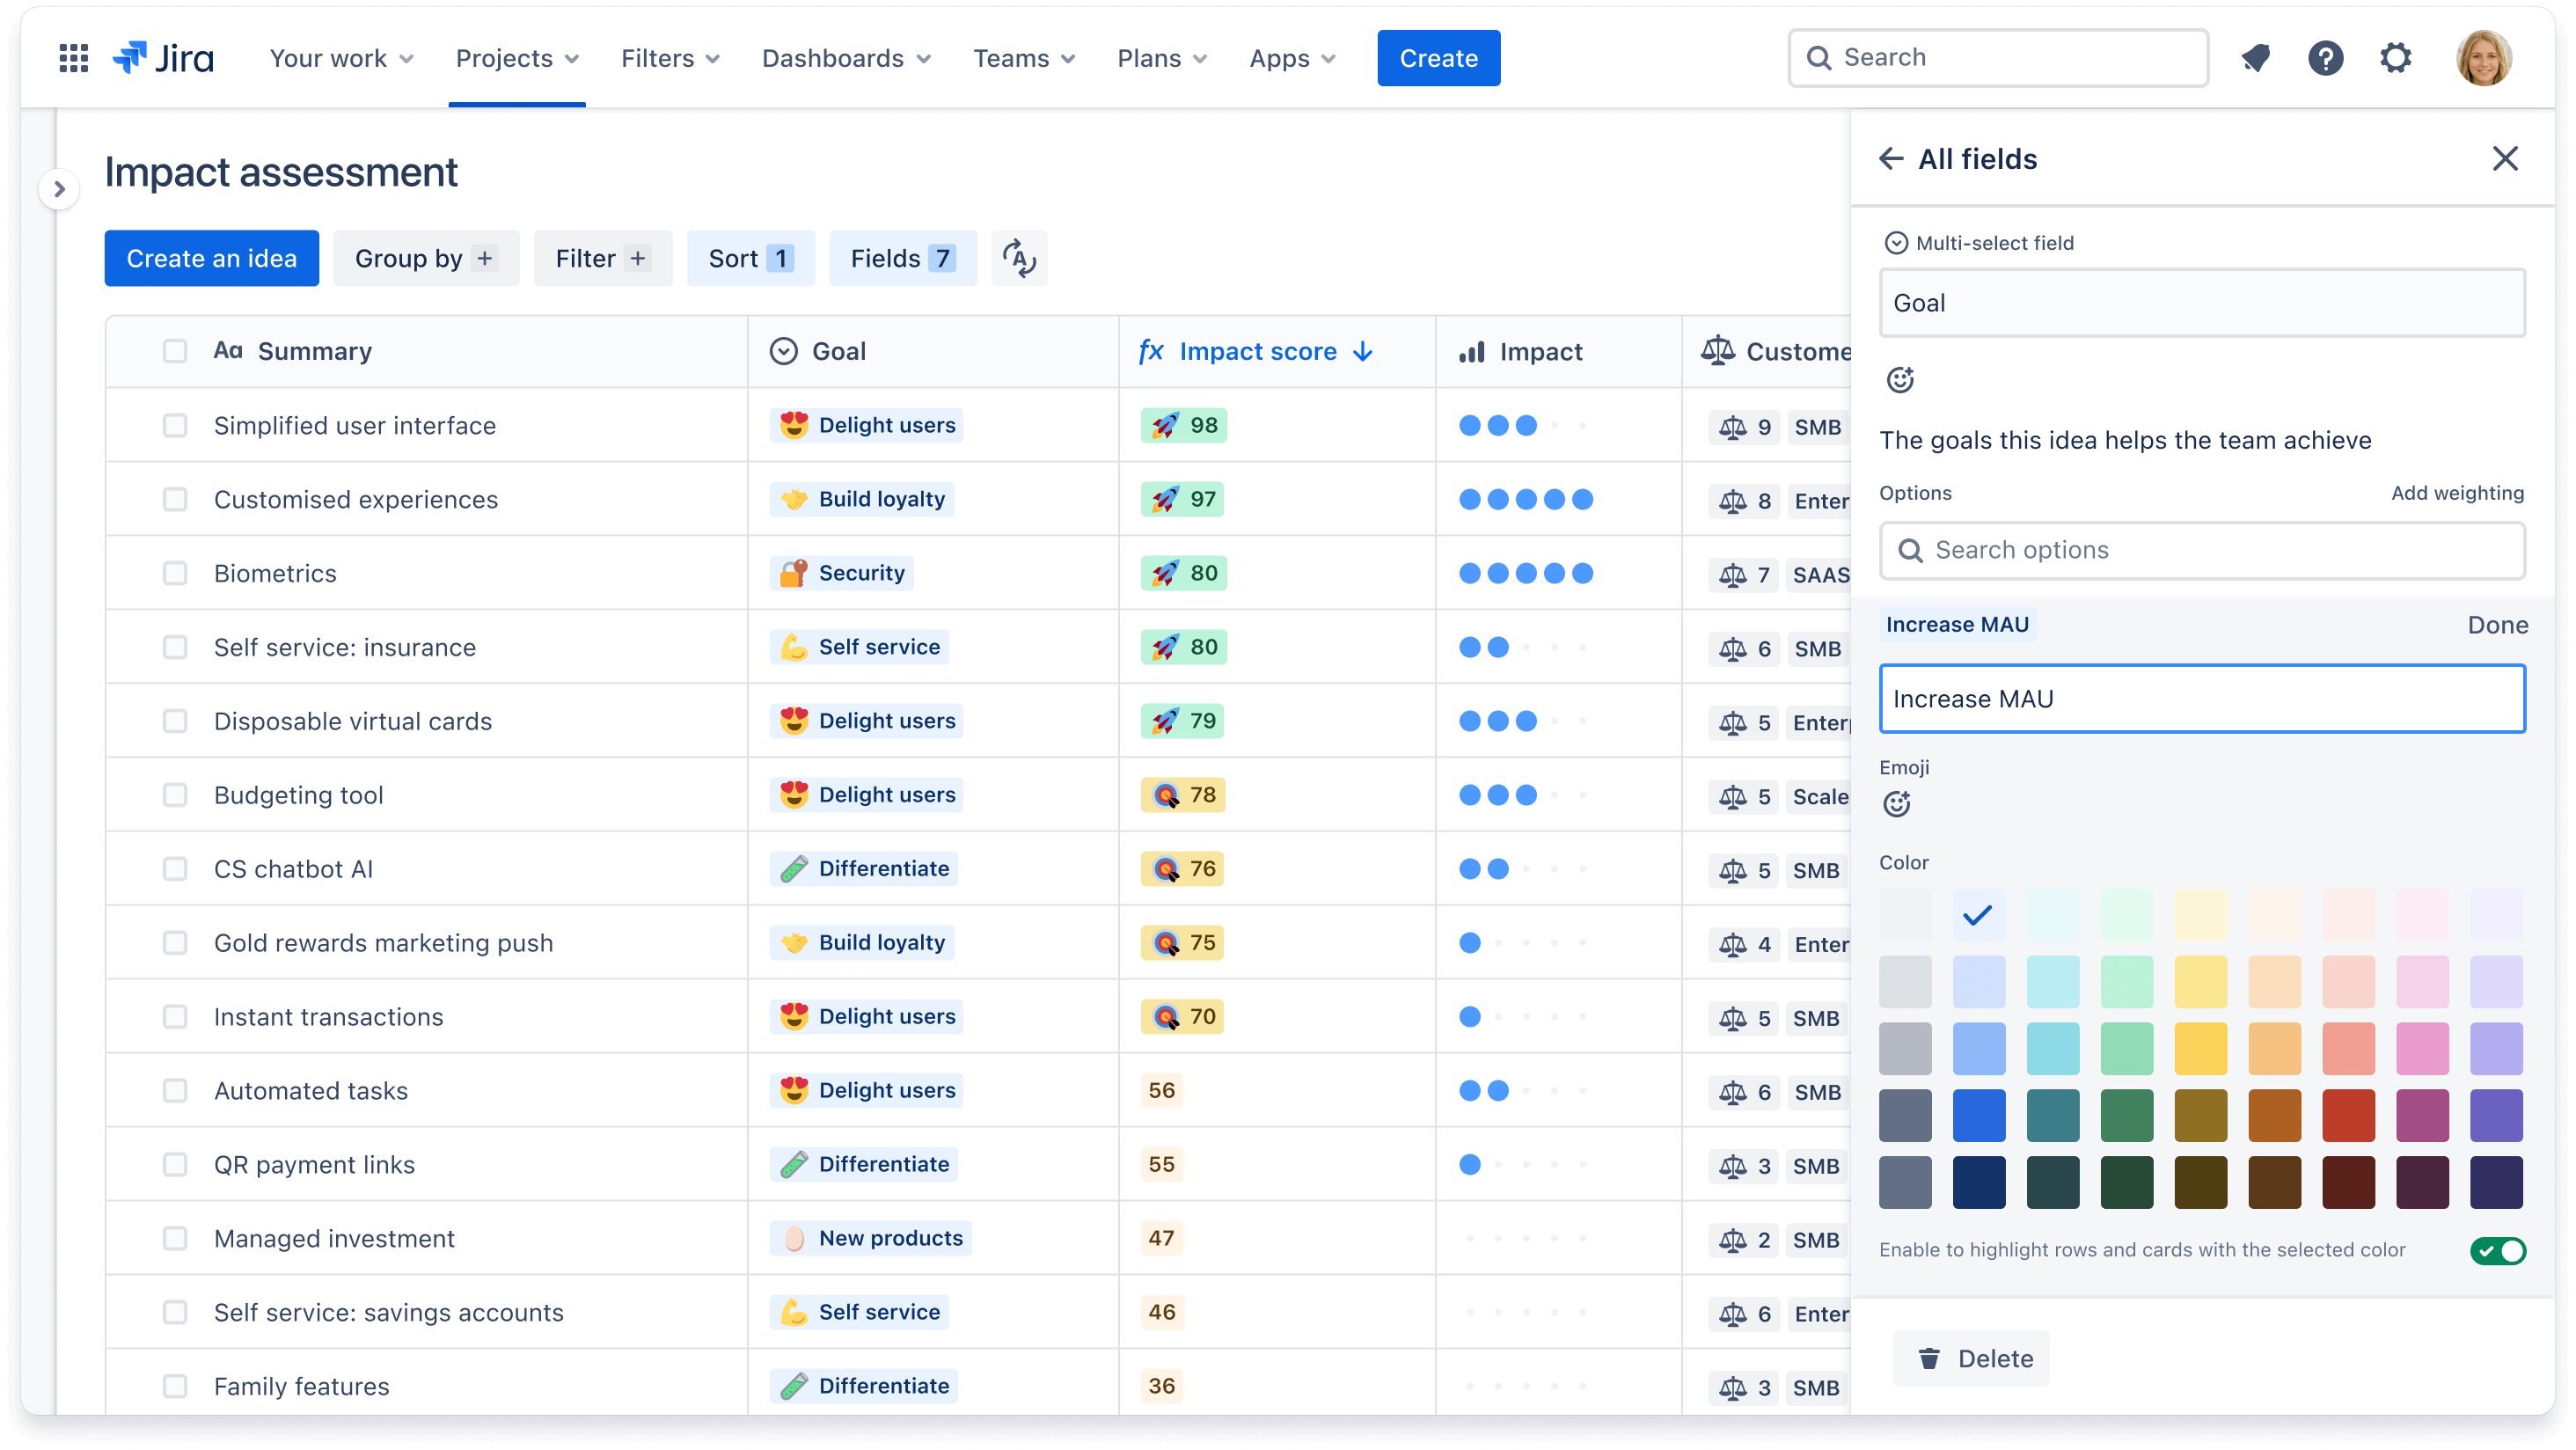
Did you know you can add weighting to each field option to define its relative importance? Follow steps 1 and 2 above, and click Add weighting in the field options section. Choose to weight options by number or rating.
Visit our documentation for detailed steps on how to create and manage fields.
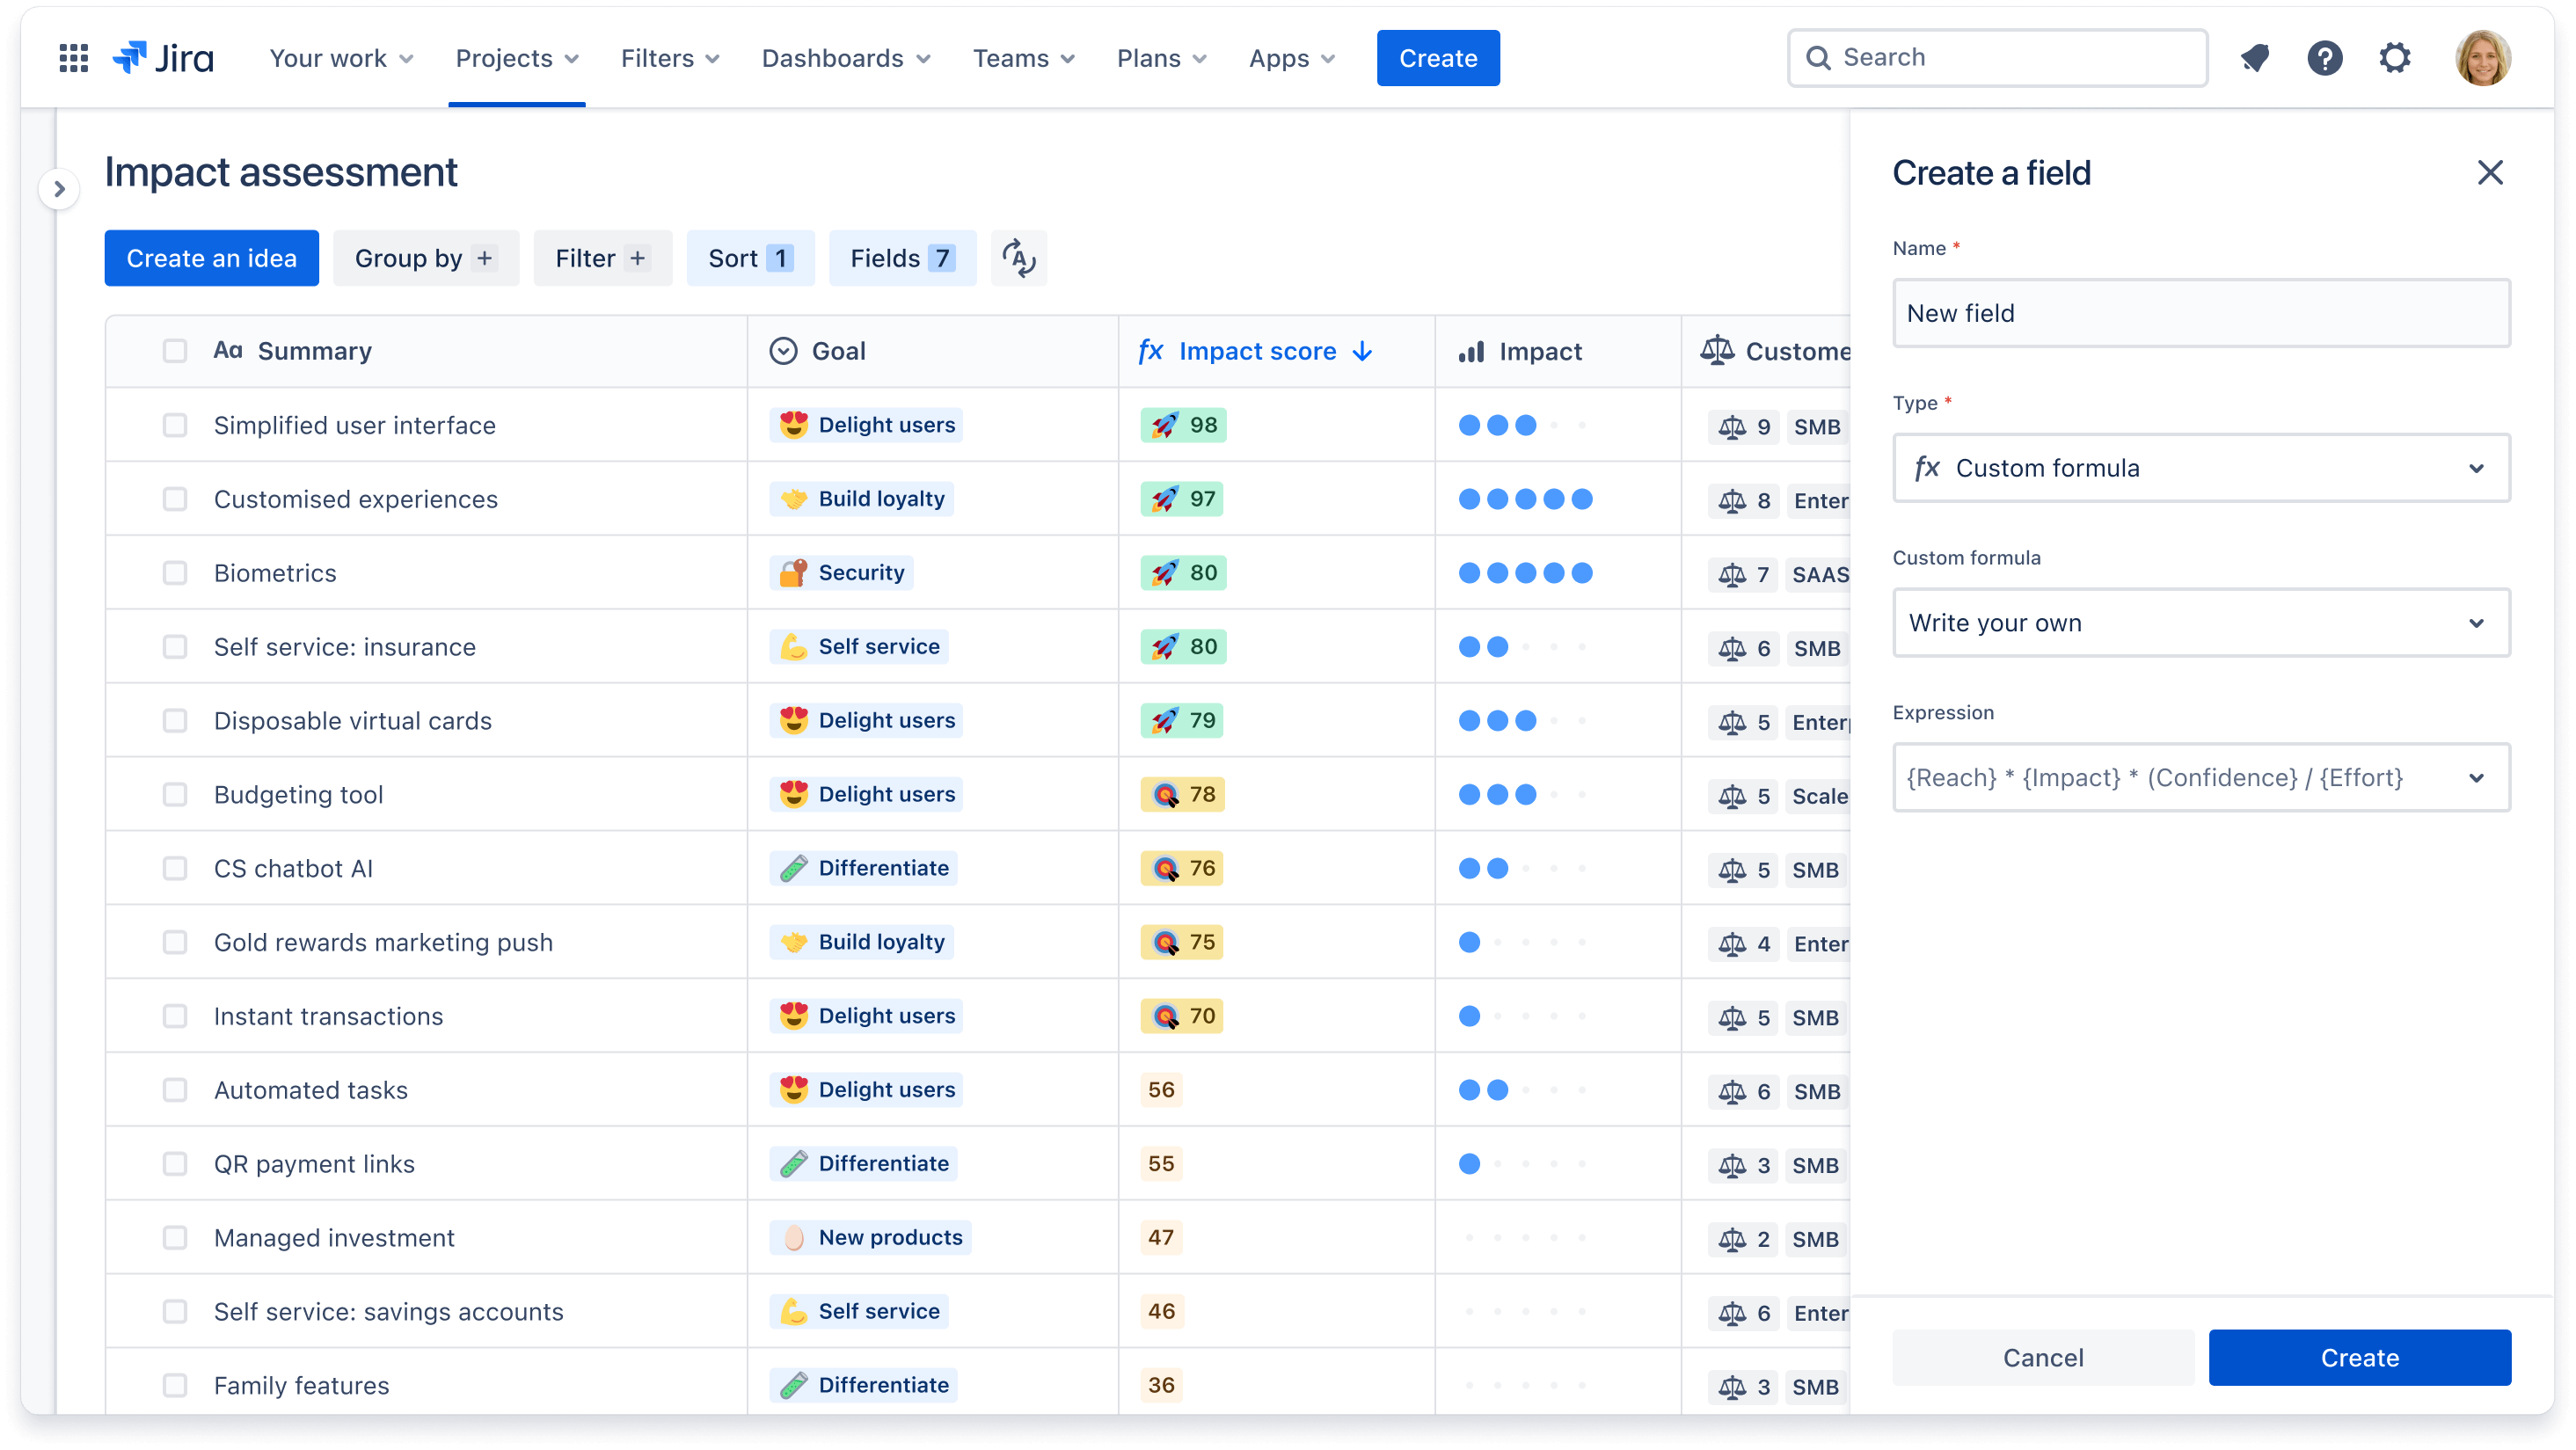
How do I create a custom formula?
If you have specific methods to prioritize your ideas, such as RICE scoring, you may want to create a custom formula field. Based on existing fields and a formula of your choice, formula fields will calculate a new value. There are three options you can use when creating a formula field:
- Weighted score - calculates the value of an idea relative to other ideas in your project
- Roll up - the sum of different field values. For example, a roll up formula could be the addition of number of Insights and number of Comments for an idea
- Write your own - write your own simple formula using addition, subtraction, multiplication, and division
Visit our documentation for more details on custom formulas.
To create a custom formula:
- Navigate to any view and click on the Fields button
- In the righthand panel that appears, click on the blue Create a new field button
- Type a field name, select Custom formula as your field type, and select a custom formula type