Quick start guide
Follow the steps below to kickstart your first discovery project.
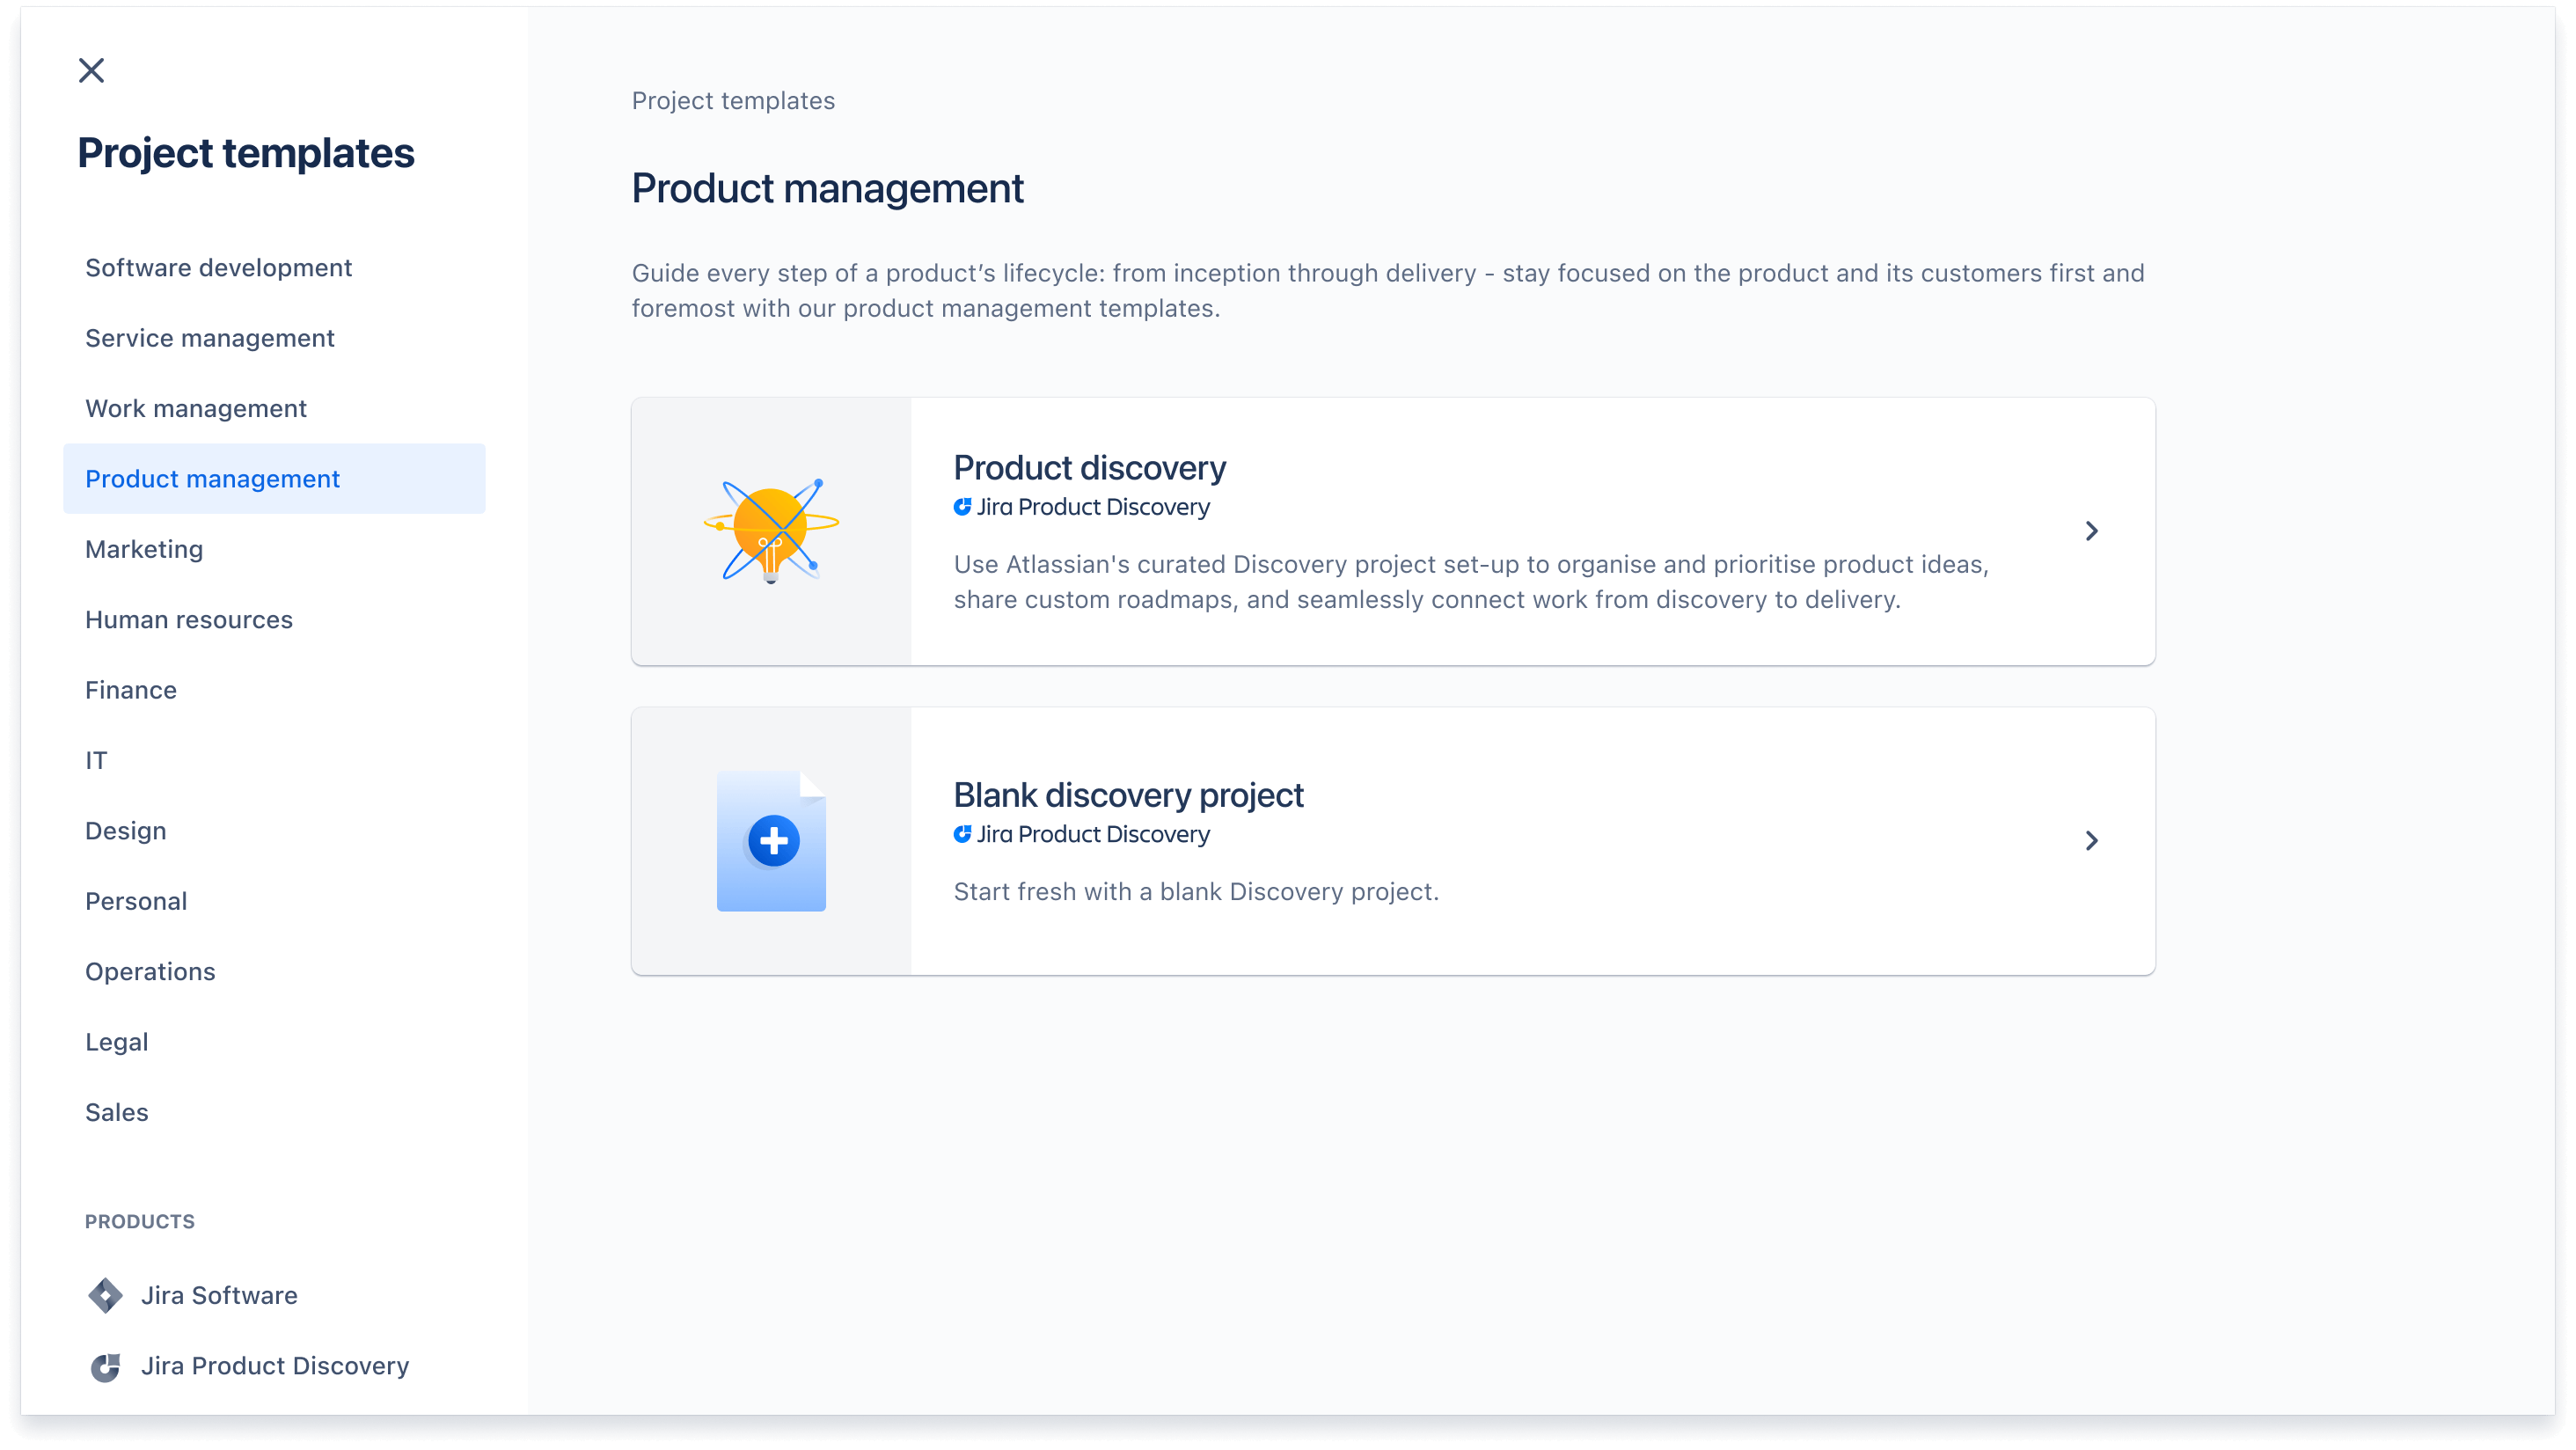
Step 1 - Create a project
Log into your Jira Product Discovery site and click on the Projects dropdown in the top navigation. Click Create project. Here you’ll find several templates you can choose from across the Jira suite of products. Select Product management or Software development and find the Product discovery template.
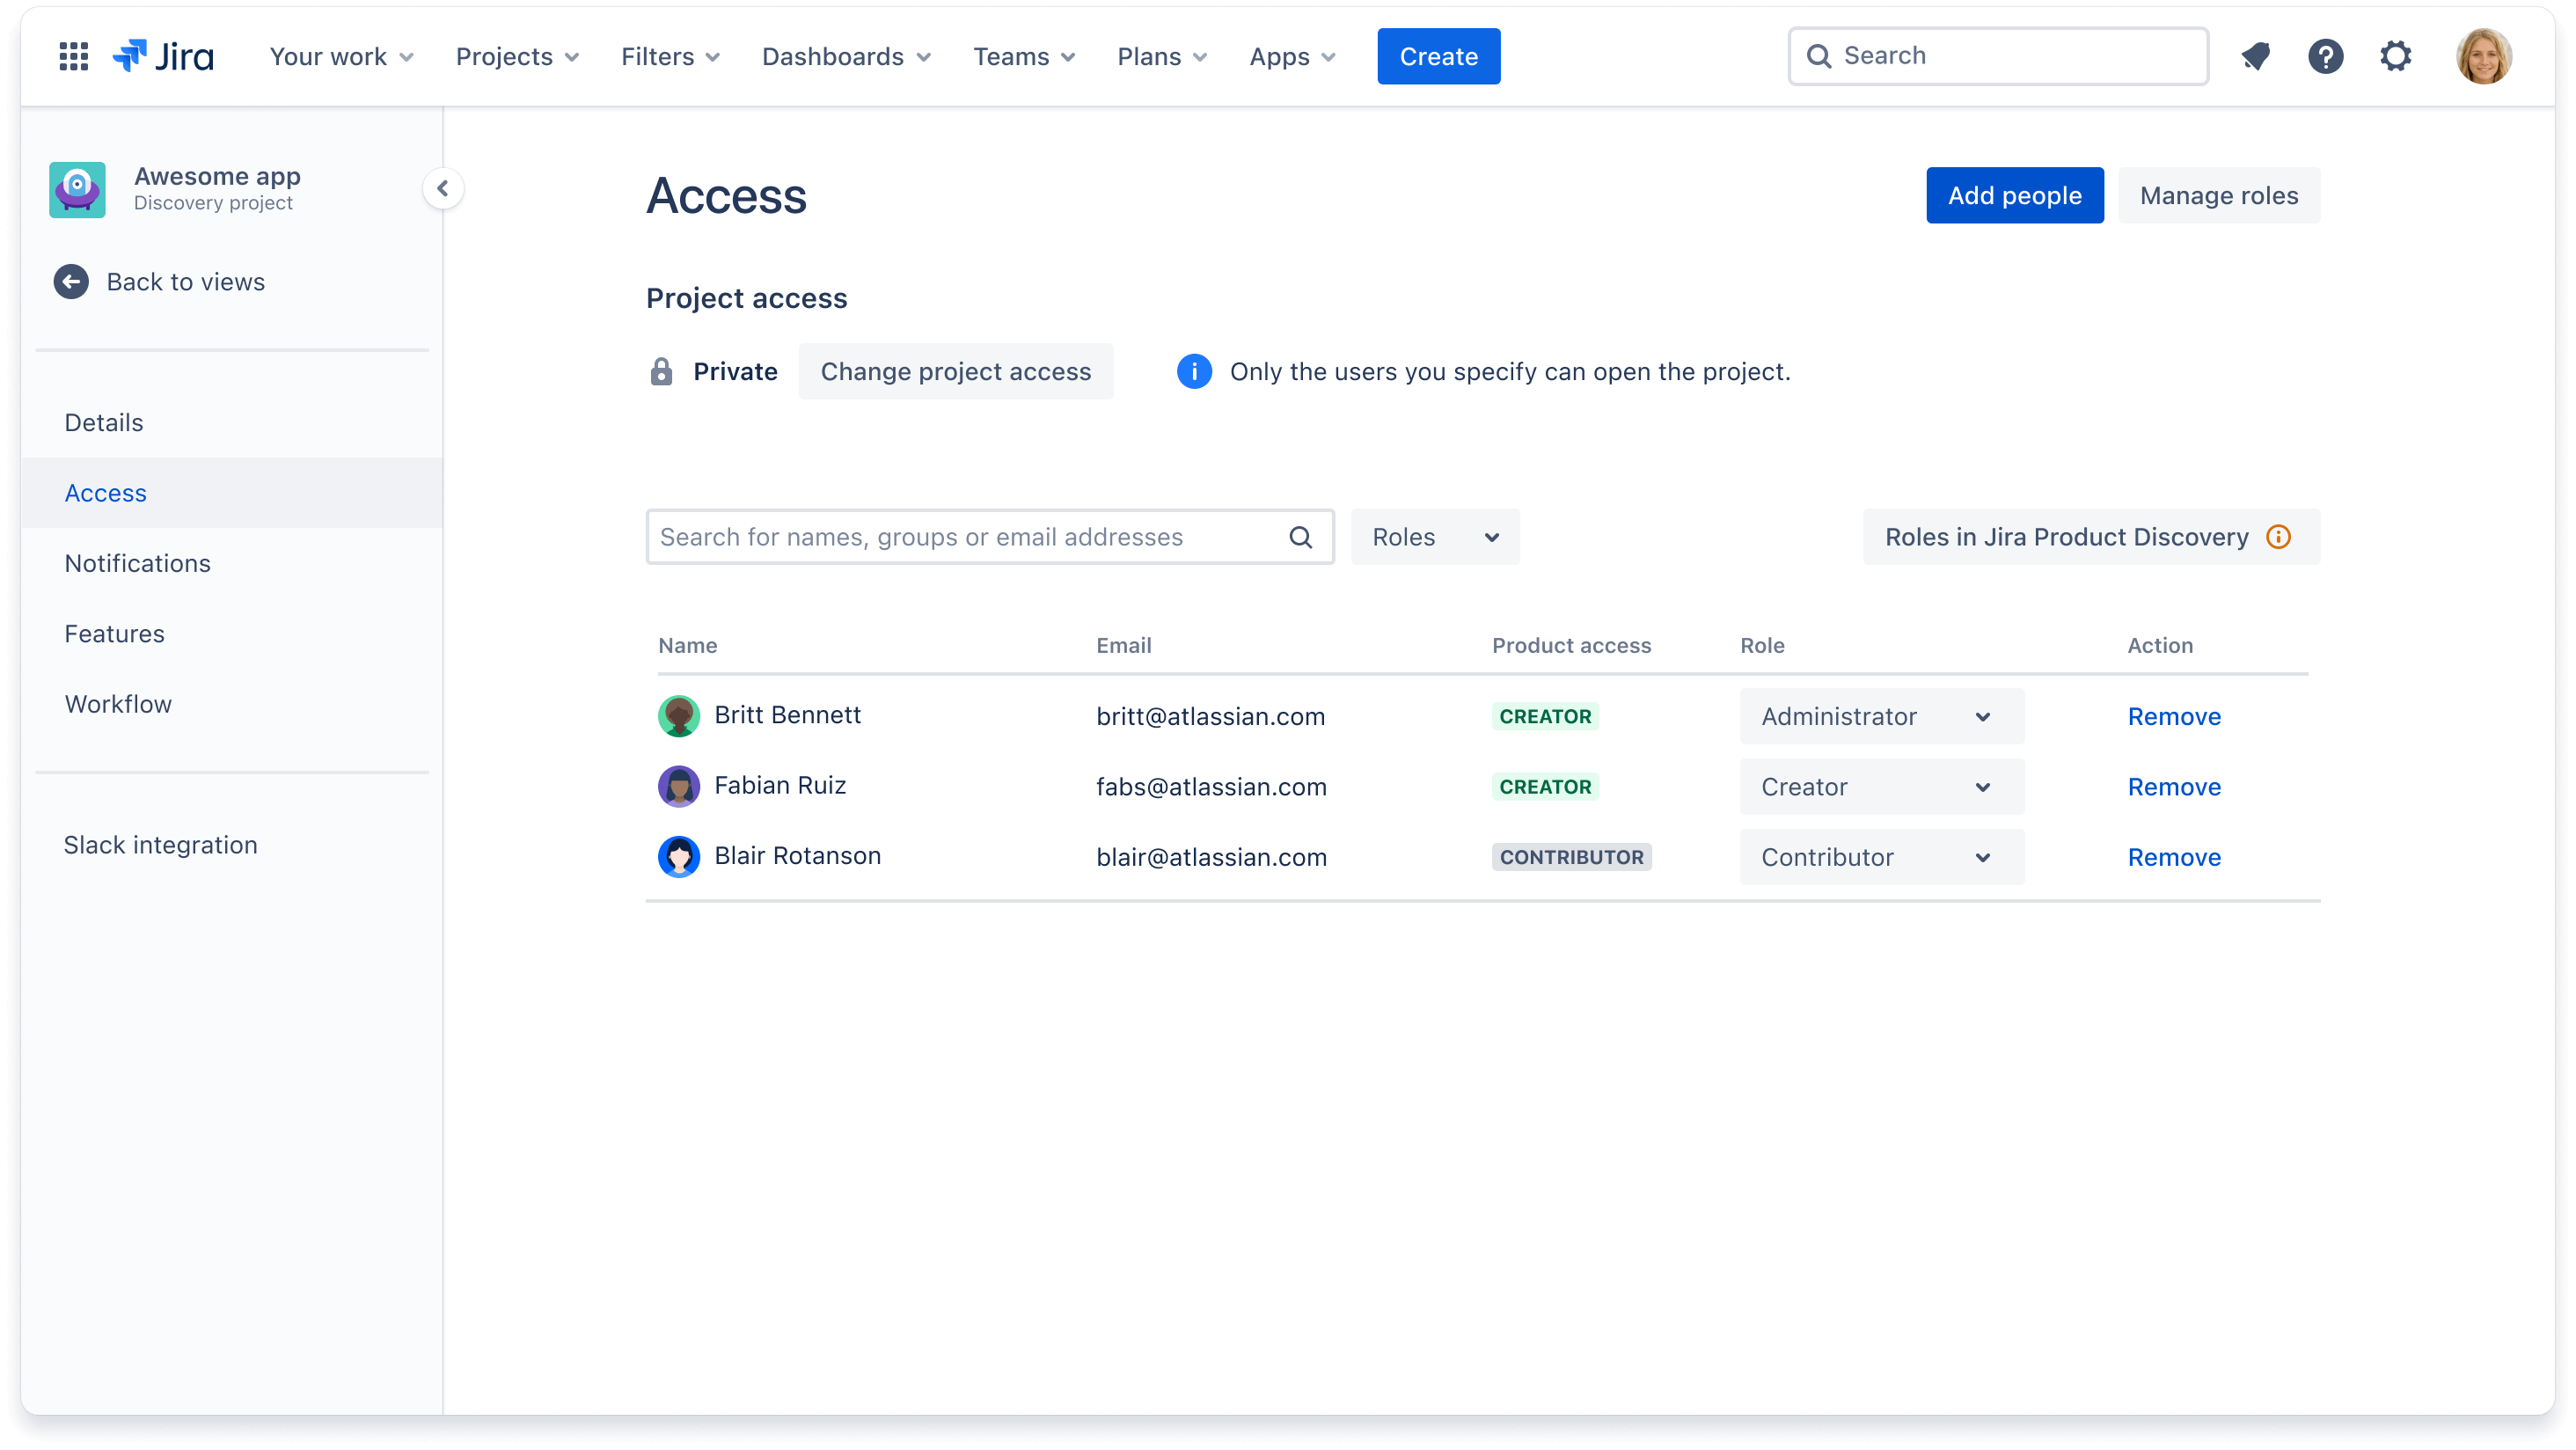
Step 2 - Assign project roles
Decide who on your team is a Creator (create and manage ideas, views, and projects) and a Contributor (add insights, comments, and reactions, and if permitted, create ideas).
To manage project access and roles, visit Project settings in the lower lefthand navigation of your discovery project, and select Access. Note, you must be a Creator or an admin to complete this step.
Visit our documentation to learn more about product access and project roles.
Step 3 - Add ideas
Once you’ve set up your project it’s time to add your ideas. A Jira Product Discovery project is made up of ideas, which can be anything from opportunities to potential solutions.
To add an idea, click the blue Create button.
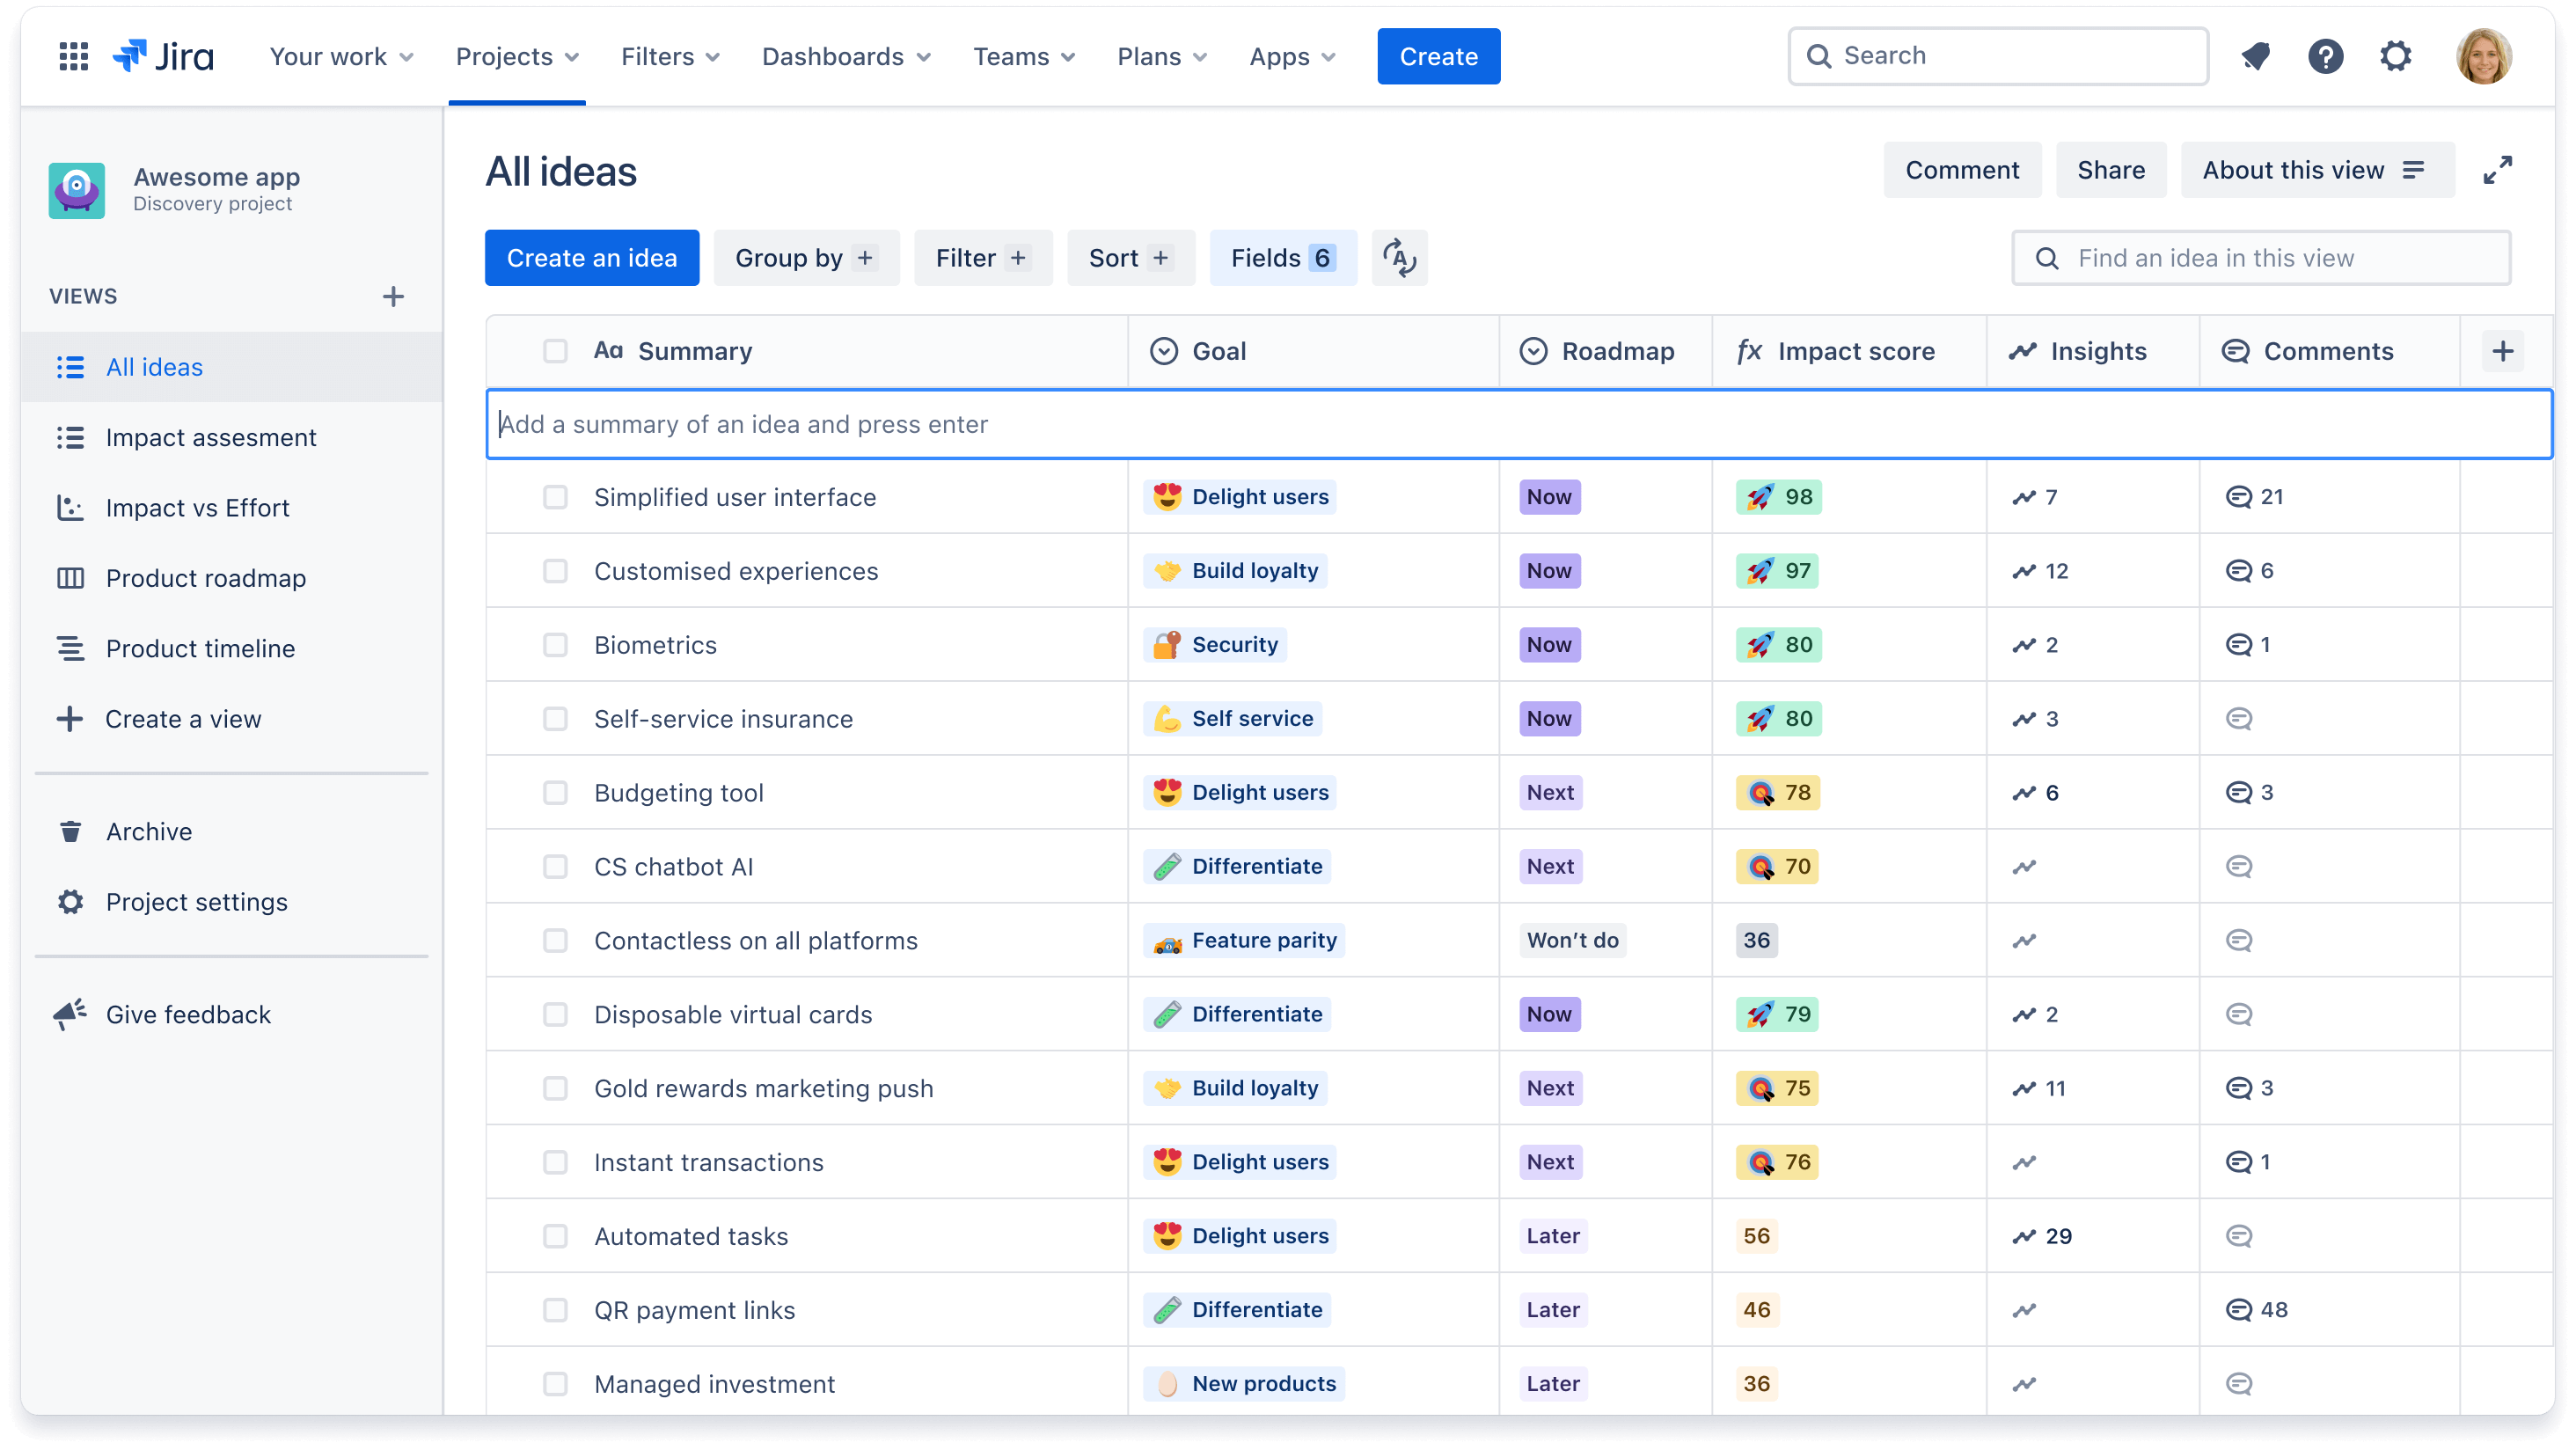
Once the idea is created, click into it to add a description or context to your idea.
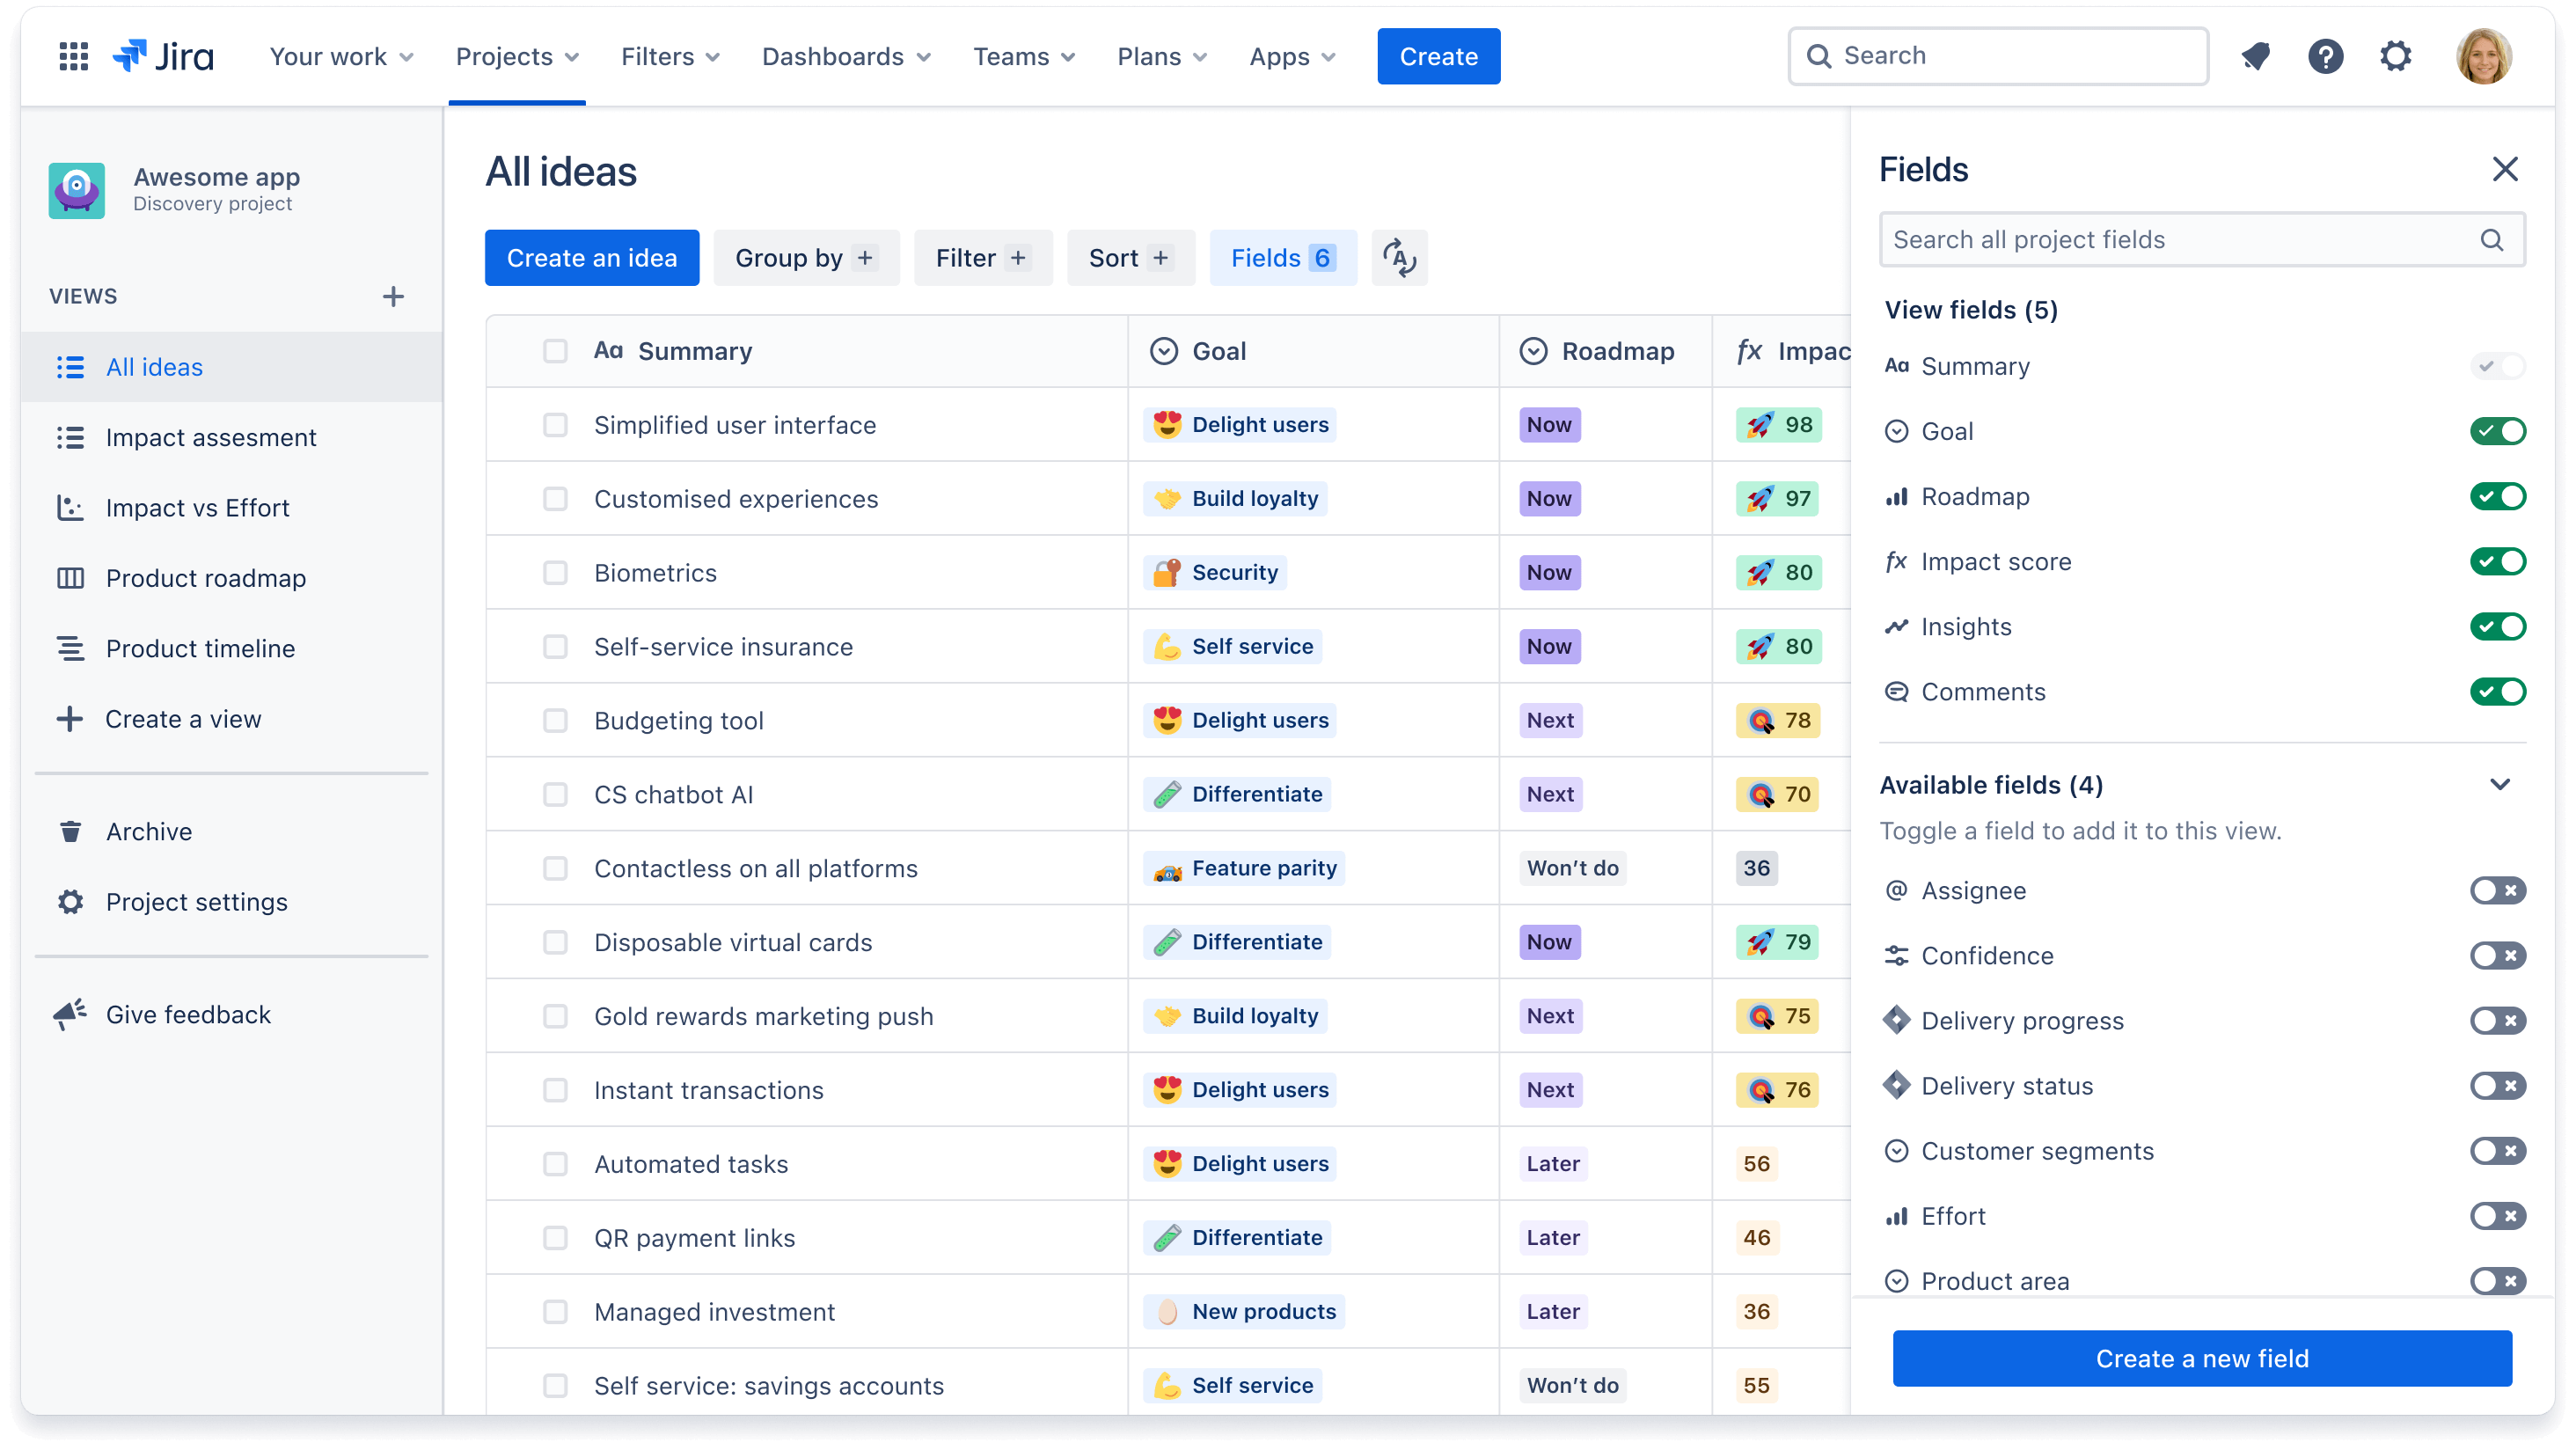
Step 4 - Create or update custom fields
Fields are granular sets of criteria or traits that can help you describe, compare, and prioritize ideas. Fields can be goals, effort level, business impact, and more.
To add a new field click the Fields + button. Select from our out-of-the-box options, or create a custom field of your own.
Learn more about fields and how to create a custom field.
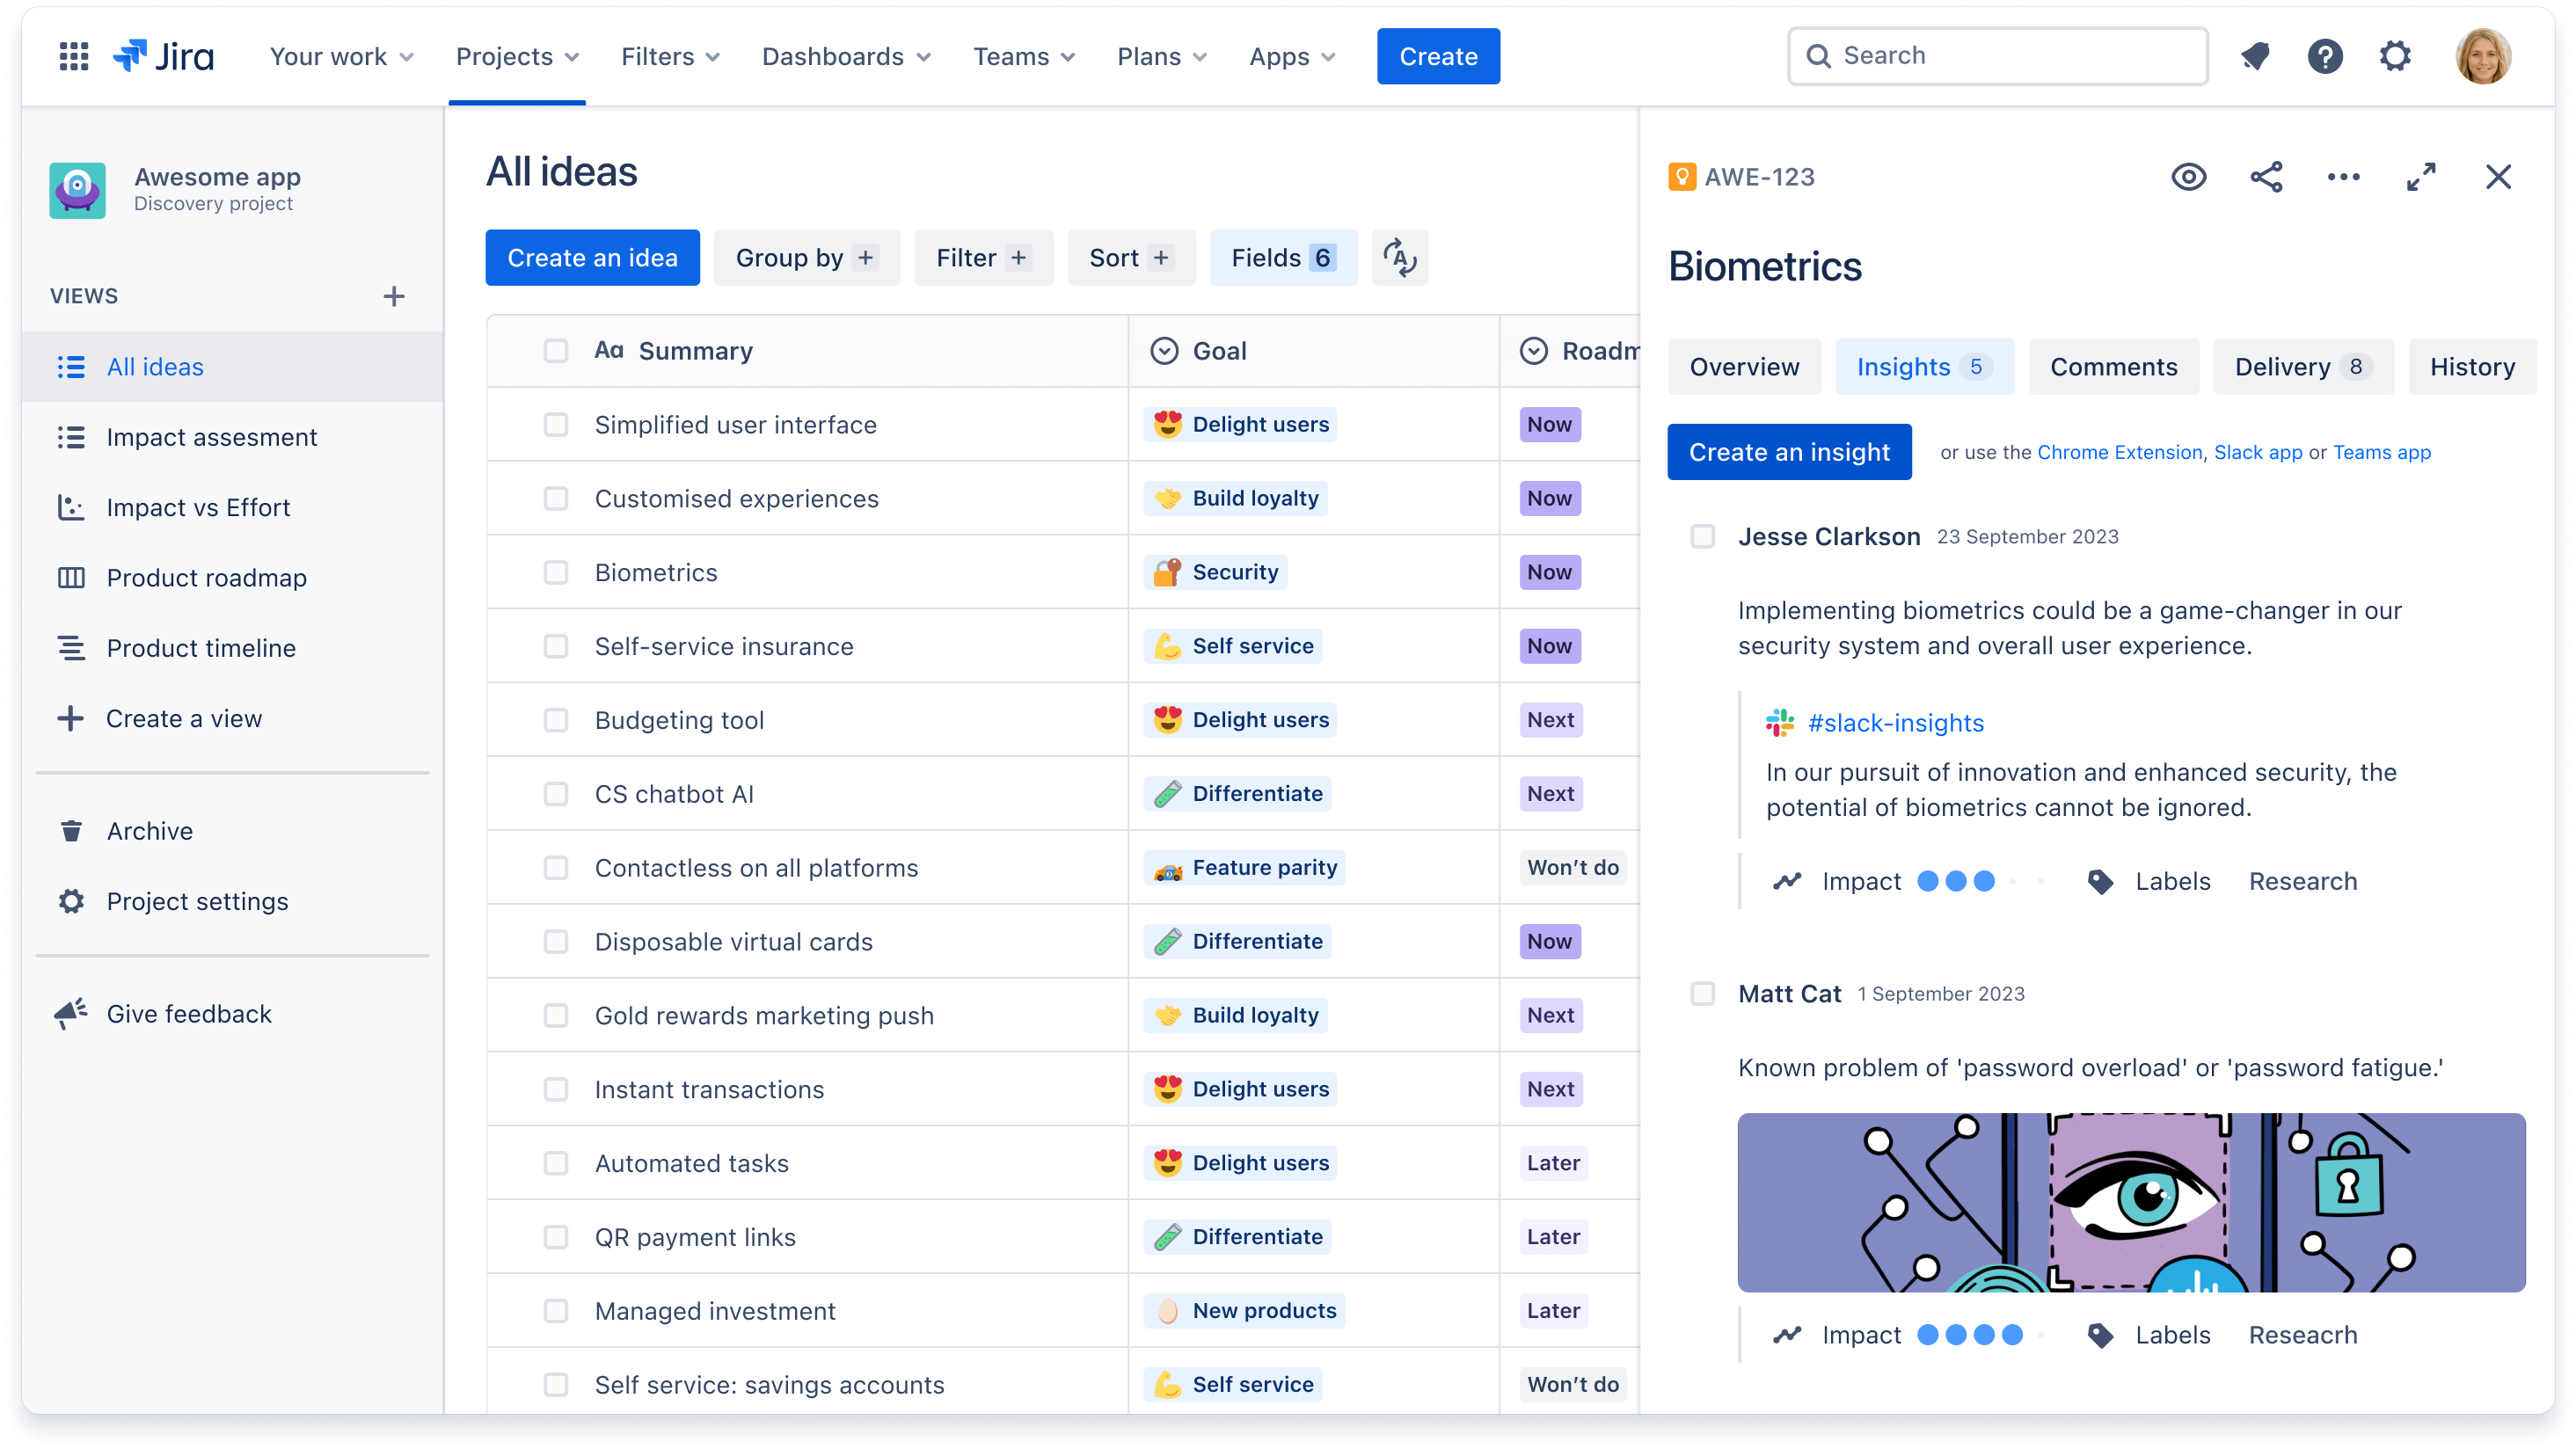
Step 5 - Add insights
Ideas are better when they’re enriched with insights. Insights can be customer quotes, product analytics, market research, and more.
There are two ways to gather insights:
-
Within an idea
- Click on an idea and click the Insights tab.
- Click the blue Create an insight button and paste plain text or a link, like a Jira Service Management ticket or a Slack message
-
Jira Product Discovery Chrome extension
- Highlight any text
- Click on the extension in your Chrome browser
- Select the idea you’d like to add to, or create a new idea, and click Add
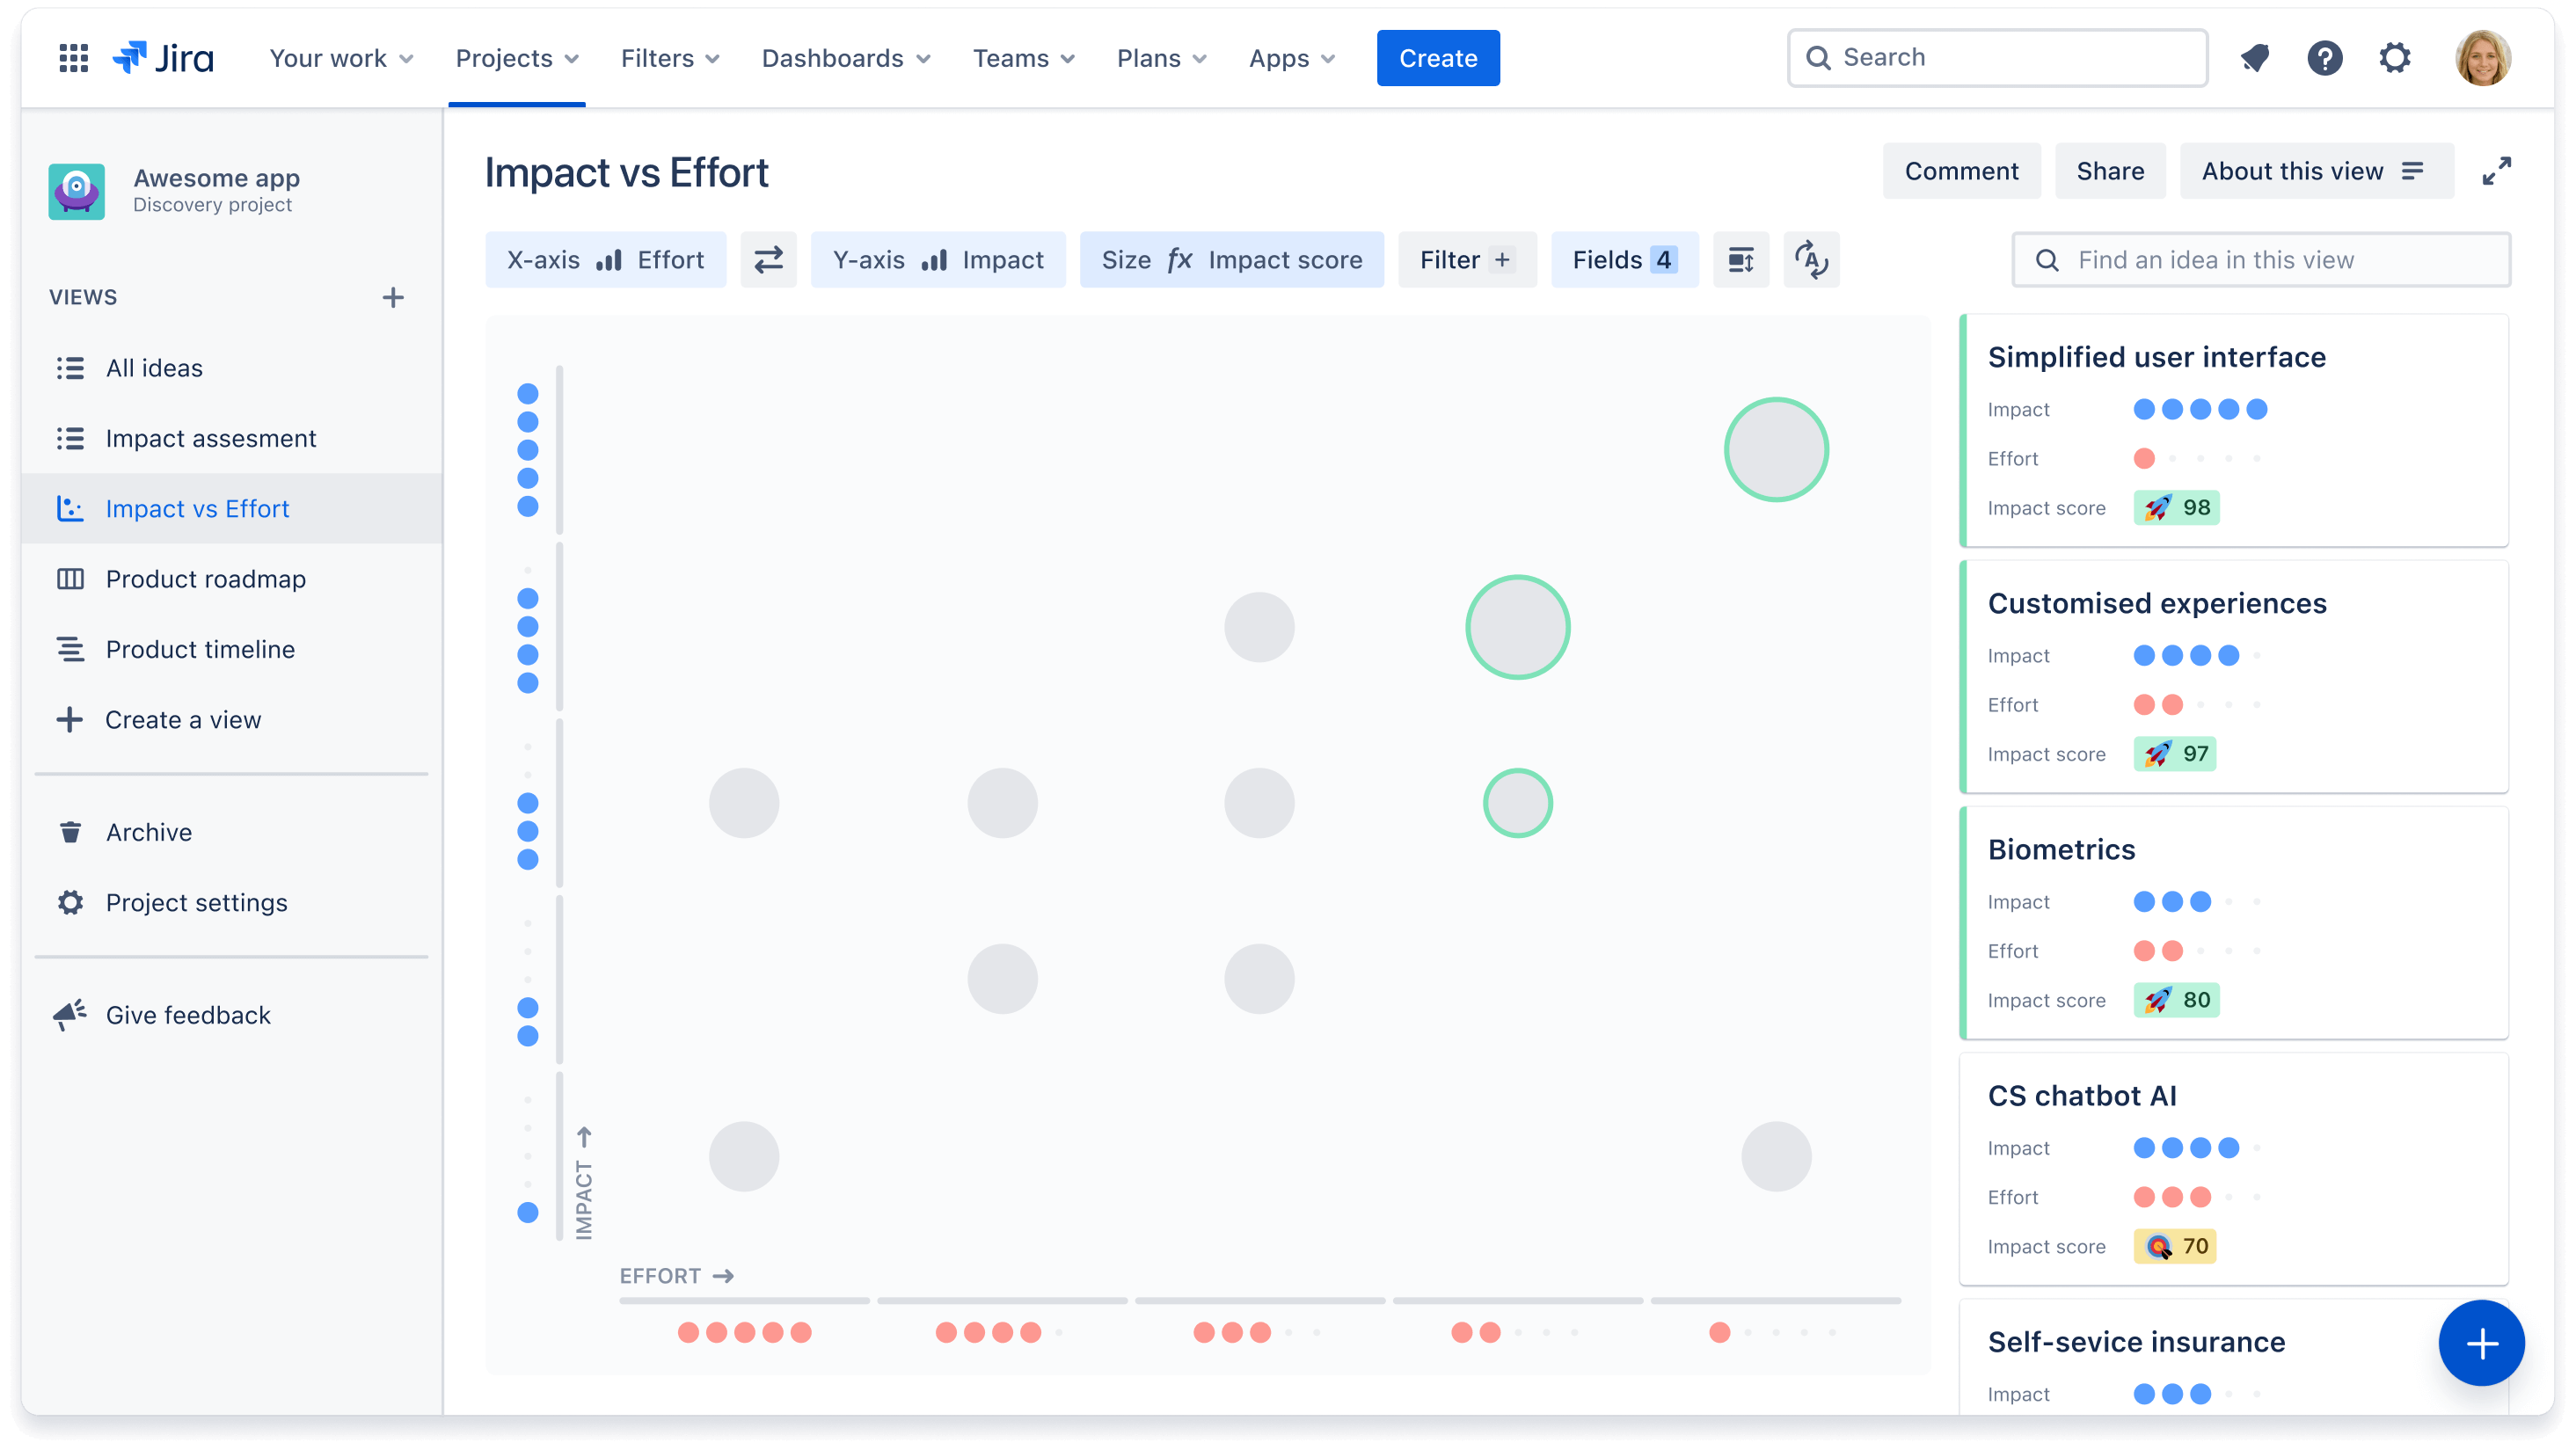
Step 6 - Prioritize ideas
Now it’s time to prioritize which ideas should come now versus later (or never). Prioritize based on criteria your care about (i.e Impact score) or use a method that works for your team (i.e RICE method).
Click Create a view + in the lefthand navigation to create a prioritization view. Select Create a new list. Add fields or create a custom formula based on how you want to prioritize your ideas. Sort ascending or descending to easily identify high priority ideas.

Looking for inspiration on how other teams triage and prioritize? Watch our video on how one team at Atlassian uses Jira Product discovery.
For an easy visual way to compare ideas against two fields, use a matrix view. Click Create a view + in the lefthand navigation and select Create a new matrix. Move ideas around and customize cards for an easy to glance view.
For more examples, watch this demo on using custom fields and views to prioritize and communicate roadmaps.
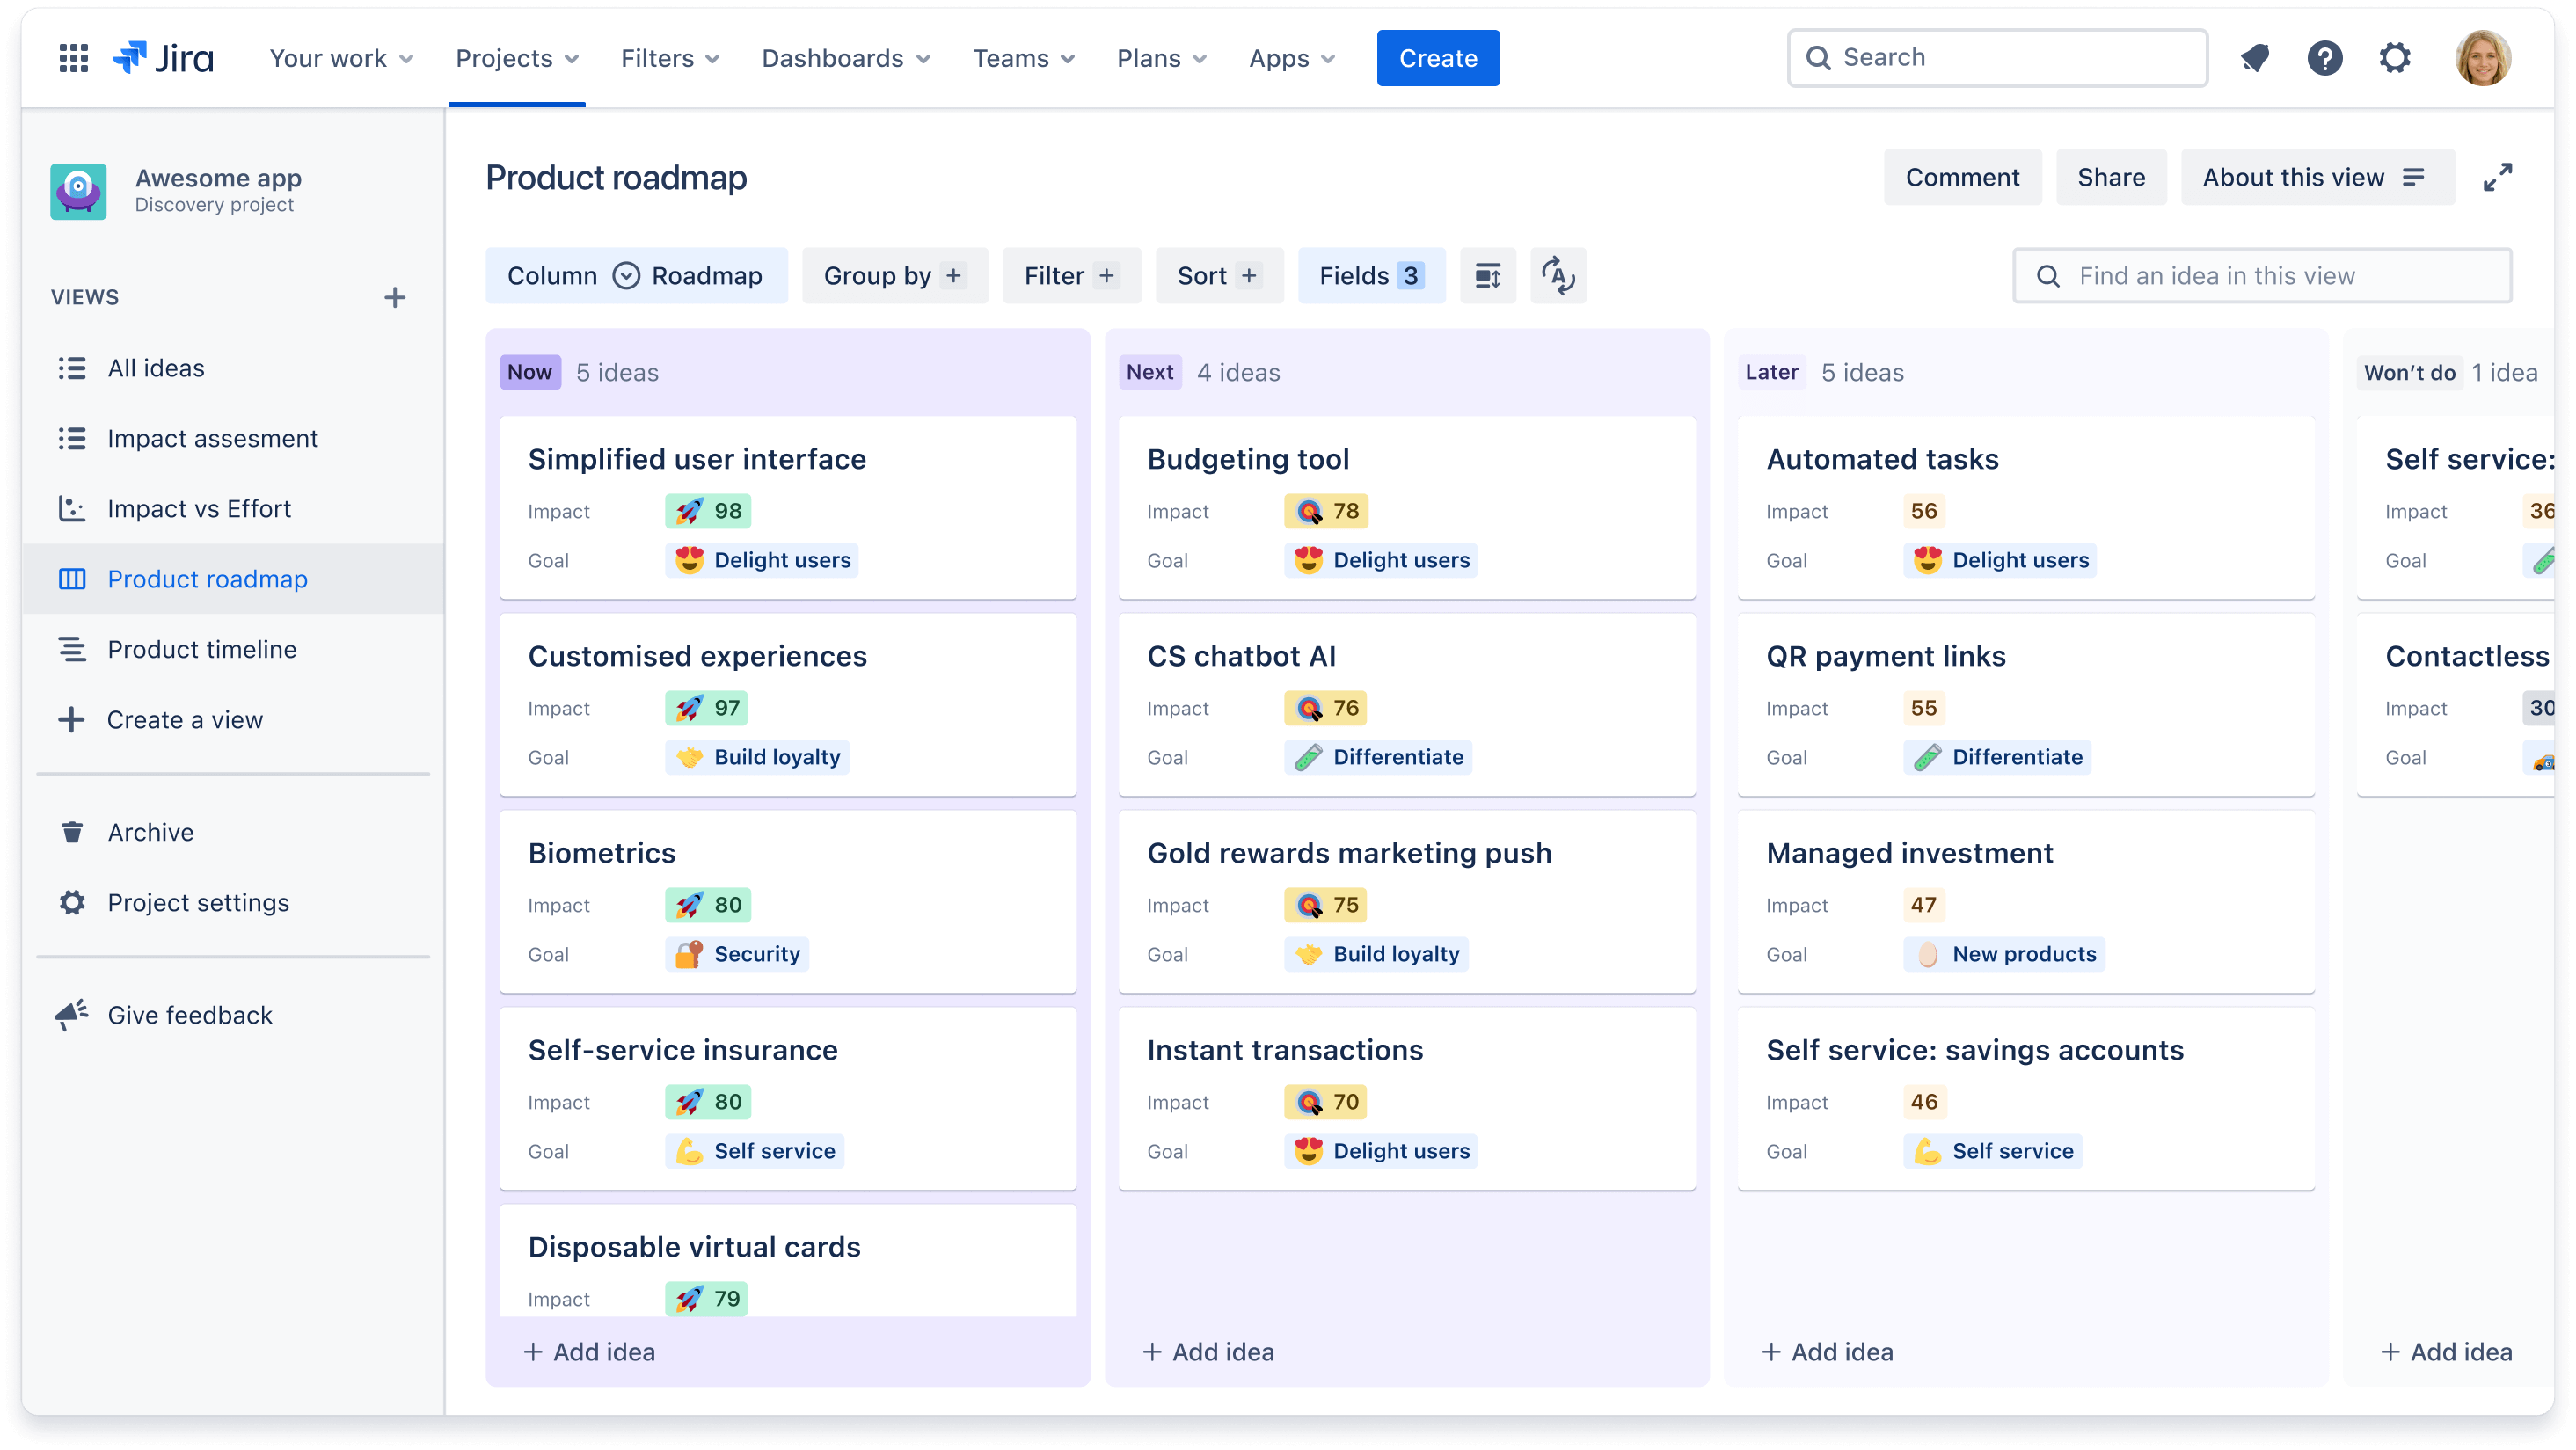
Step 7 - Create and share roadmap
Now that ideas have been prioritized, create your roadmap and share with stakeholders for feedback. Create your roadmap by clicking + Create a view in the lefthand navigation and select Create a new board. Click the Columns + button and select Roadmap in the field dropdown. Move ideas around to display if they will be completed Now, Next, or Later.
You can also create a timeline view to show rough estimates of delivery dates using a timeline view. Click + Create a view in the lefthand navigation and select Create a new timeline. Click the Select fields + button to set your start and end date in months or quarters, and the blue + icon to add ideas to your timeline.
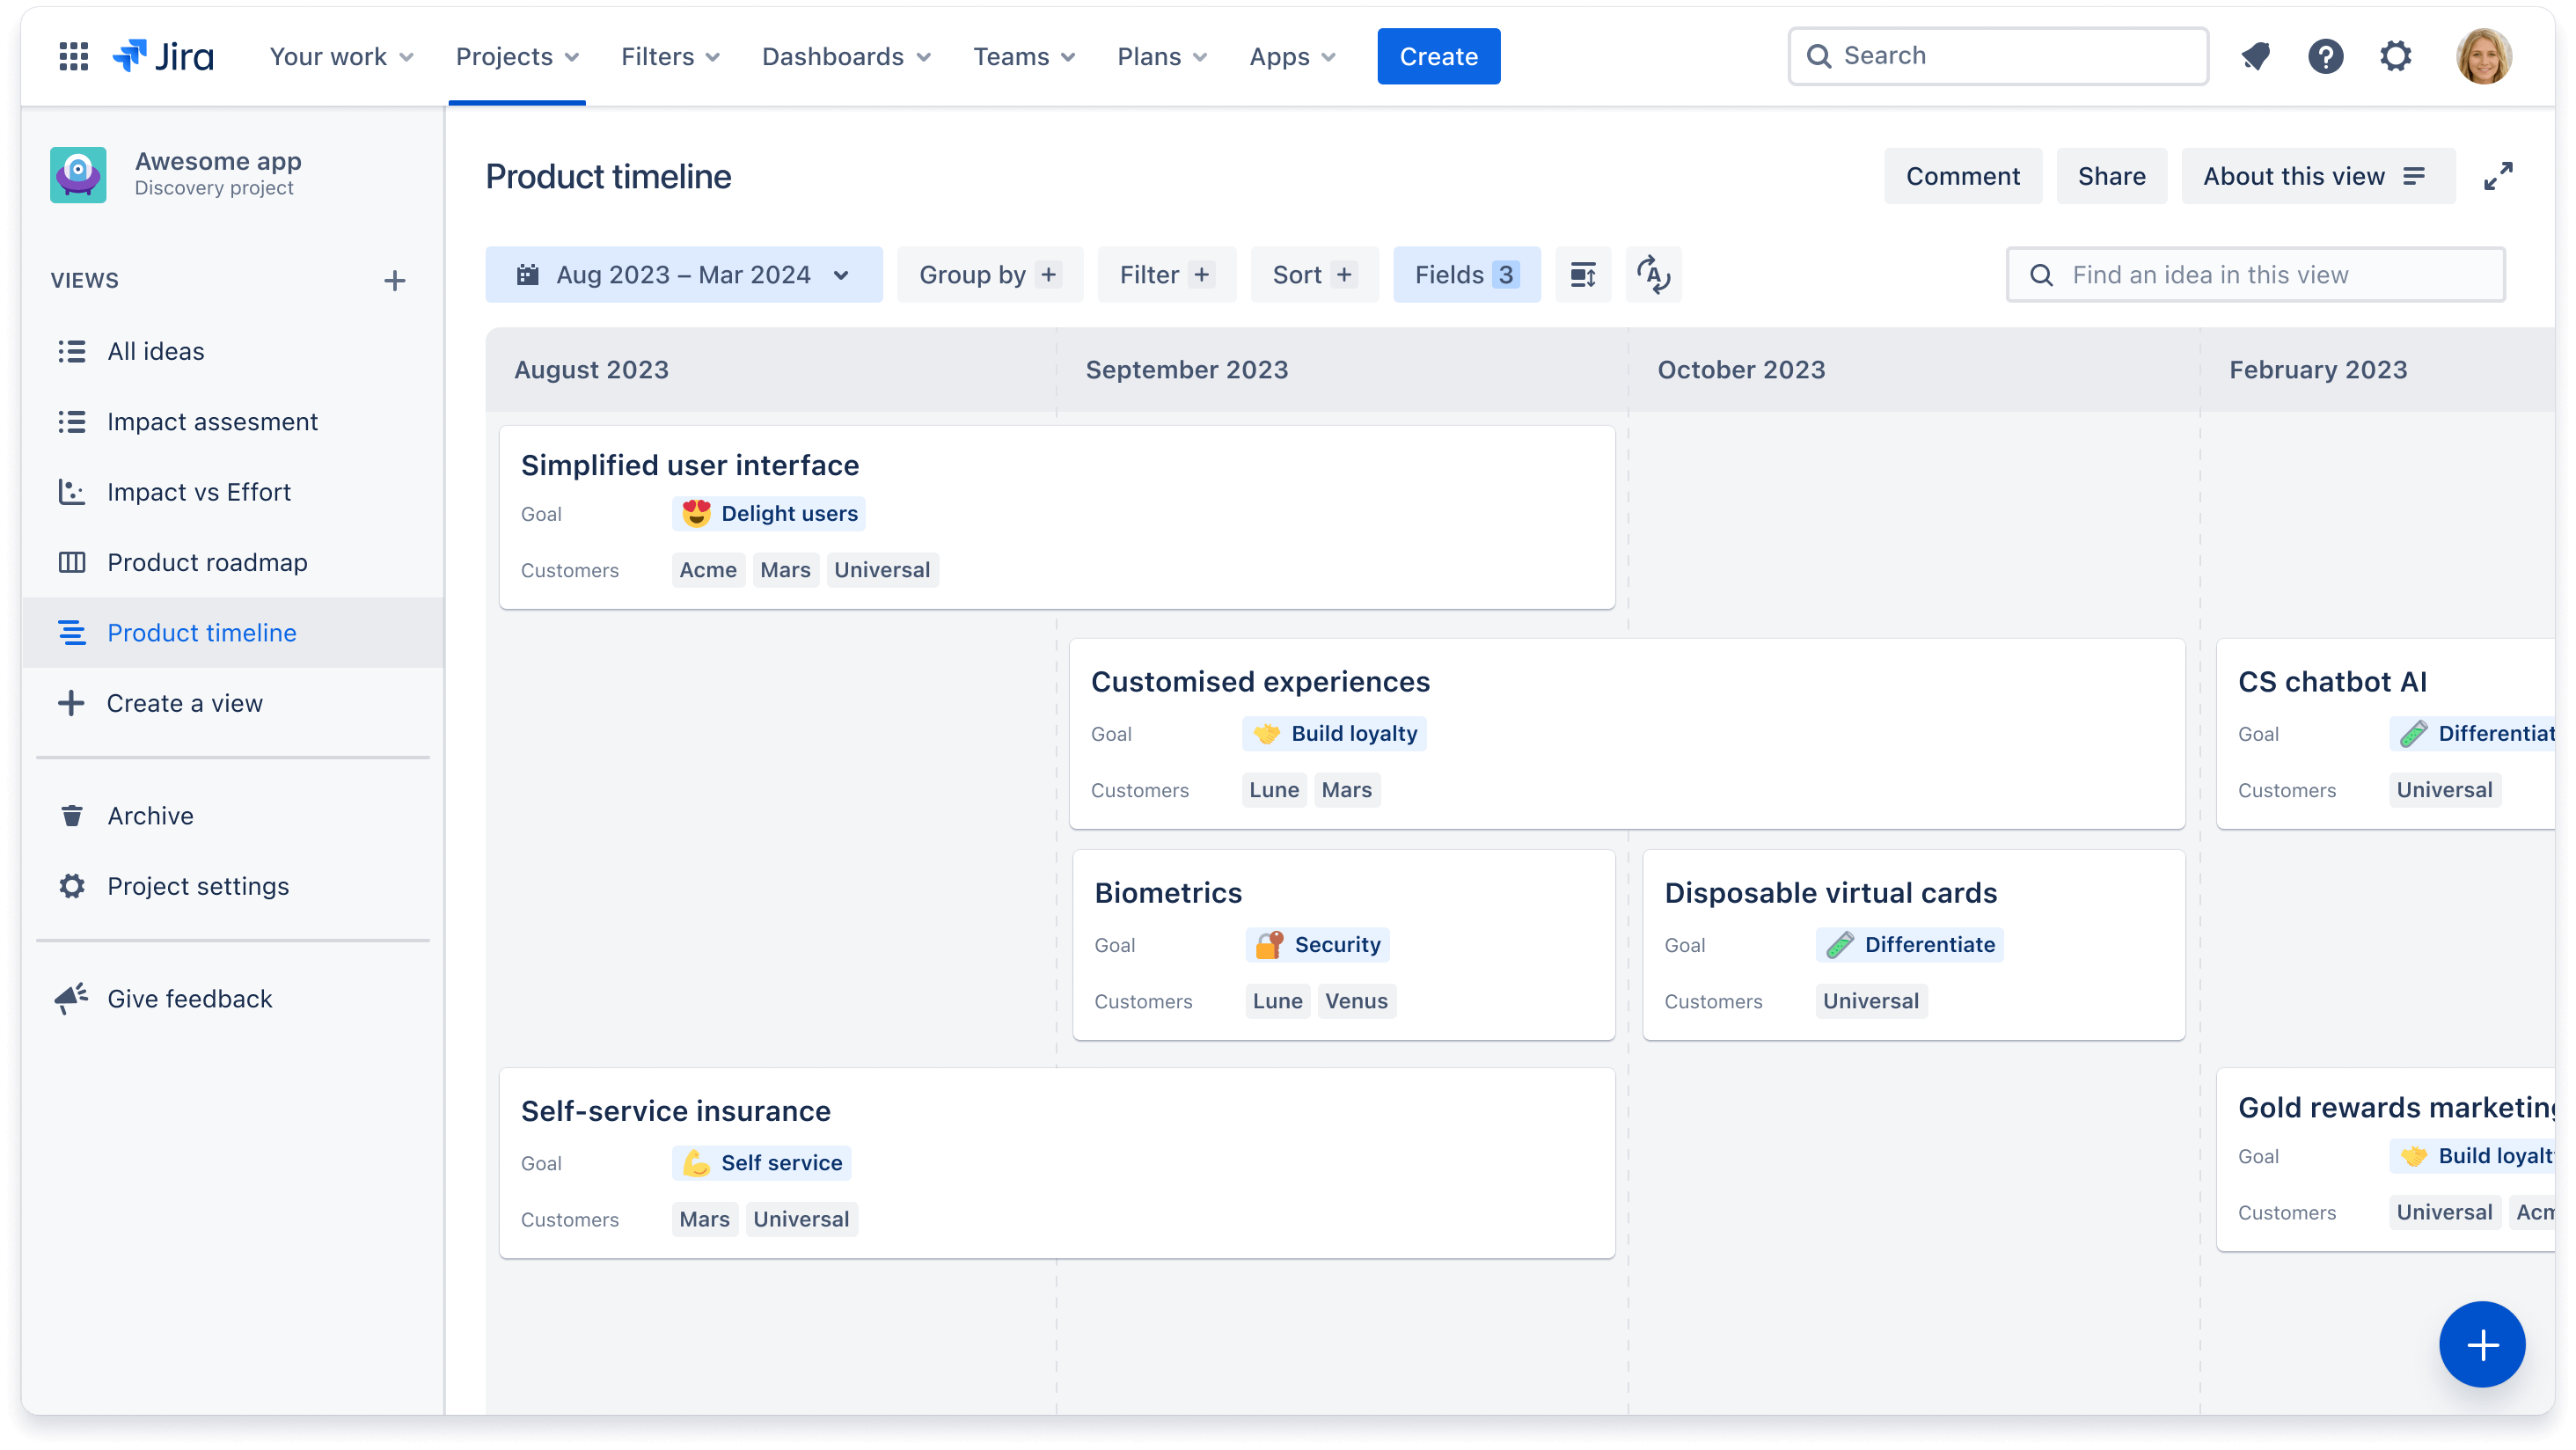
When ready, share a link with contributors for feedback via comments, votes, and reactions, or publish a read-only view to external stakeholders.
Learn more about the board view and timeline view for creating custom roadmaps.
Step 8 - Connect with Jira Software
The last step is bringing ideas to life with the help of your development team. For a seamless and unified workflow, connect your ideas in Jira Product Discovery to the development work happening in Jira Software. To do so, you must have a Jira Software project created on the same site.
Click into one of your committed ideas, and select the Delivery tab in the idea panel. If you already have existing epics and issues, then select Add a delivery ticket. If not, select Create a delivery ticket to add a new epic or issue from within Jira Product Discovery. This will auto-populate with Jira Software projects from your site.
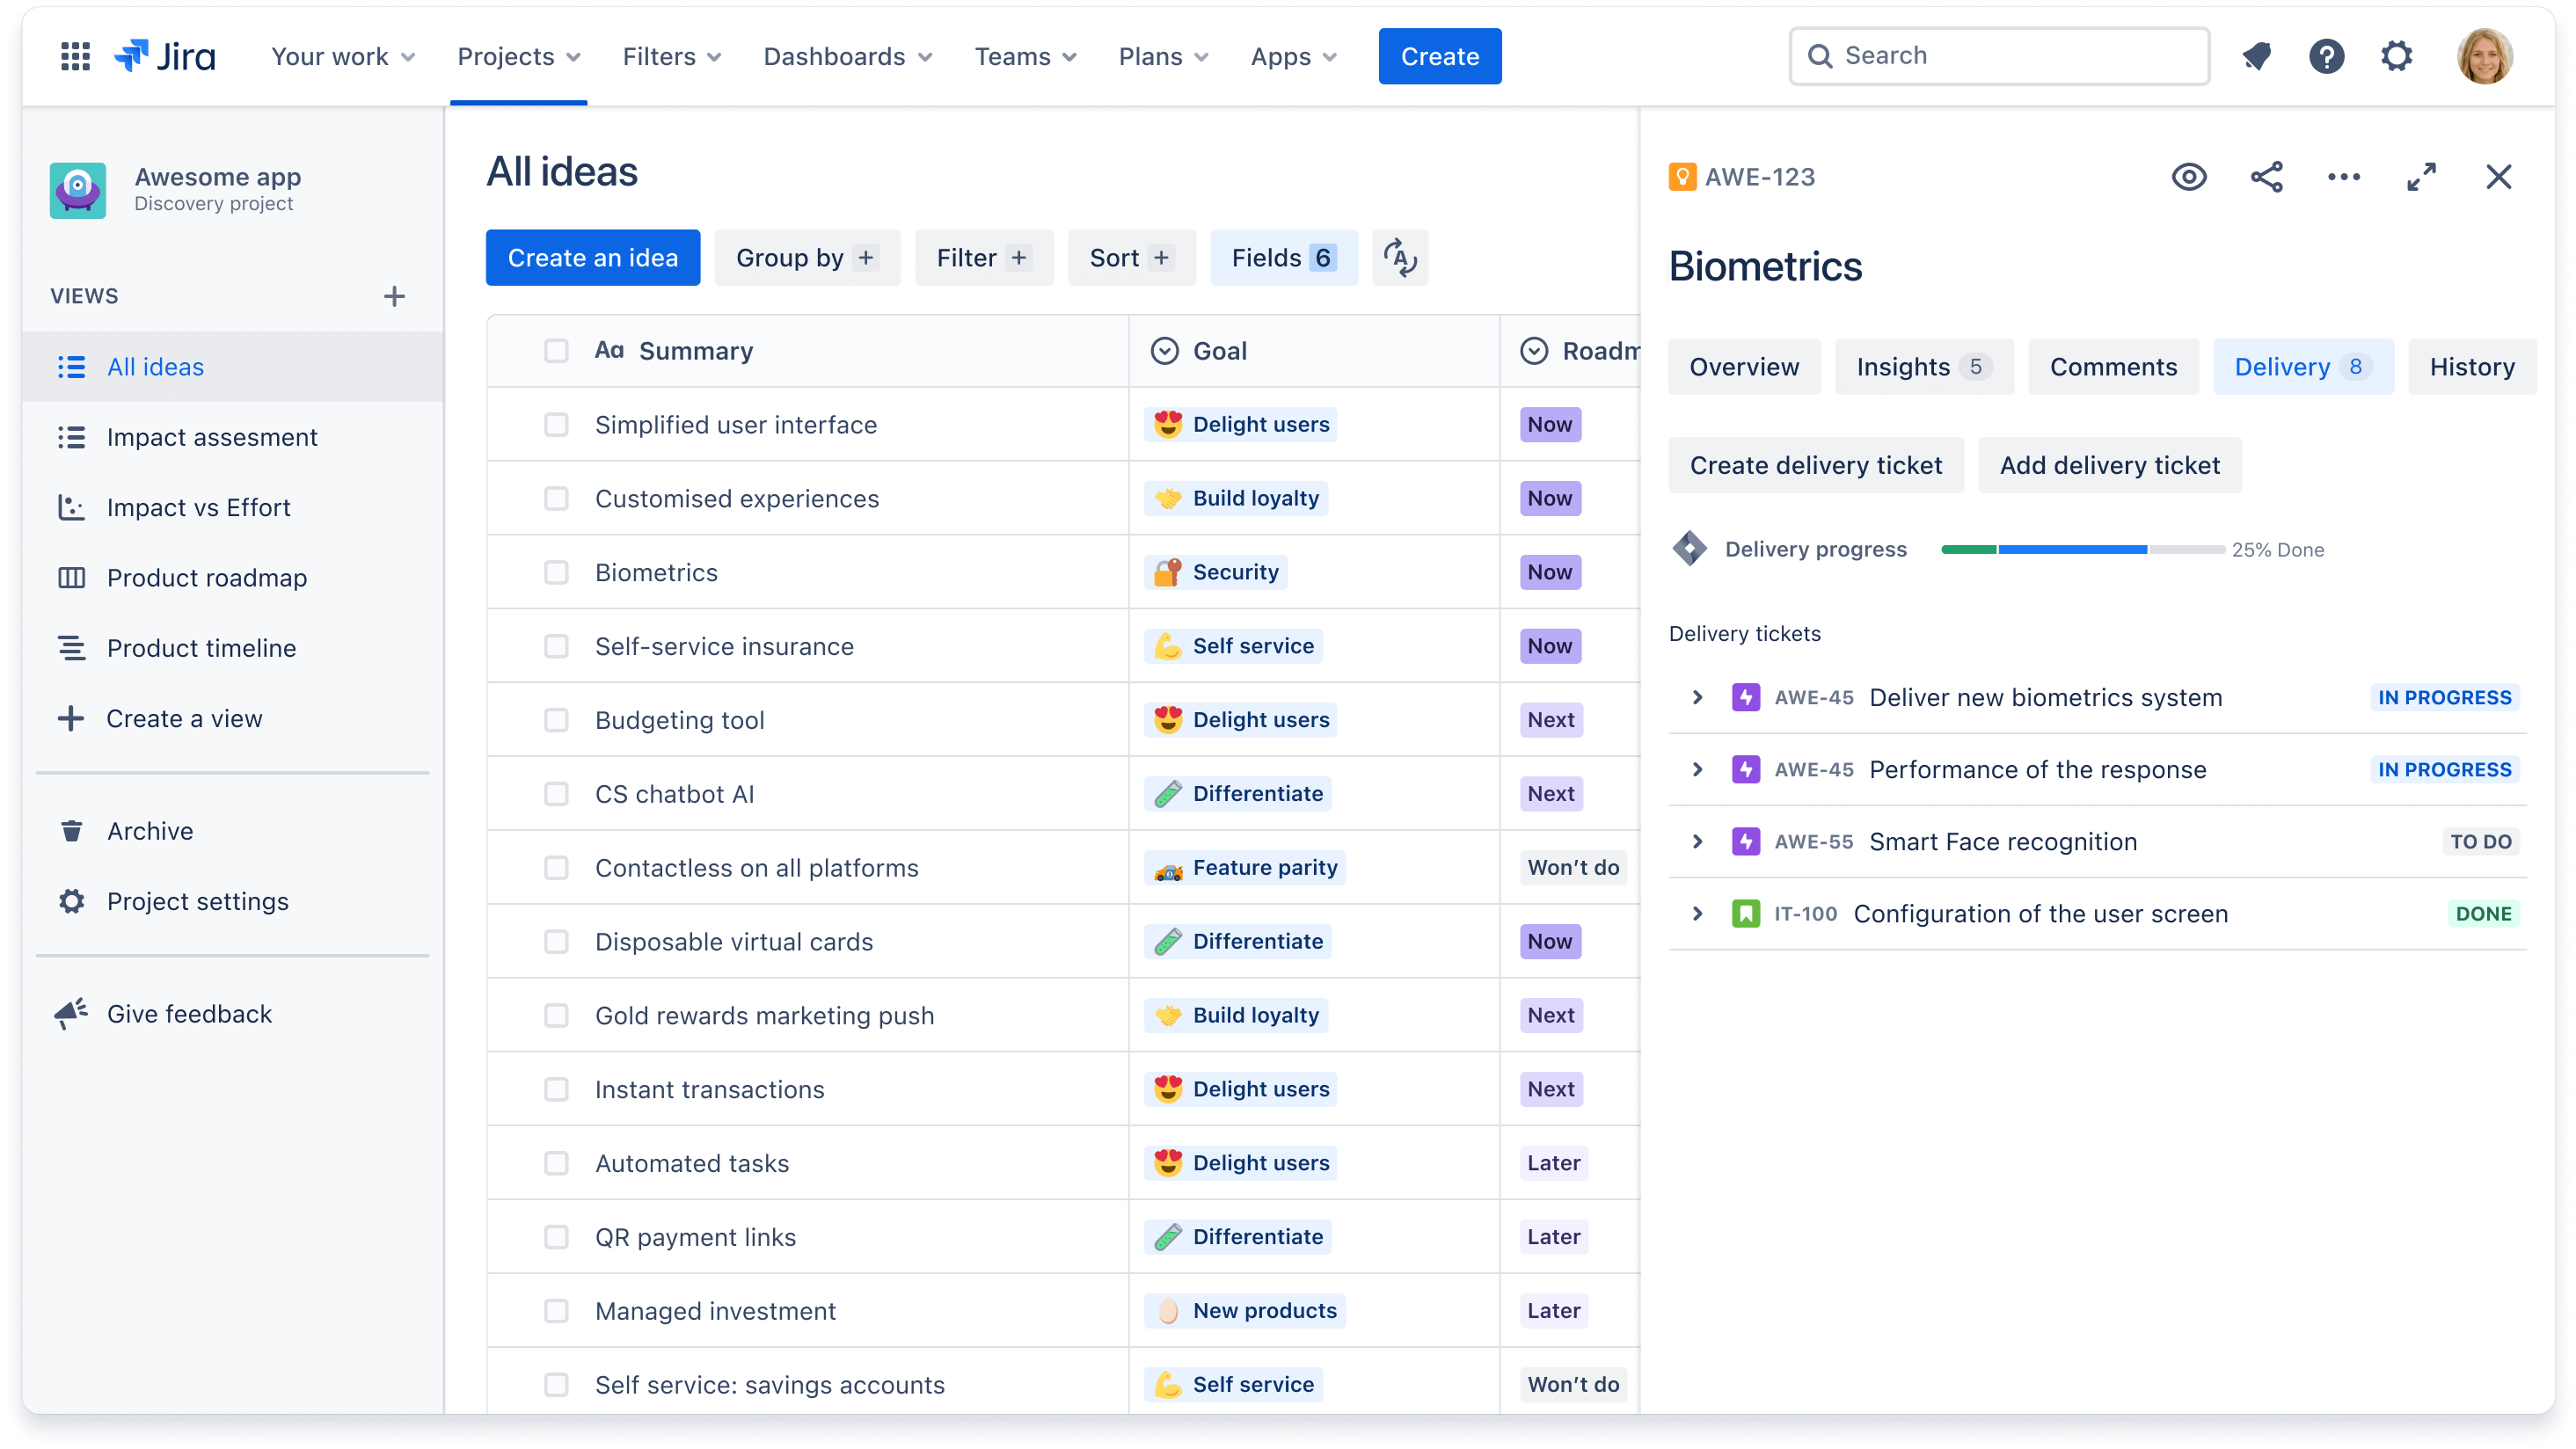
You are now able to track a helicopter view of progress for your Jira Software epics and issues directly from Jira Product Discovery using the fields Delivery progress and Delivery status. Many customers also choose to create a separate delivery view so they have one space within Jira Product Discovery to see high-level progress on the actual work happening.