Managing your Loom workspace and content
Loom workspaces are where your team’s videos live and where collaboration happens. Every Loom account includes at least one workspace where you and your teammates can record, watch, share, and organize videos together. You can see which workspace you’re currently in at the top left of the Loom sidebar. If you’re part of multiple workspaces, you can switch between them from this area.
Each workspace is made up of two key areas: your Library and Spaces. In this section, we’ll walk you through all the basics you need to know about your Loom workspace, how to manage your Loom workspace and your content.
Your Library: your personal video home
Your Library is where all the videos you’ve created are stored.
- Videos in your Library are private to you by default until you choose to share them.
- From here, you can rename, move, share, or organize your videos as your personal source of truth.
Think of your Library as your private workspace inside the broader team workspace.
Spaces: where teams share and discover
Spaces are shared areas where people in your workspace can post and discover videos. You can use Spaces to organize and share videos across your team, ensuring your videos are seen by the right people.
- Every workspace has at least one default Space where all members can share and browse content.
- You can use Spaces to group videos by team, project, or topic so the right people can easily find what they need.
Spaces are ideal for building a living library of knowledge that everyone on your team can benefit from. Watch a quick tutorial on how to get started with Loom spaces:
Workspace roles
Roles define your permissions within a Loom workspace, including recording, editing, managing, and administering. Your roles depend on your workspace's plan (Starter Free, Business, Business+ AI, Enterprise). To view your role, click your Profile icon at the top right of Loom, where you’ll see your “Current role.”
Roles fall into three simple buckets: Free, Creator, and Admin.
If you’ve just been invited to try Loom with your team, you’re most likely a Free user or a Creator. If you set Loom up for your team, you’re an Admin.
Free
If you’re just exploring Loom, this role gives you everything you need to record and share videos.
- Record and edit up to 25 videos.
- Watch, comment, and react to videos shared with you.
- View video transcripts and closed captions on videos that have them.
- Use core editing tools like trimming and basic stitching.
For unlimited recording time and storage, full access to editing and analytics features, ability to manage billing and workspace-wide settings, you may consider a Business or higher plan.
Creator
- Record unlimited videos for an unlimited recording time.
- Use the full set of recording features such as custom sized recording, screen and camera combinations, and higher quality recordings.
- Use advanced editing and analytics features, including detailed trimming and stitching, editing transcripts, custom thumbnails, and call-to-action buttons
- Access more detailed engagement insights.
Admin
Every workspace has at least one admin. Admins can typically do everything in Creator, plus:
- Manage people and roles such as inviting members to the workspace, changing roles, and deactivating or reactivating members as team members join or leave.
- Manage the plan and billing such as upgrading the workspace, viewing invoices, and updating payment methods.
- Manage workspace settings and structure, such as configuring custom branding for your videos, setting default privacy settings and private link behaviors, managing spaces, and adding workspace integrations.
If your Loom workspace is integrated with Atlassian systems, some Admin responsibilities—especially around billing and product access—are handled by Atlassian admins (billing admin, org admin, or site admin). You can learn more about Atlassian admin roles.
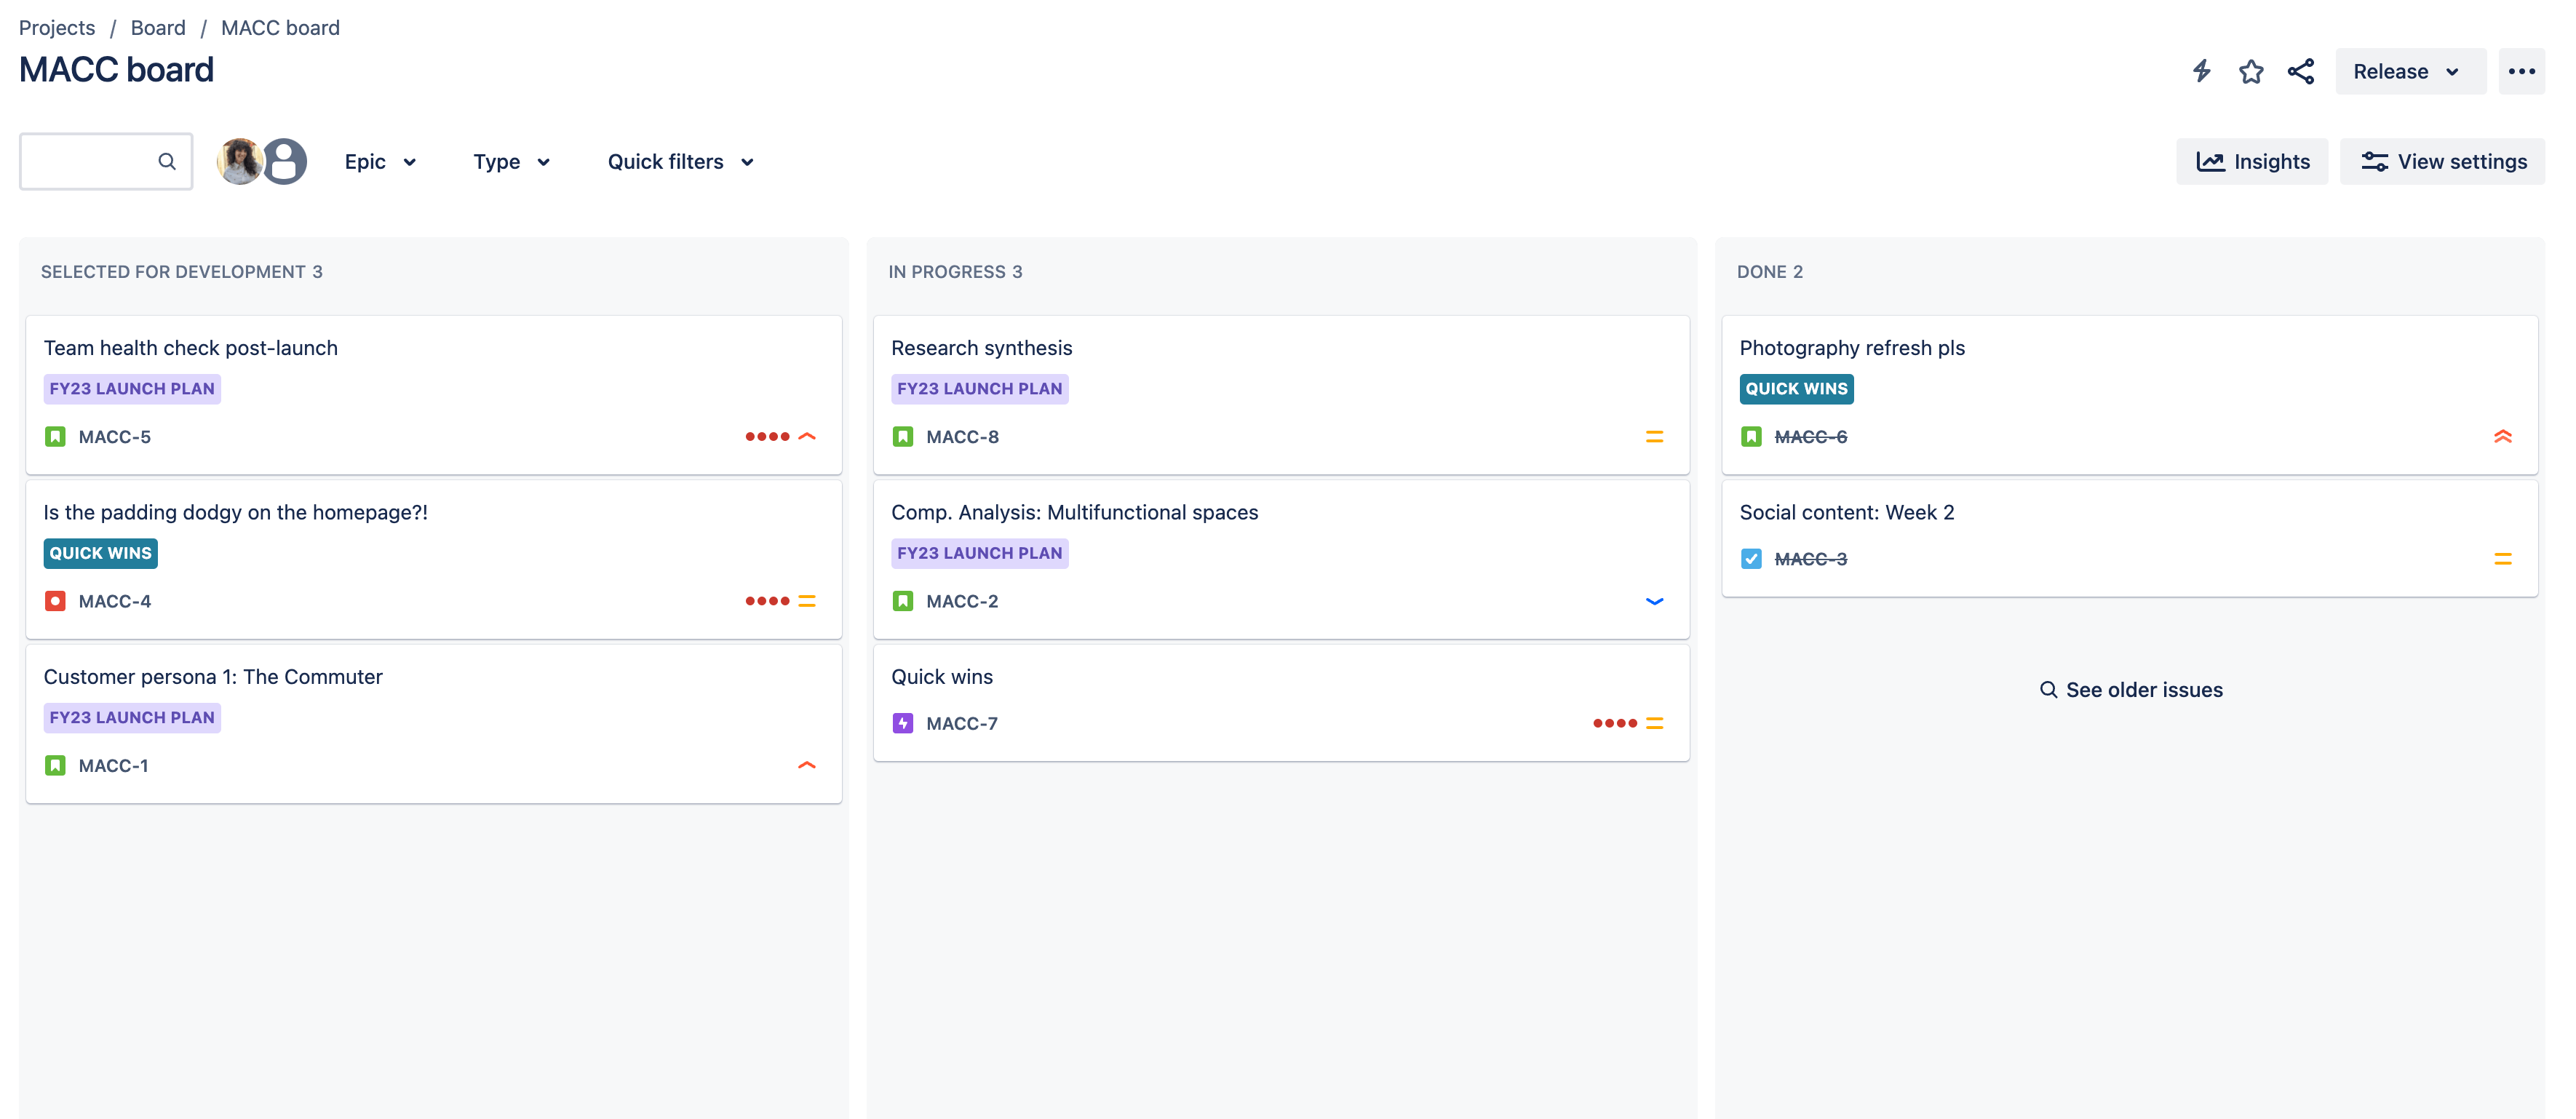
Scrum board
The scrum framework enables software teams to manage complex projects by creating a culture of collaboration. The Jira scrum board is the tool that unites teams around a single goal and promotes iterative, incremental delivery.
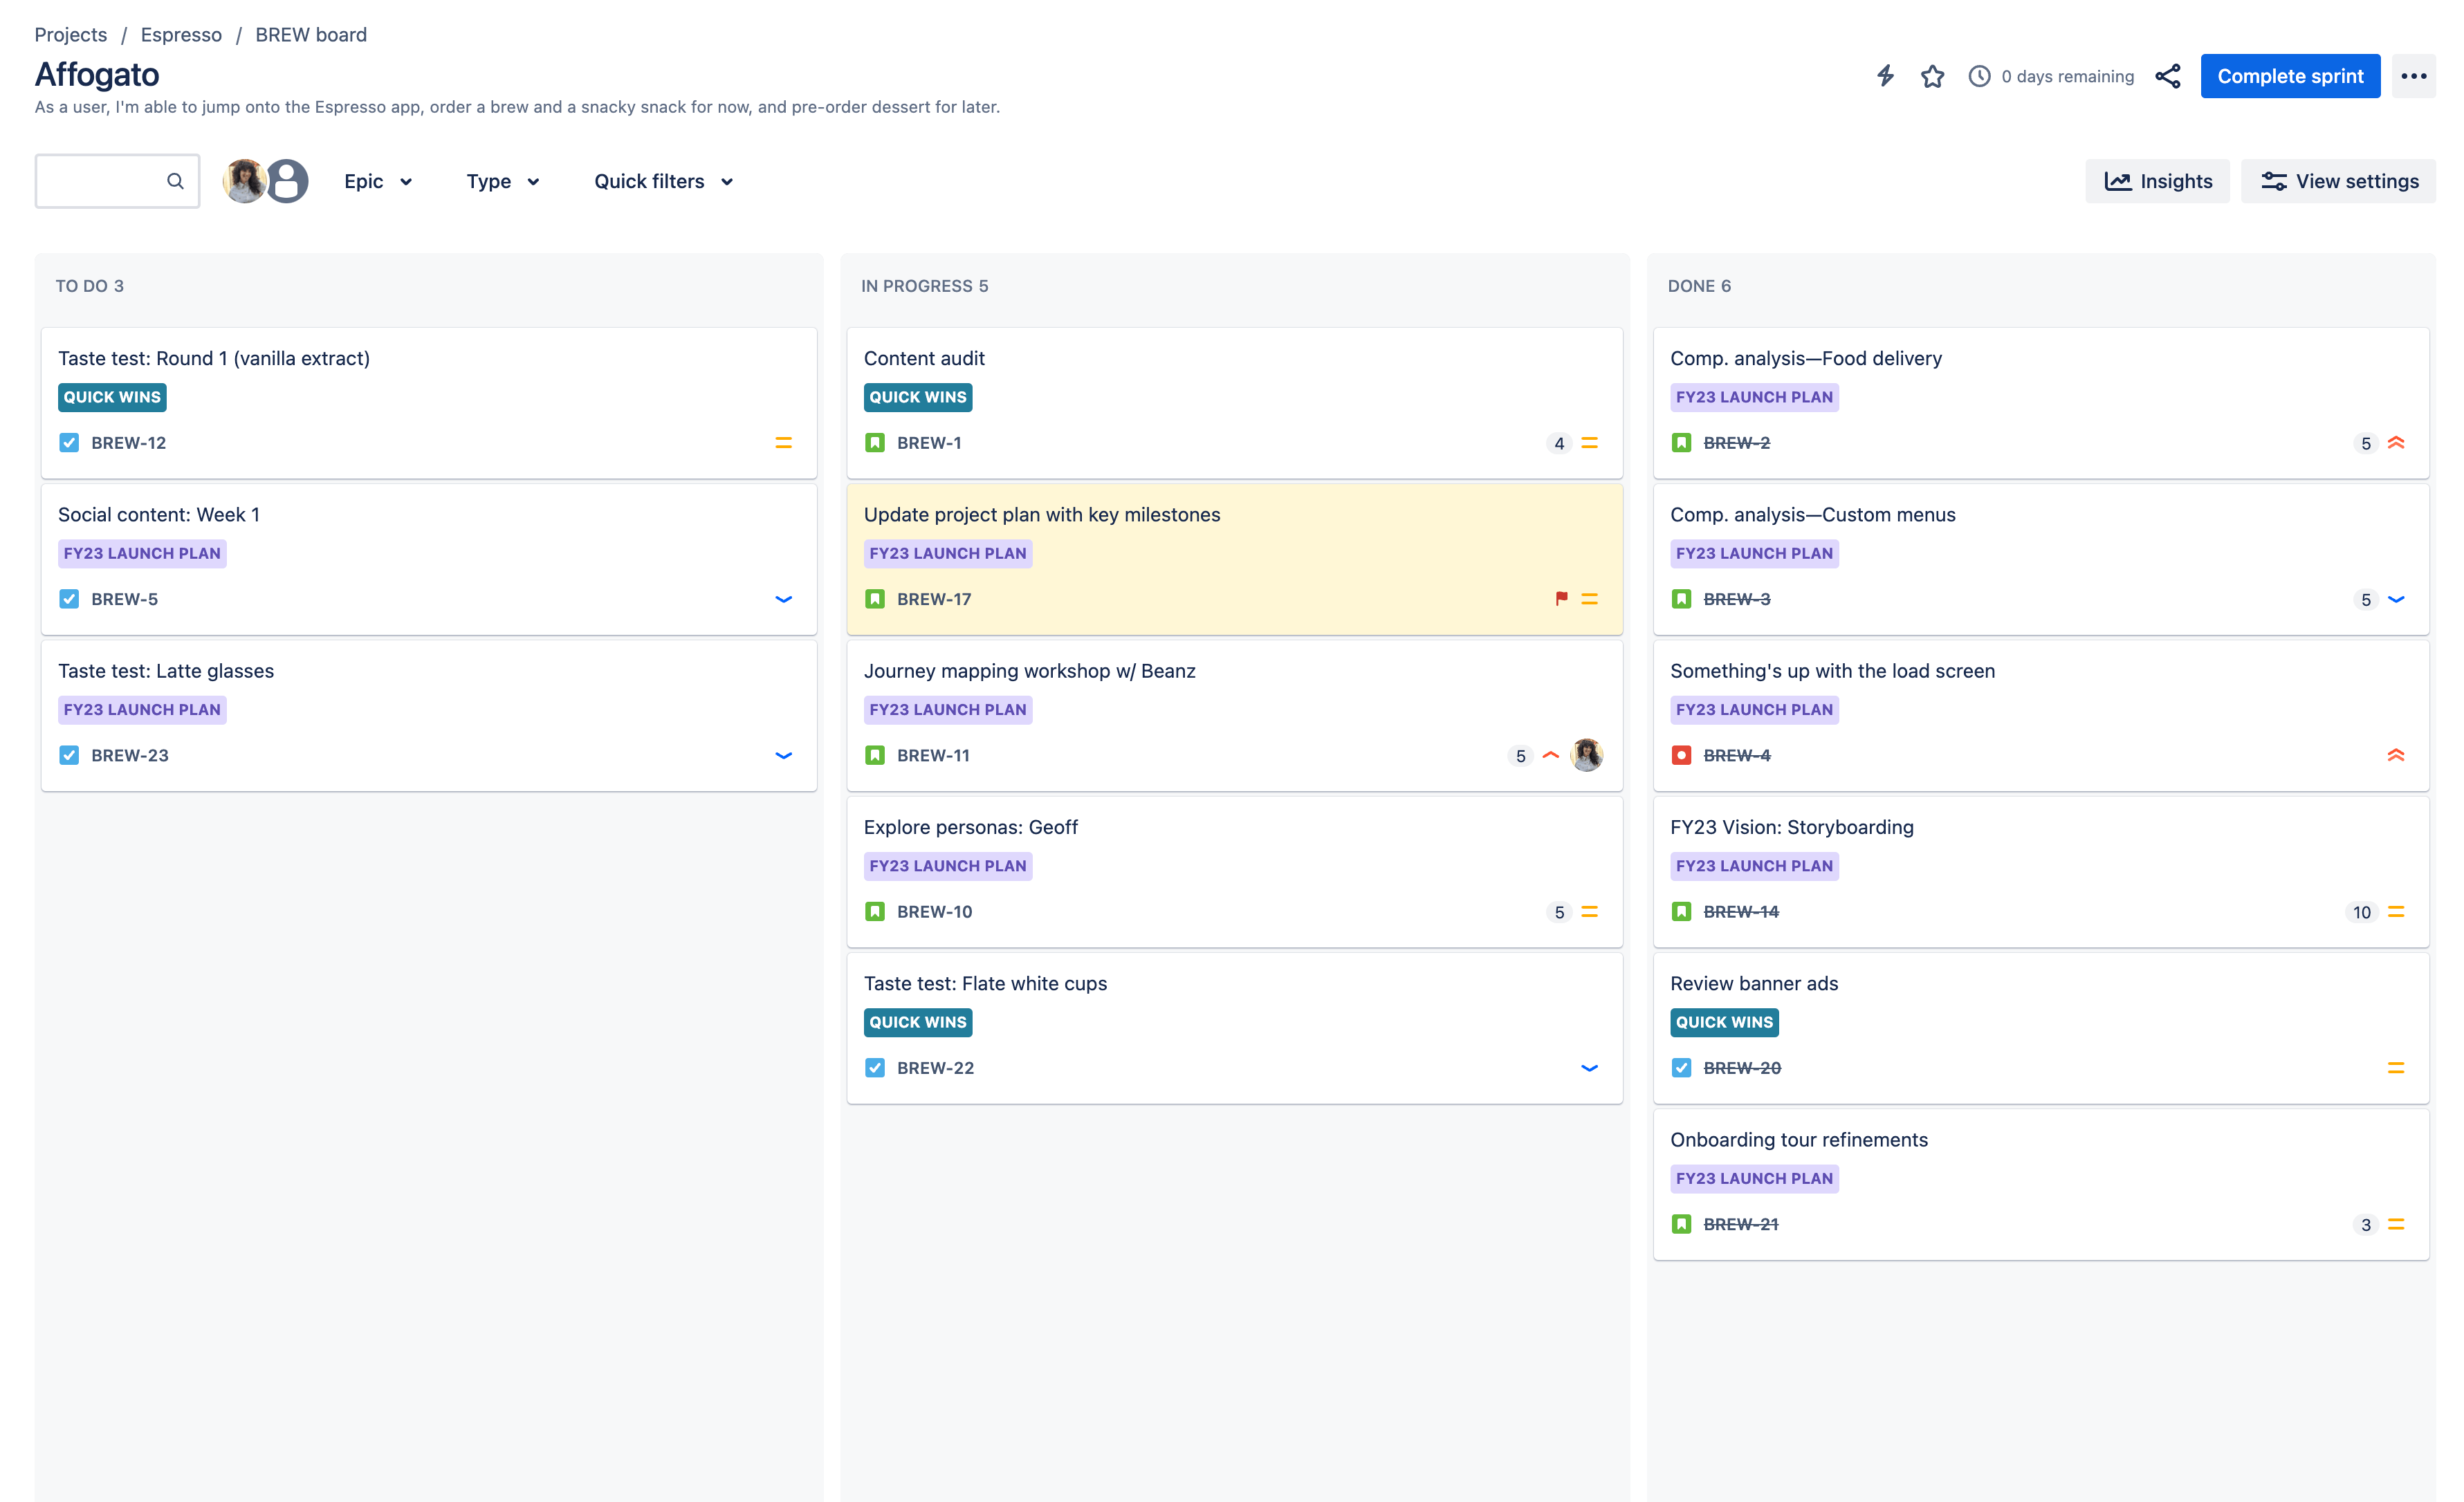
Kanban board
Kanban is a common framework for agile and DevOps software development that provides transparency of work and team capacity. Kanban boards in Jira help teams visualize their workflow, limit work-in-progress, and maximize efficiency.
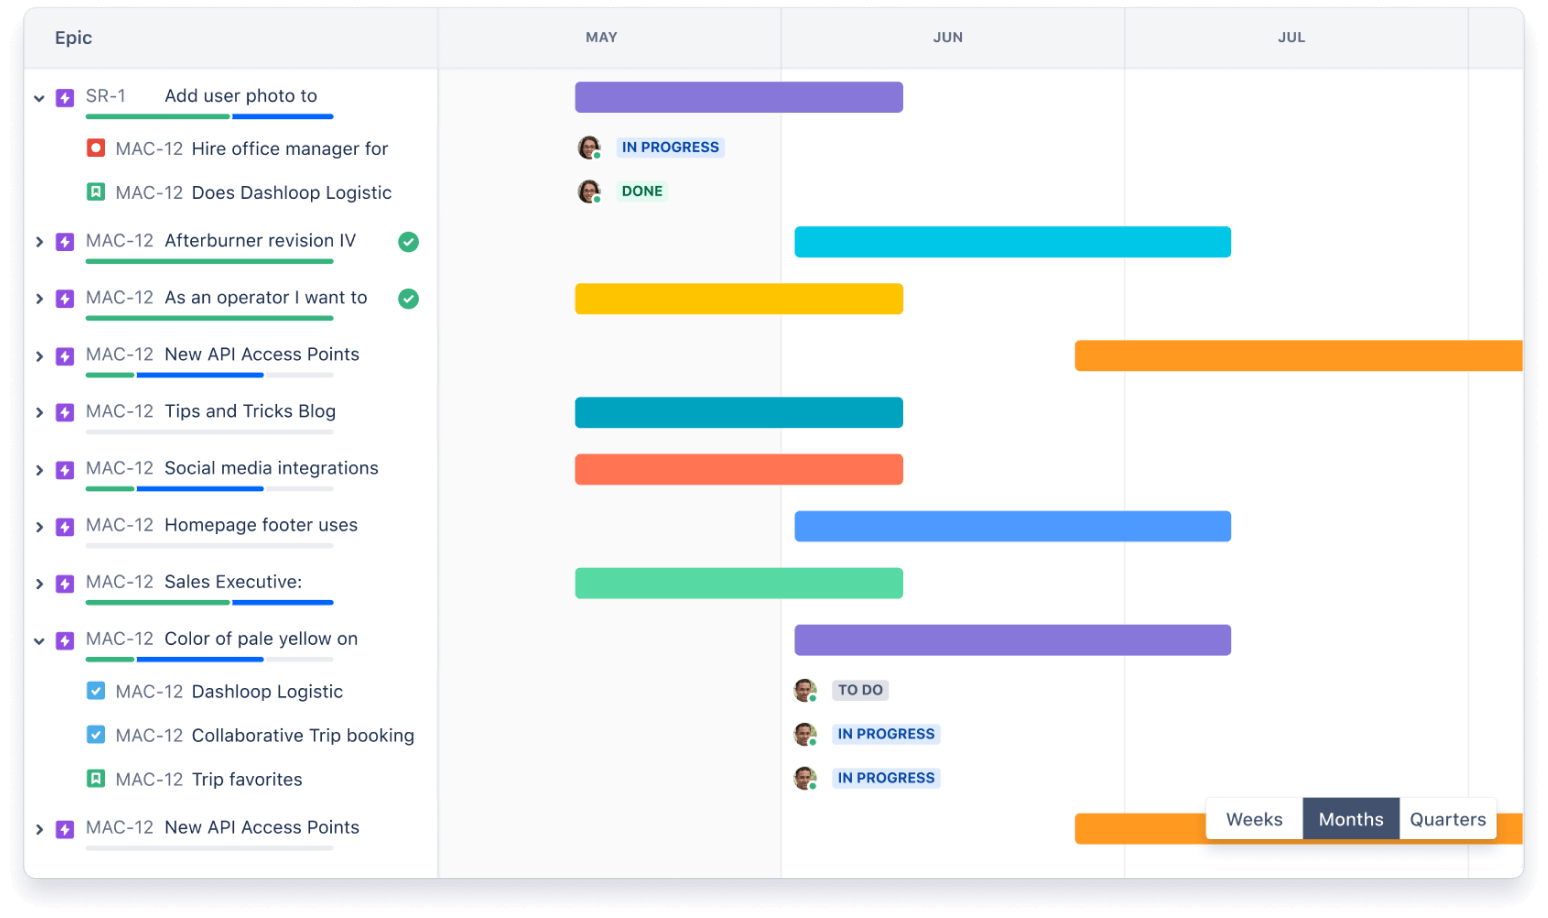
Timeline
The timeline view in Jira is useful for planning large pieces of work several months in advance within a single project. Simple planning and dependency management features help your teams visualize and manage work better together.
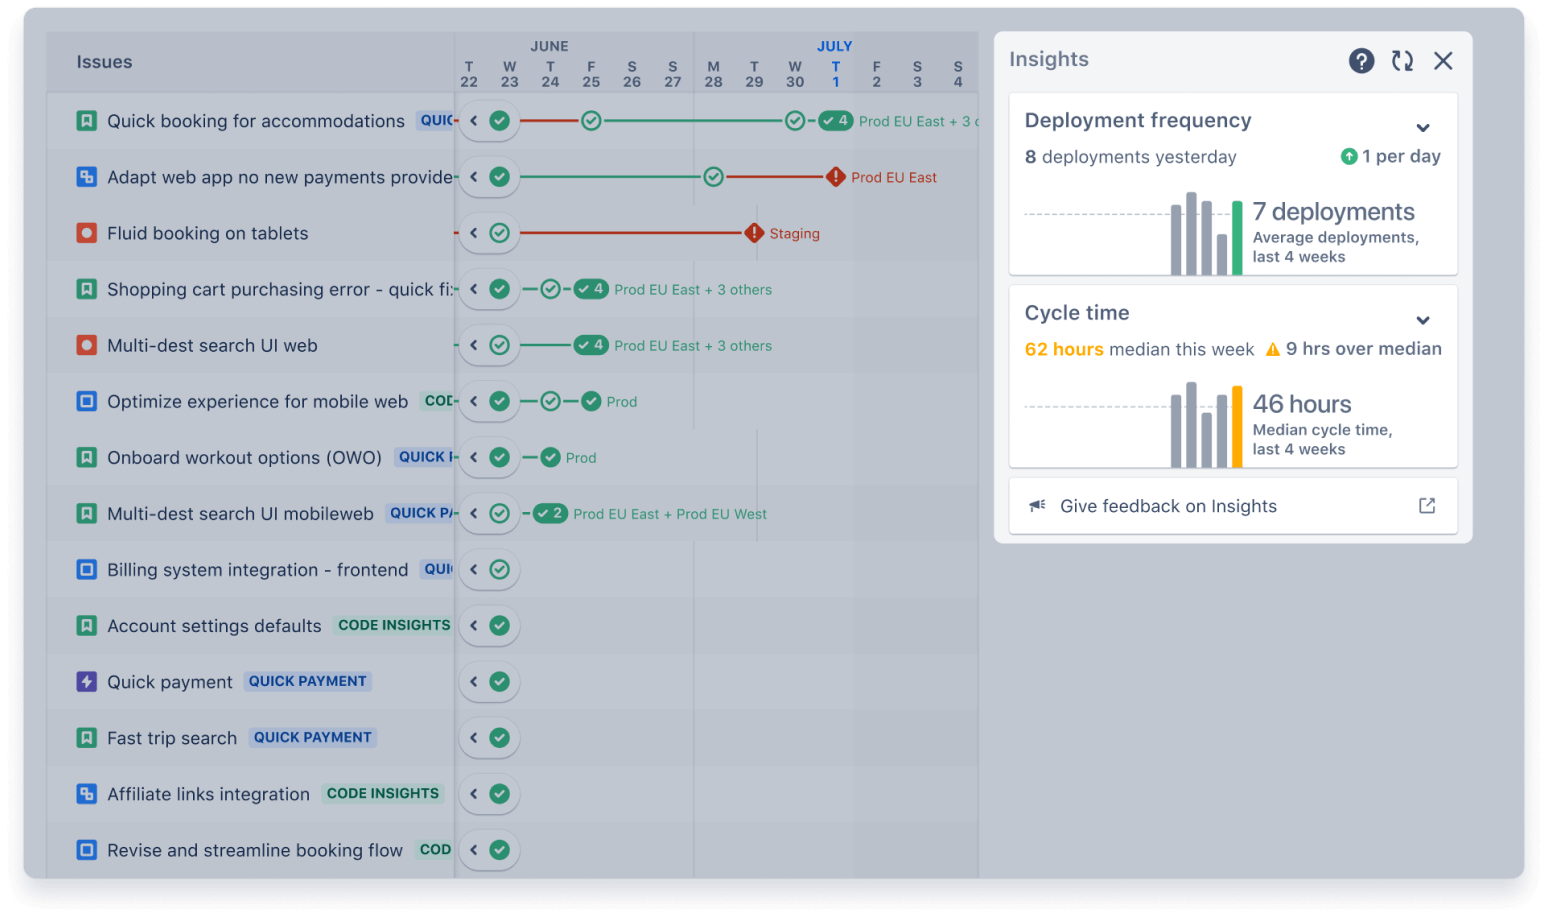
Insights
In Jira, insights helps the team make data-driven decisions without leaving their current context. Insights source data from your Jira boards and projects to present aggregated views of your team’s historical progress. Insights are currently available for scrum metrics in both company-managed and team-managed projects.
Integrations
In Jira, an app (sometimes called an add-on or plugin) is an installable component that supplements or enhances the functionality of your instance. You and your teams can spend less time managing work and more time building great software with over 3,000 Jira apps that can be custom-tailored to fit any and every use case.