Cloud Adoption Toolkit
A guide outlining key UX differences users can expect with the move to cloud so admins can prepare teams for the change ahead

Key differences in Jira Cloud
General user interface and navigation
We designed the cloud platform to be more intuitive for all of your users - not just developers. We’ve found some of these changes to the core experiences are easier for users to navigate independently.
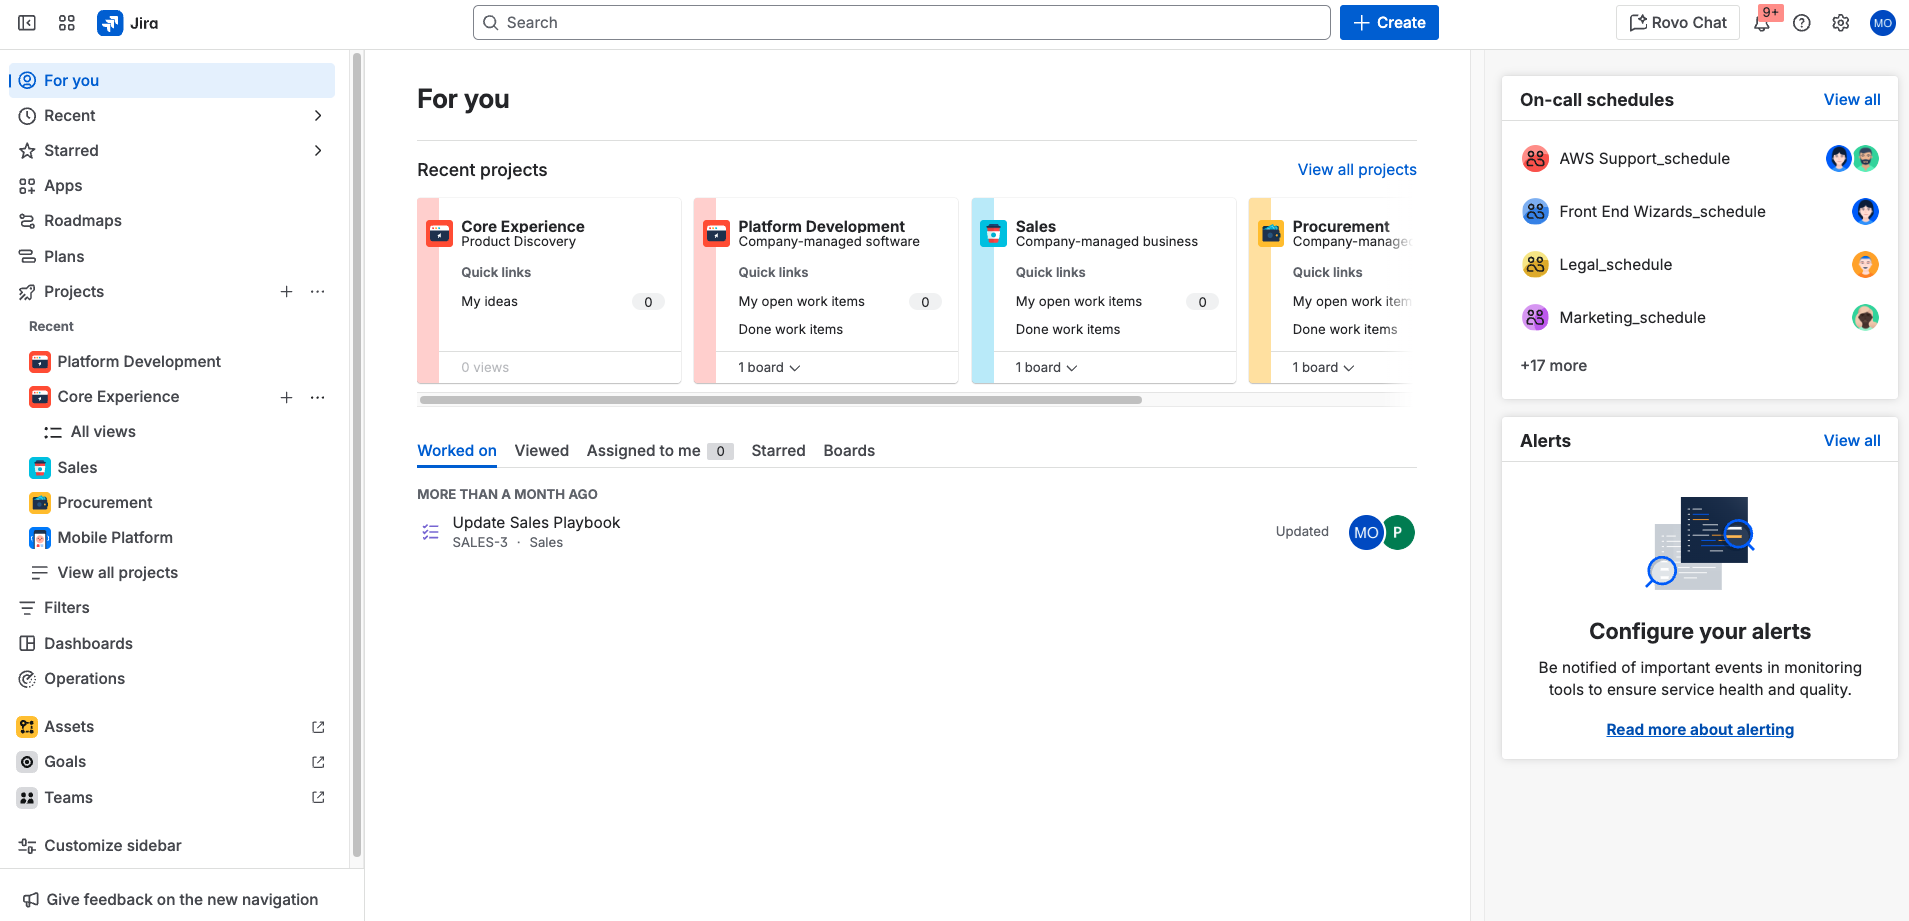
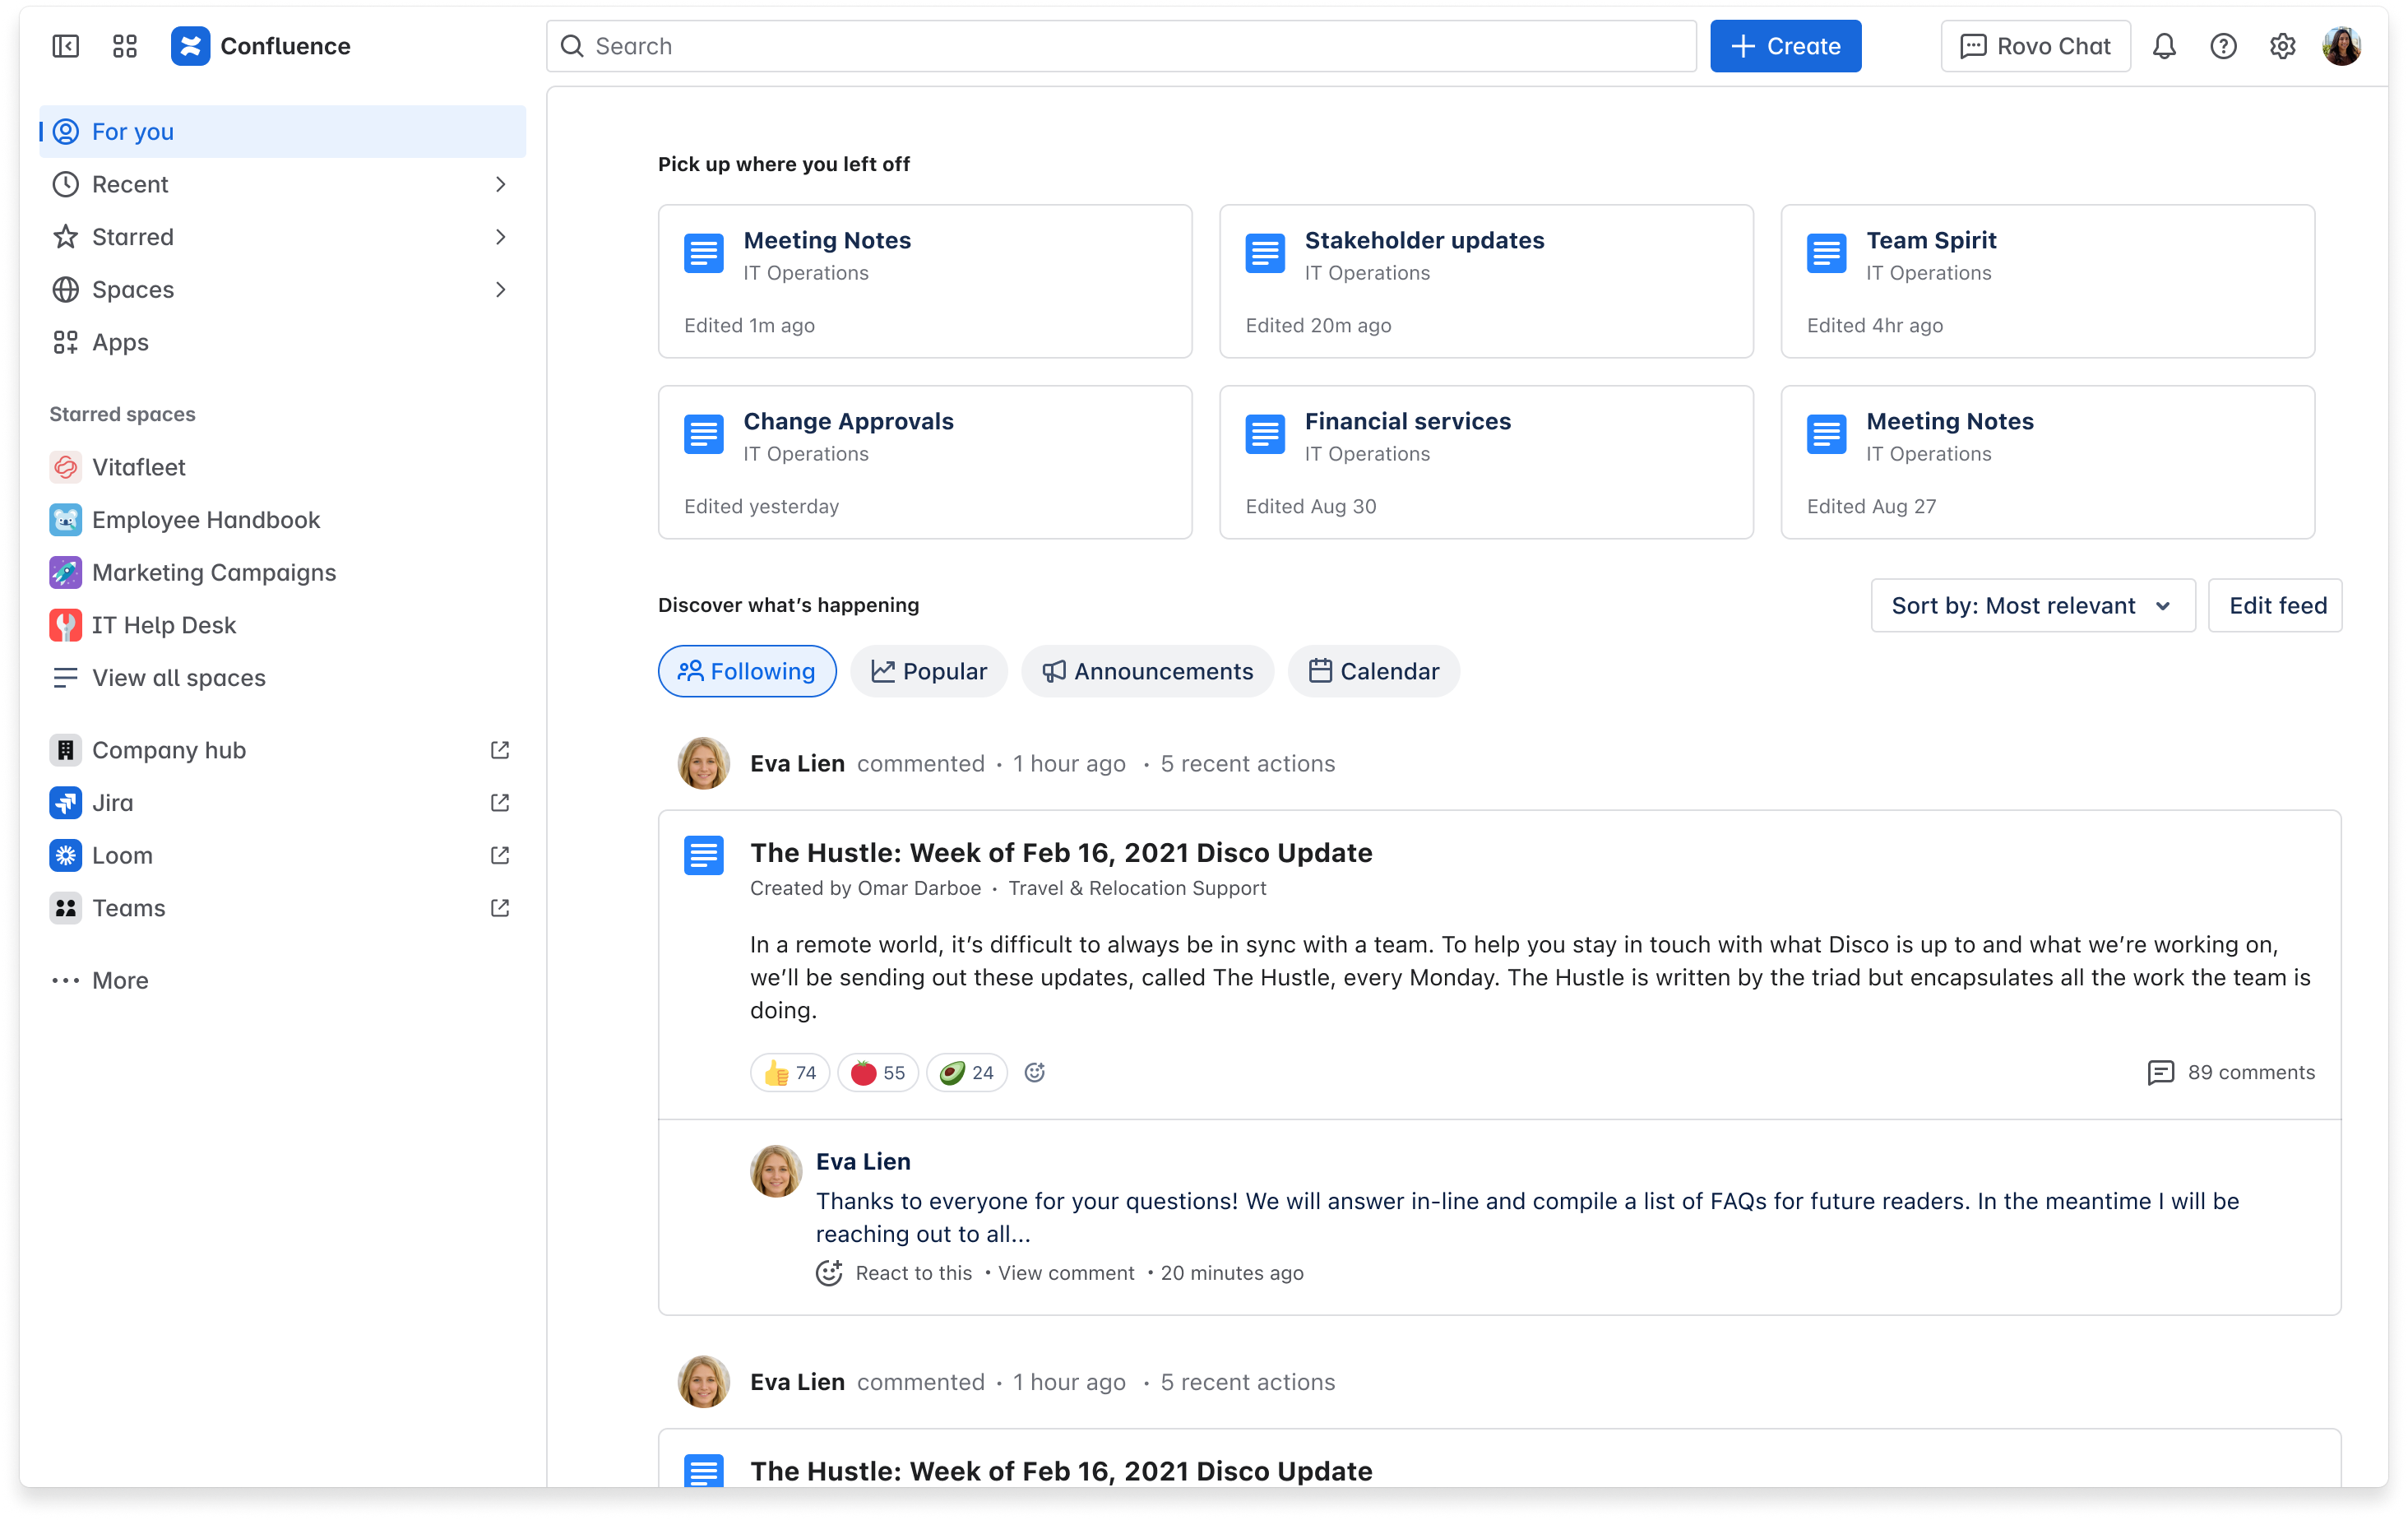
Cloud has a different sidebar and horizontal navigation from data center. You’ll see the same main navigation bar across all Jira Cloud apps. This gives you quick access to the spaces (previously called ‘projects’), filters, and dashboards you use most. It also lets you create work items (previously called issues), search and chat using Rovo, and access help notifications and global Jira settings.
Use the diagram below to familiarize yourself with the navigation bar for all Jira Cloud apps:
NOTE: Depending on the Jira app and app version, the navigation bar options may vary slightly.

- App switcher: Switch between Atlassian and third-party apps, like Confluence, Talent, and Miro, or go to other sites.
- Jira logo: Keep track of which Atlassian app you're in as you switch between apps. Use this logo to navigate back to your homepage from any page.
- For you: Get an overview of the things you care most about in Jira. Find work items, spaces, boards, and queues you’ve visited, work assigned to you, and your starred items.
- Spaces, Filters, Dashboards, and more: Quickly find and resume work on the things you use most. Your starred items appear at the top of each menu, followed by your recently visited items.
- Teams: See the people and teams you work with, and create new teams.
- Apps: See and manage marketplace apps installed on your Jira site.
- Search: Find work items, spaces, boards, queues, filters and people. If enabled, paid editions get AI-powered, cross-app search via Rovo.
- Create: Create work items easily from anywhere within Jira.
- Rovo Chat: Ask questions and explore your company’s knowledge through an AI-powered chat interface. Rovo chat is available on paid editions and must be enabled by admins.
- Notifications, Help, Settings, and your profile: See what's happening in Jira, get help, and customize Jira’s settings (Jira admins only) and your personal settings.
For more details, see the Jira Cloud navigation page.
Where did the work items dropdown go?
You’ll most likely notice that cloud doesn’t have a dropdown for work items. Instead, your recent activity will appear in the ‘For you’ section on the sidebar. Filters are now a separate menu item and work items can be reached via the sidebar.
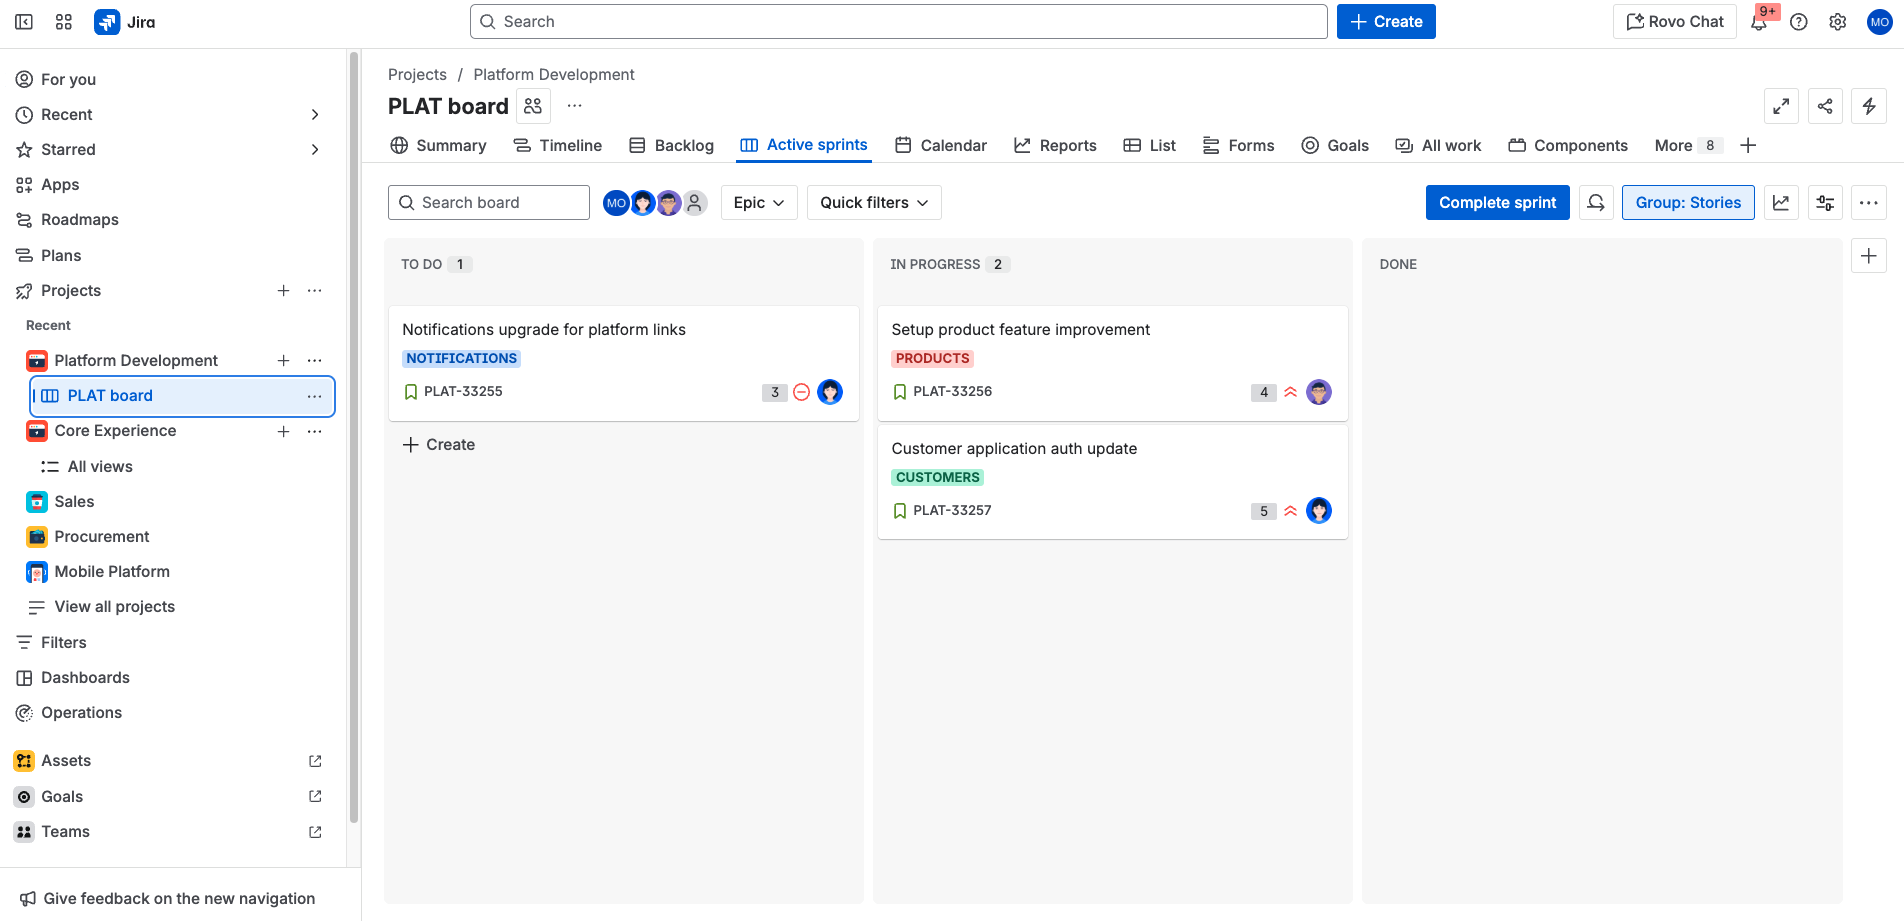
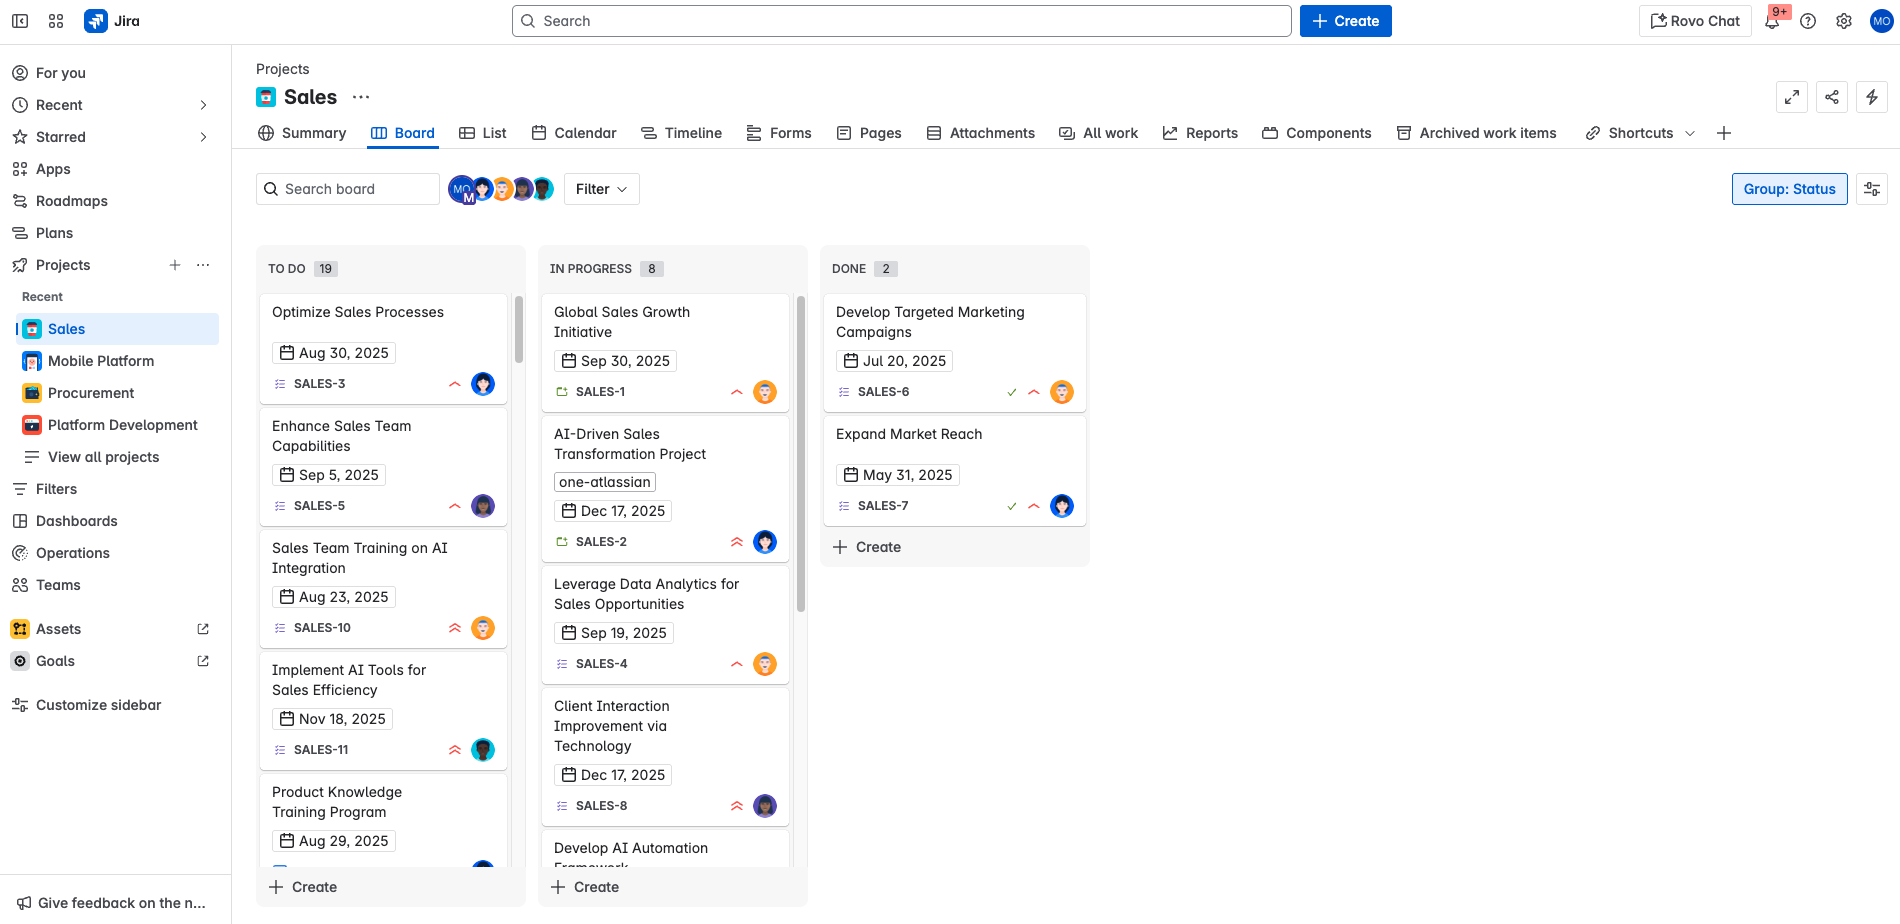
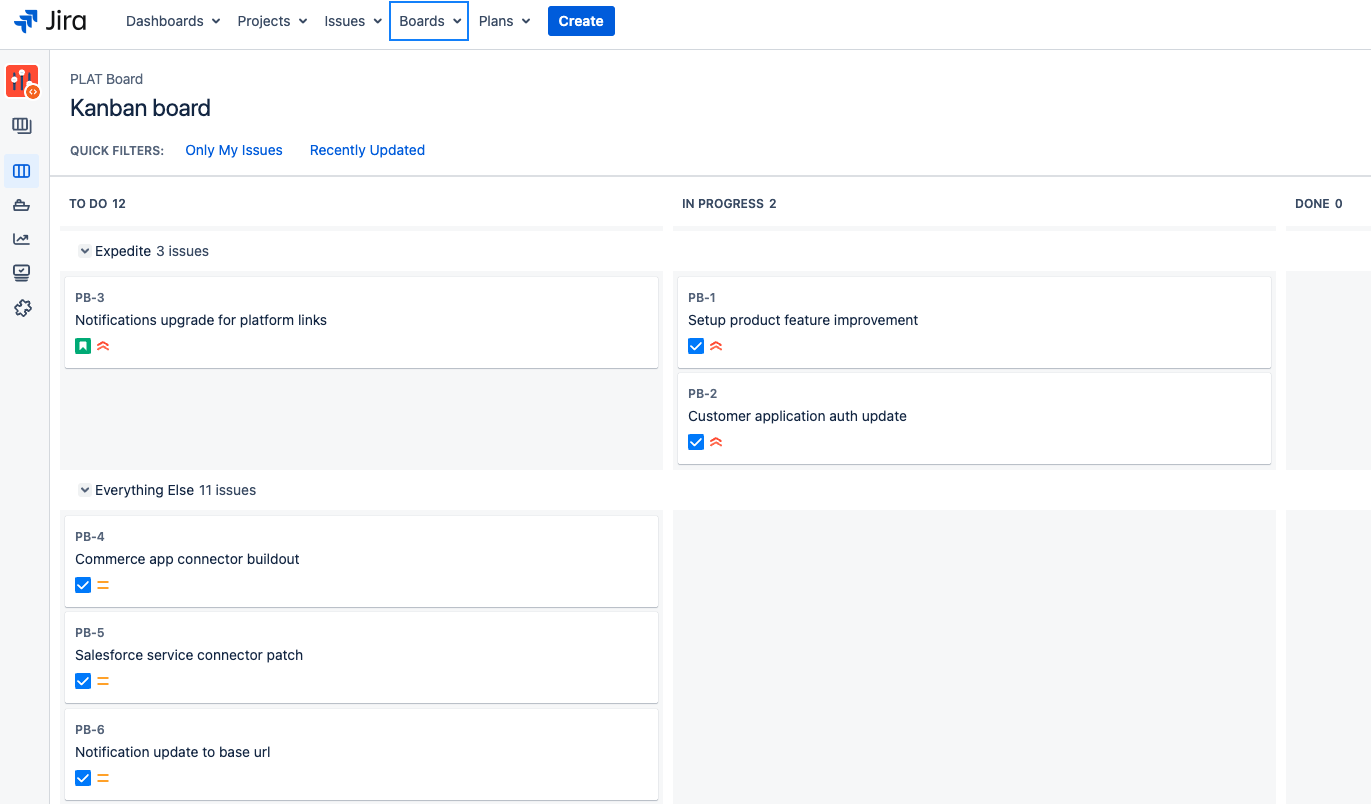
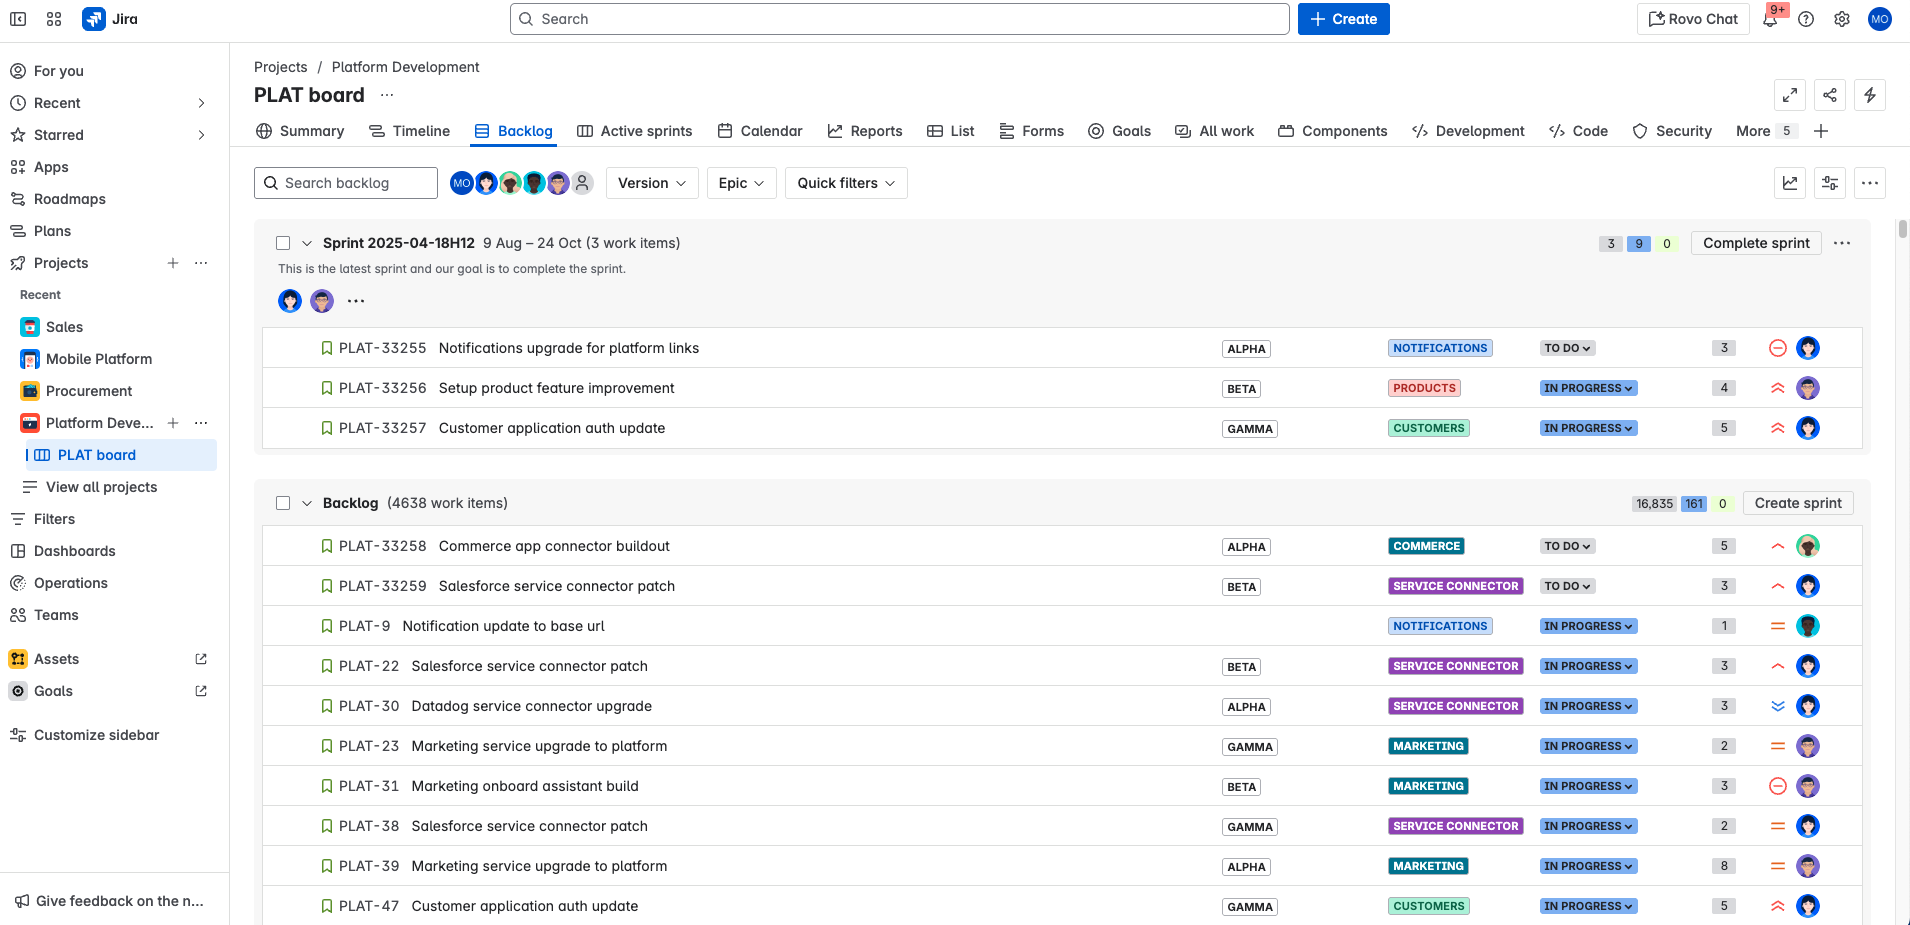
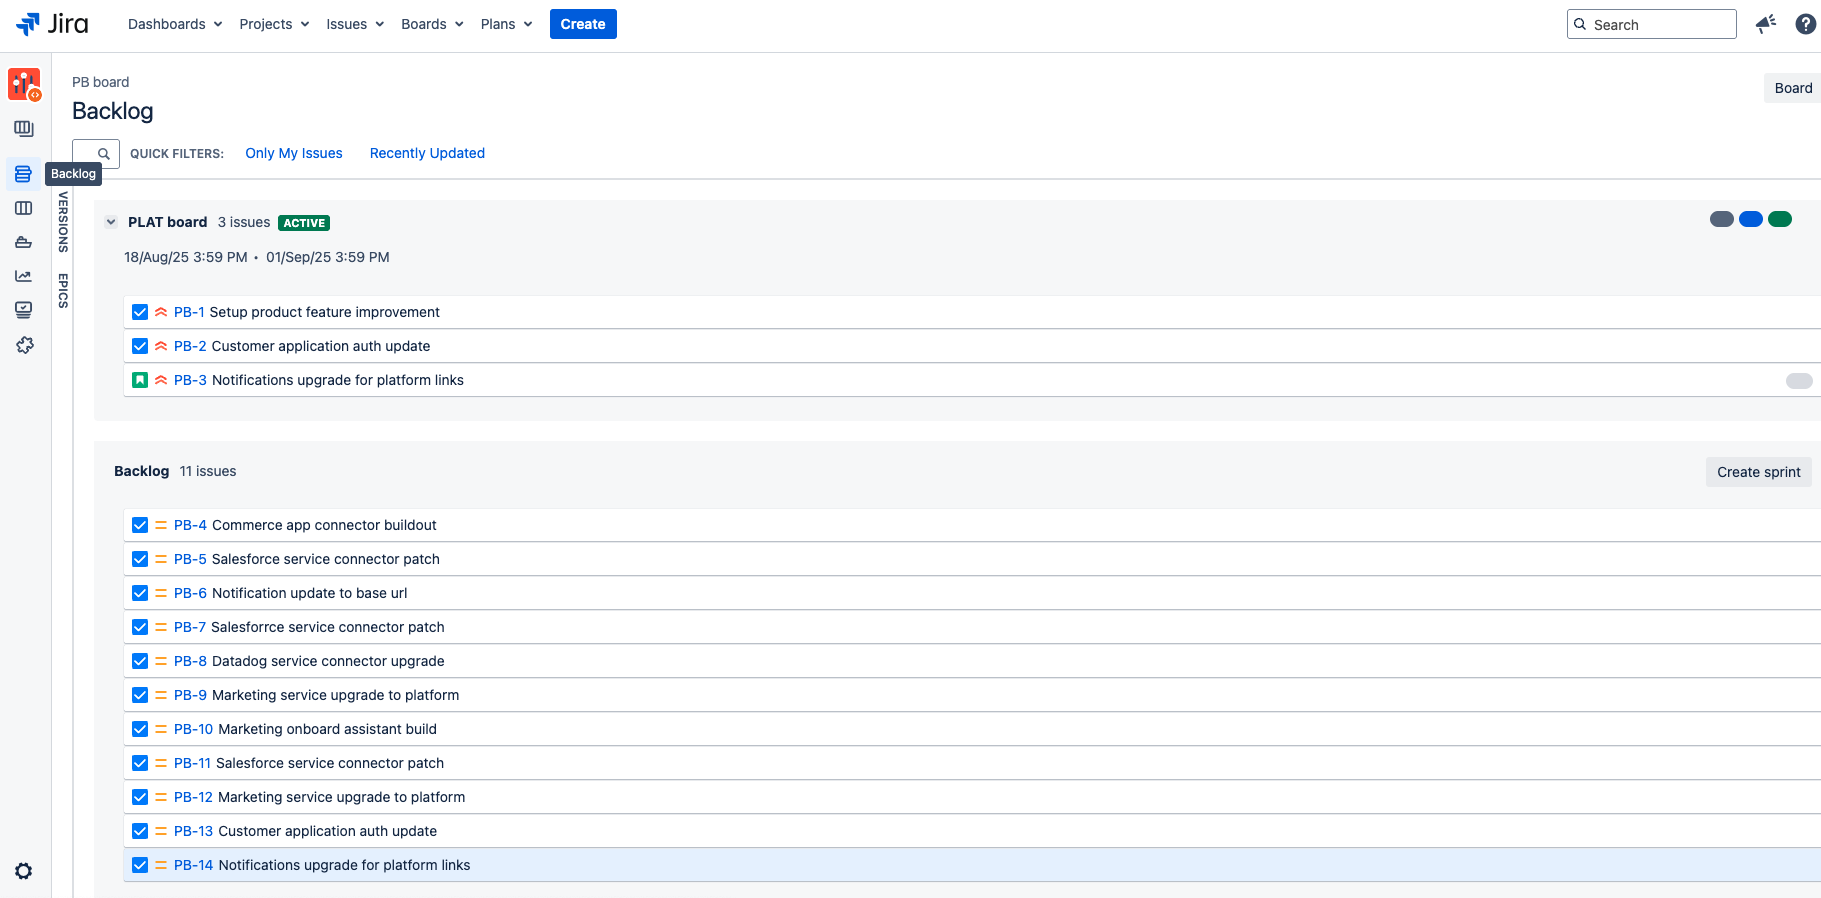
Key changes to board view
The space board and backlog views are very similar in both versions for Scrum/Kanban spaces. In cloud, there’s a 5,000 work item limit per board, and you can view sprint insights to stay on top of progress made and deliver with confidence.
Key changes to work item view
Jira Cloud has a new work item view that groups key actions and information in a more logical way, making it easier for you to scan and update your work items. It usually appears as a 2-column layout on boards and as a single column in the backlog but is responsive to the size of your window.
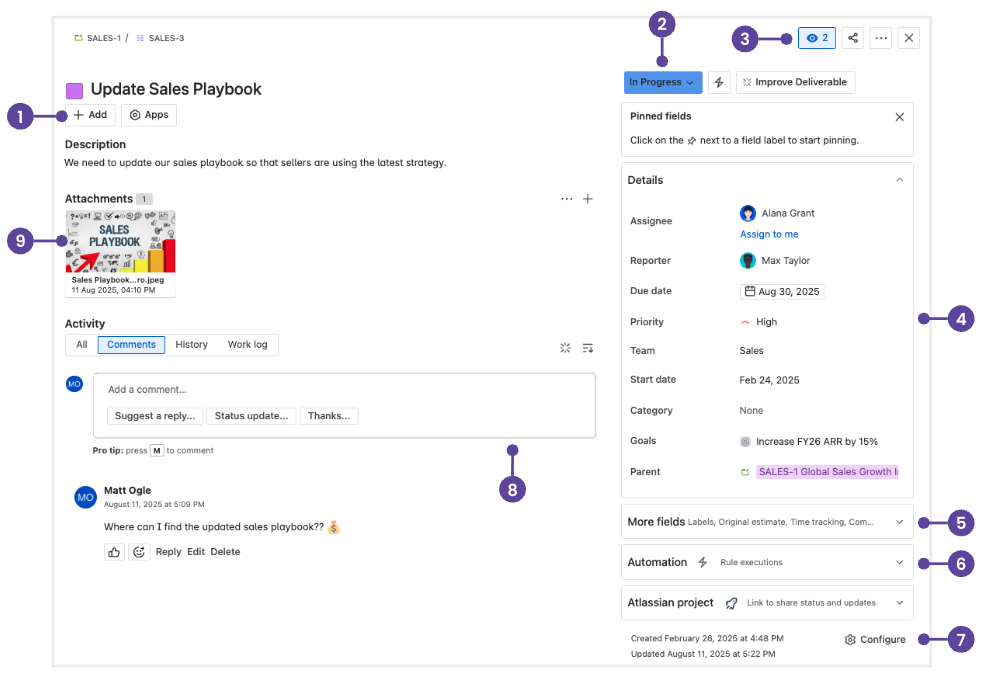
- Quick-add button: Add attachments, subtasks (company-managed spaces), or child work items (team-managed spaces); link to work items, URLs, and content from Atlassian Marketplace apps.
- Transition work item: Update a status, view workflow steps, or take other work item actions by selecting the down arrows (⌄).
- Watch, Vote, and More actions: Watch, vote, and give feedback, and perform other actions like move and clone via the ‘More actions •••’ menu.
- Flexible layout: View and update information organizing your work items including the Development panel linking to development tools like Bitbucket (if connected by your admin). Fields can be placed where they work best for you. On the right side menu, pin your most important and frequently used fields to the top, including the ones under the Show more fields link. To do so, hover over the bold name of the field and select ‘Pin to top’.
- More fields: Select the down arrow (⌄) to view all work item fields.
- Automations: Select the down arrow (⌄) to view Automation rules that have recently run.
- Configure work item layout: Move, hide, and change fields in the work item view for individual spaces.
- Activity and docked Comments bar: Add notes, updates, or questions in the Comments bar. Tag your teammates to notify them or restrict the comment on a public work item.
- Attachments: Switch between the list and strip view for attachments, or download them all at once to work with them on your device.
TIP: Share the Jira Cloud quick start guide with your users so they can easily reference the changes outlined above.
New ways to manage Jira spaces
While spaces are managed at the company level in data center, you have the option in cloud to manage spaces at either the company or the team level. The core functionality of these space types is the same, but it can be helpful to know which type of space your team is working in if you’re looking for certain configurations.
Team-managed spaces offer a powerful yet simpler configuration that's independent of other spaces on the cloud instance. Anyone on the team can create a team-managed space and serve as the space admin. Space admins administer and have total control over the configuration of their team-managed spaces. This includes configuring workflows, custom fields, work item types, permissions, and more without having to contact the Jira app or site admin. With company-managed spaces, the Jira app admin is responsible for making these types of configuration changes.
TIP: Jira admins can configure and control space settings via Jira Settings > System > Global Permissions.
| | Team-managed space | Company-managed space |
|---|---|---|
Default | Team-managed space Default space type | Company-managed space Can be enabled by admin |
Overview | Team-managed space Simplified configuration that is independent of other spaces. Settings and changes in team-managed spaces can be made by the space admin and are contained; they won’t impact other spaces on the same instance. | Company-managed space Expert configuration with greater complexity and flexibility, but also the ability to standardize workflows across spaces. When a Jira admin changes a scheme or screen, every company-managed space using that configuration changes accordingly. |
Configuration | Team-managed space
| Company-managed space
|
Features | Team-managed space Essential A modern Jira experience for teams who don’t need advanced features.Basic Roadmaps
| Company-managed space Advanced All the power and features that Jira is known for.
|
When to use | Team-managed space
| Company-managed space
|
Popular new features in Jira Cloud
One of the most common reasons customers cite when deciding to move to cloud is to have access to the latest and greatest features in Atlassian apps. We're continuously releasing new value and innovation for you and your teams, and you can see a curated list of some of our most popular new Jira Cloud features in this section.
1. Automation
Jira Cloud’s native automation engine has powerful features which are exclusive to cloud and not available for data center, namely:
- Create variable action
- Lookup work items action
- Sum, min, max, average, and conditional smart values
- The ability to run rules as another user
- Unique triggers
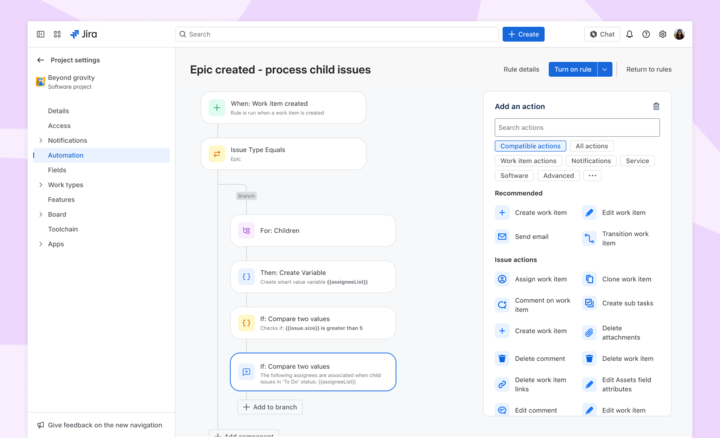
In Jira Cloud, advanced triggers and automation functionality are included out-of-the-box. Learn more about automating your processes and workflows.
2. Plans (included with Cloud Premium and Enterprise plans)
Plans (formerly known as Advanced Roadmaps), which you may have been using as an app with your data center instance, is available out-of-the-box with all cloud Premium and Enterprise plans. Plans are available for company and team-managed spaces.
NOTE: Plans can include work items from all Jira space types.
The cloud version of Plans doesn’t include the ability to create Programs, i.e. group of plans, which is available on data center. However, in most cases, a Program can be duplicated through custom hierarchy levels for Plans. You can learn more about how to get started with advanced planning here.
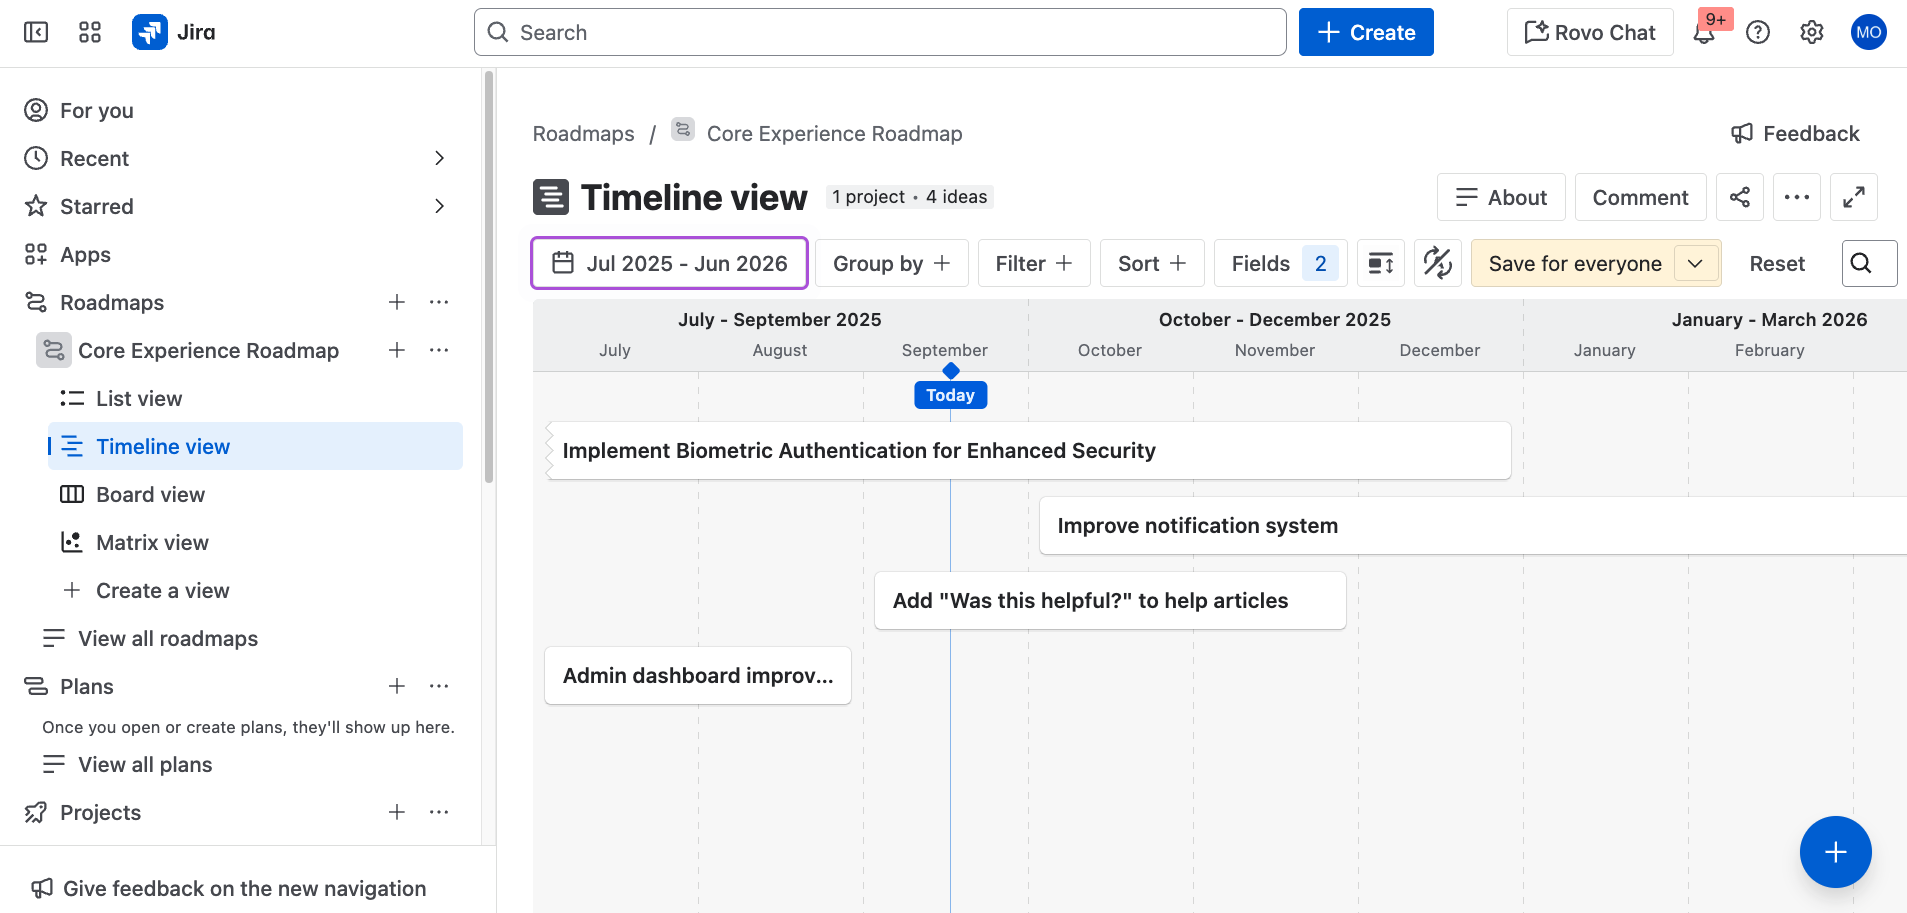
3. Basic roadmaps
For all cloud plans, you can use the space-specific roadmap. The roadmap is where you can create, manage, and visualize your team's epics. Roadmaps are useful for planning large pieces of work several months in advance and planning large groups of stories across different sprints. While Plans provide the ability for cross-space roadmaps, basic roadmaps are for single spaces.
4. Space templates
Jira Cloud offers over 40 ready-to-use space templates for many use cases, with more being shipped on a regular basis. Jira Enterprise plan also offers custom space templates that allow admins to reduce space setup time by reusing settings from existing spaces.
5. DevOps Insights
If your admin has integrated your CI/CD pipeline with Jira, you can take advantage of DevOps Insight, which includes cycle time and deployment frequency reports and insights that can be used to analyze risk and measure how often you are shipping value to your customers.
6. Better integrations
With Jira Cloud, integrating with other Atlassian apps like Confluence, and third party tools like MS Teams and your development tools is easier than ever.
7. AI capabilities
Built-in AI helps you work smarter, faster, and more collaboratively. Instead of spending time on completing manual tasks and updates, Jira AI handles the details so you can focus on impact. Here are a few ways you can start using Jira AI capabilities:
- Work breakdown: Turn high-level ideas into manageable tasks with AI-generated summaries, descriptions, and subtasks.
- Workflow guidance: Use Rovo Agents like the Workflow Builder or Work Readiness Checker to design processes, check task clarity, and ensure spaces stay on track.
- On-demand context: Surface related Jira work items, Confluence pages, and even in-line definitions directly in your workspace, so you always have the right information at hand.
You can learn more about how to use AI in Jira with these resources:
Key differences in Confluence Cloud
Home page
Both cloud and data center have a common access point to the home page: the ‘Confluence’ logo at the top left. Most elements of the cloud home page are also on the data center home page and relatively straightforward to find. However, the home page itself has a very different appearance and layout as you can see below.
Navigation
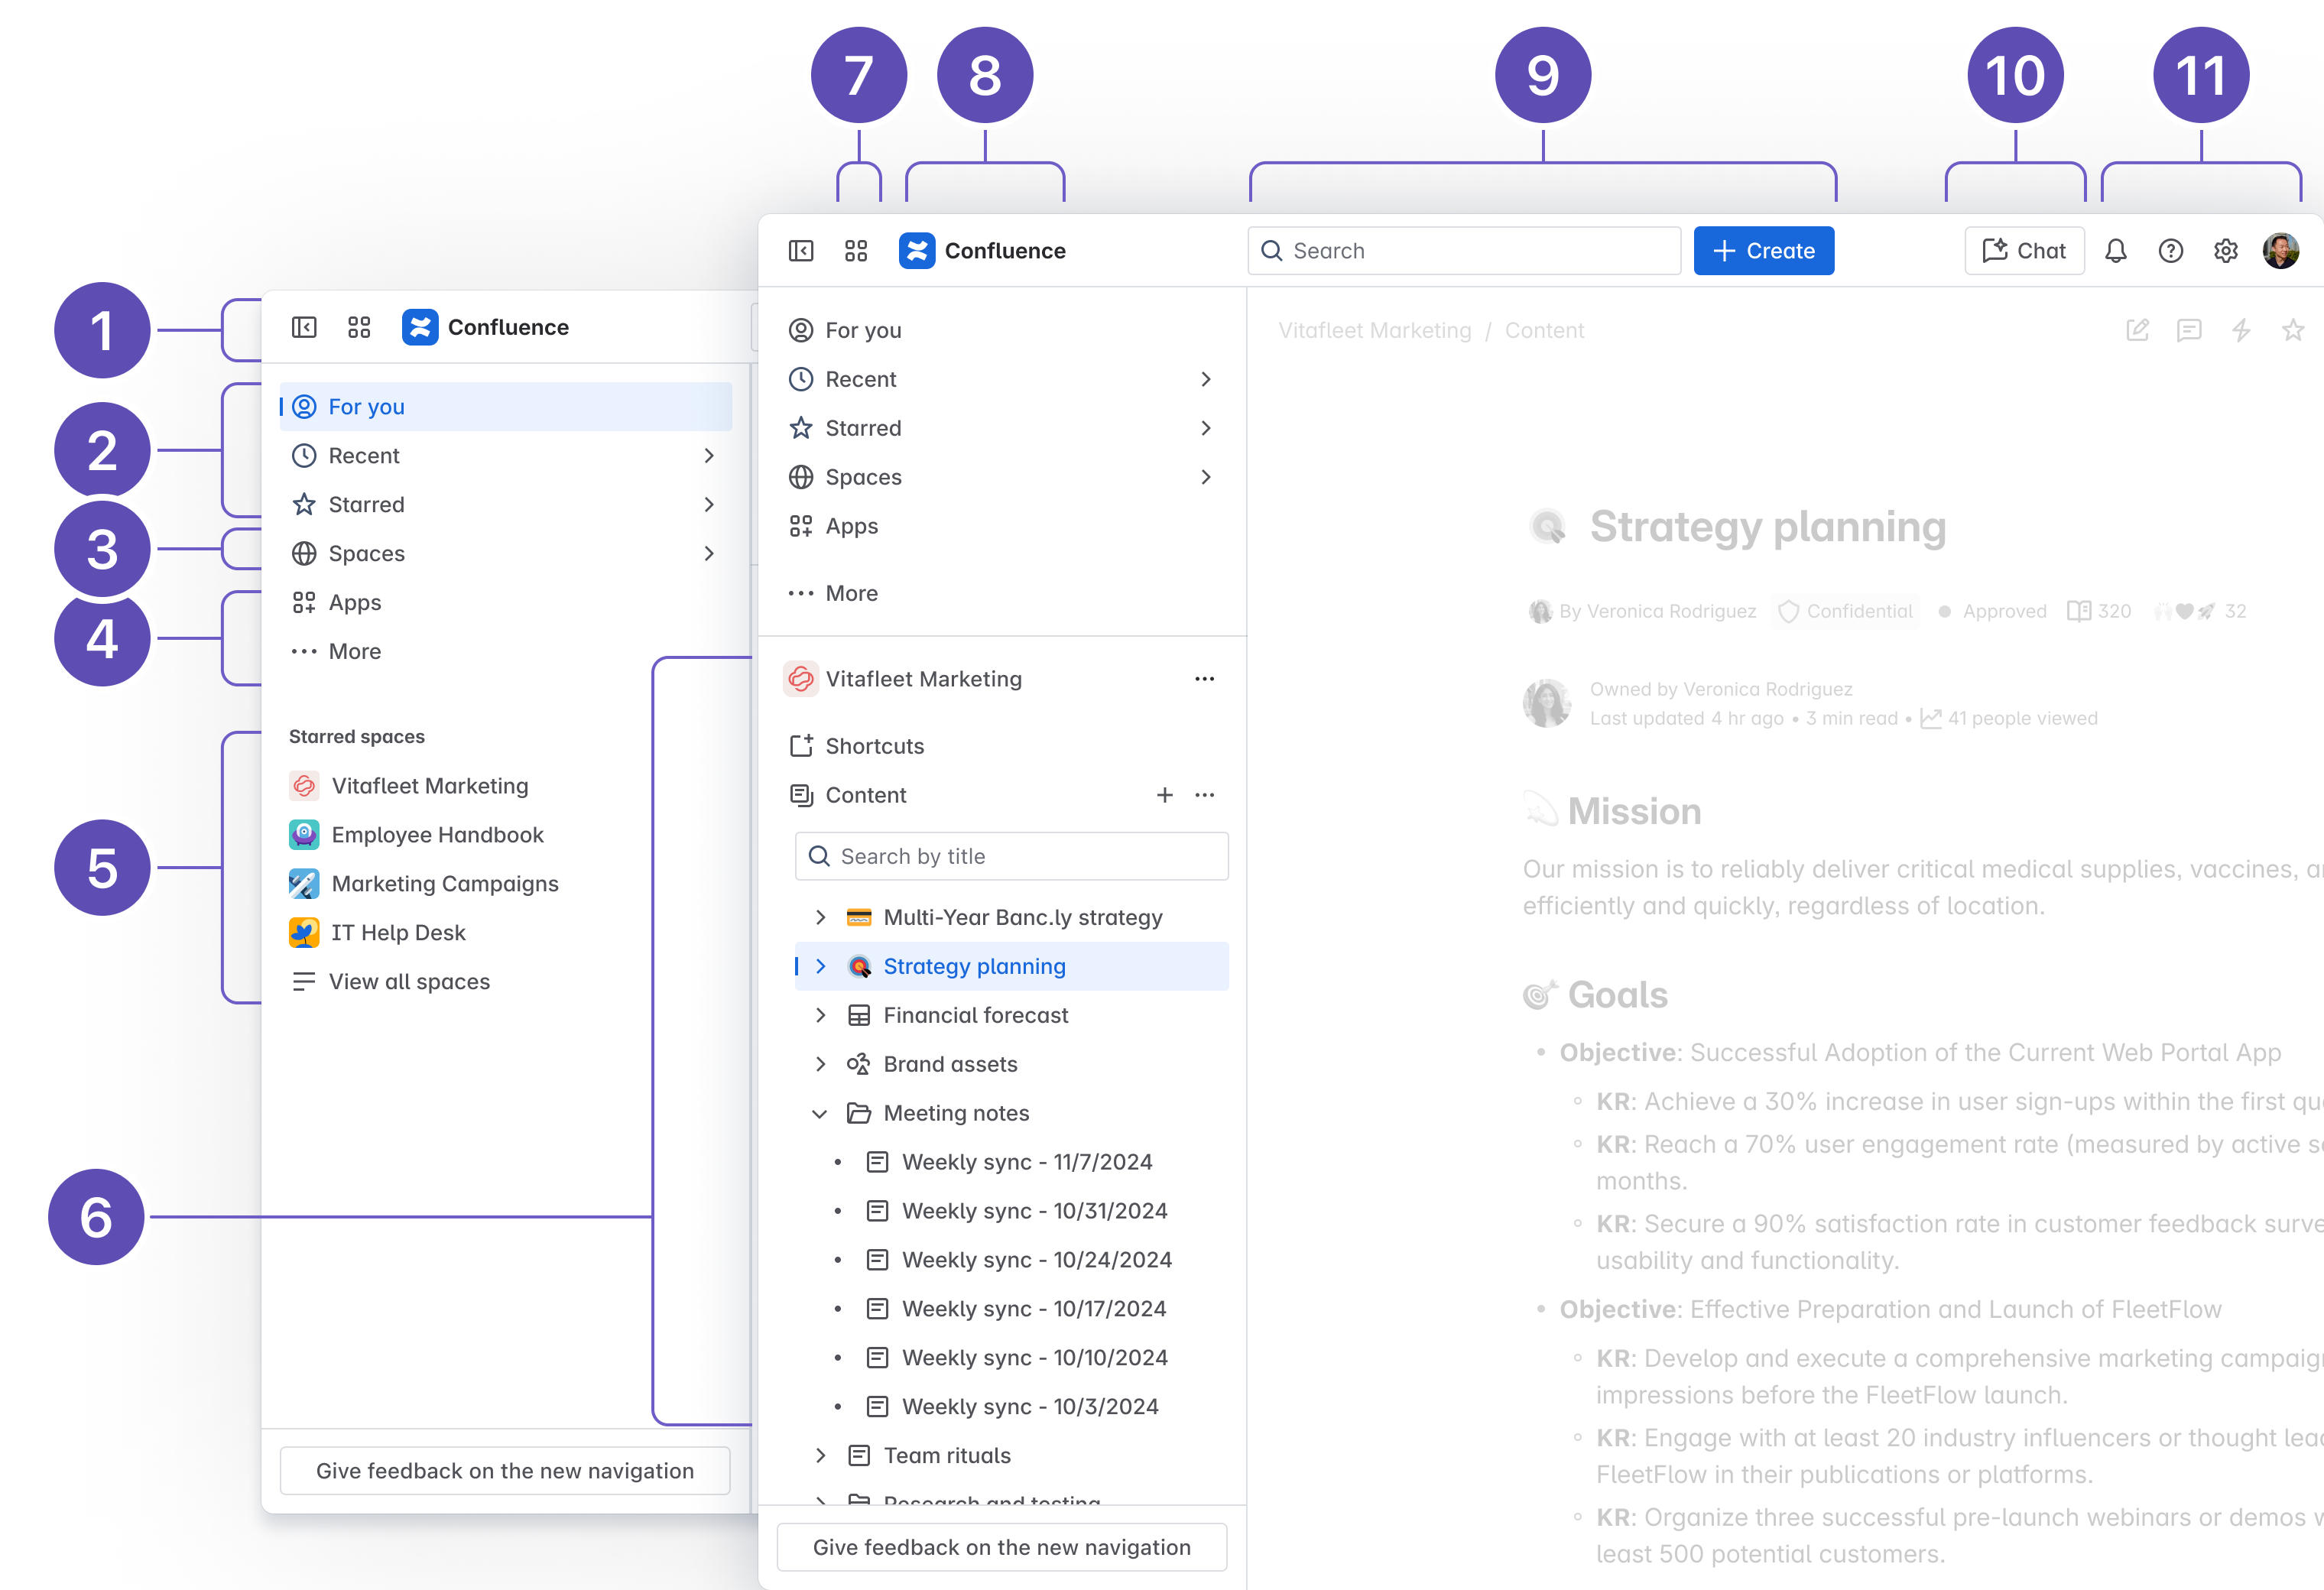
Navigation in cloud is redesigned to help you find what you need faster. The top navigation is decluttered to streamline essential actions like search and create. Everything else lives in a customizable sidebar, giving you more control over how you move through Confluence. Read the blog to learn more.
- Collapsible sidebar: Hide the sidebar for a distraction-free, wider view of your content.
- Access the essentials: 'For you' allows you to discover trending content from across your site and updates from people you follow. 'Recent' & 'Starred' allows you to quickly jump back into content you've recently viewed, edited, or starred.
- Spaces: Browse all your spaces. Starred spaces are pinned to the top and recently visited ones just below.
- Apps & More: See and manage apps installed on your Confluence site. Note: Calendars and Analytics (Premium and Enterprise only) in your previous navigation bar are now located in this menu. Find apps like Teams (formerly People) under More—and pin them for easy access.
- Starred spaces: When you’re not inside a space, starred spaces appear here for quick access.
- Space content: When you’re inside a space, this section shows the space’s content tree in place of starred spaces.
- App switcher: Switch between Atlassian sites or apps, or collapse the sidebar for a distraction-free, wider view of your content.
- Confluence logo: Click the Confluence logo to return to ‘For you’ from anywhere.
- Search & Create: 'Search' allows you to find content, spaces, and people across Confluence. If enabled, paid editions get AI-powered, cross-app search via Rovo. 'Create' allows you to start any content type—live docs, pages, whiteboards, blogs, databases, smart links, or entire spaces—from one central spot.
- Rovo Chat: Ask questions and explore your company’s knowledge through an AI-powered chat interface. Rovo chat is available on paid editions and must be enabled by admins.
- Notifications, Help, Settings, and your profile: Stay updated, get support, and personalize your experience.
General interface
Both versions include a sidebar for navigating space content, but some elements have moved. One key change: Space settings is now located under More actions (•••) next to your space’s name in the sidebar.
Editor
This is one of the biggest differences you’ll notice in cloud, as we’ve made significant updates to the cloud editor:
-
Floating action toolbar: Frequently used tools—like comments and page details—now live in a dedicated floating toolbar on the right, so they’re easier to find and no longer buried in the editing toolbar.
-
Pinnable editing toolbar: Choose how you work – let the toolbar follow you inline for faster editing, or pin it to the top for a more fixed experience.
-
Templates: Get started faster with a bigger library of templates.
- Macros: In cloud, we’ve removed older macros (especially those that hurt performance) and replaced them with simpler, built-in commands. You can see a list of the removed macros and alternative methods here. Cloud does not currently support user macros.

Autocomplete keyboard shortcuts in editor
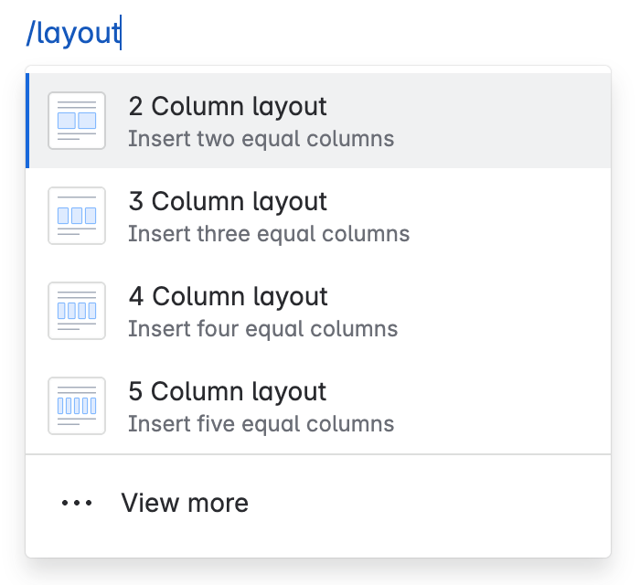
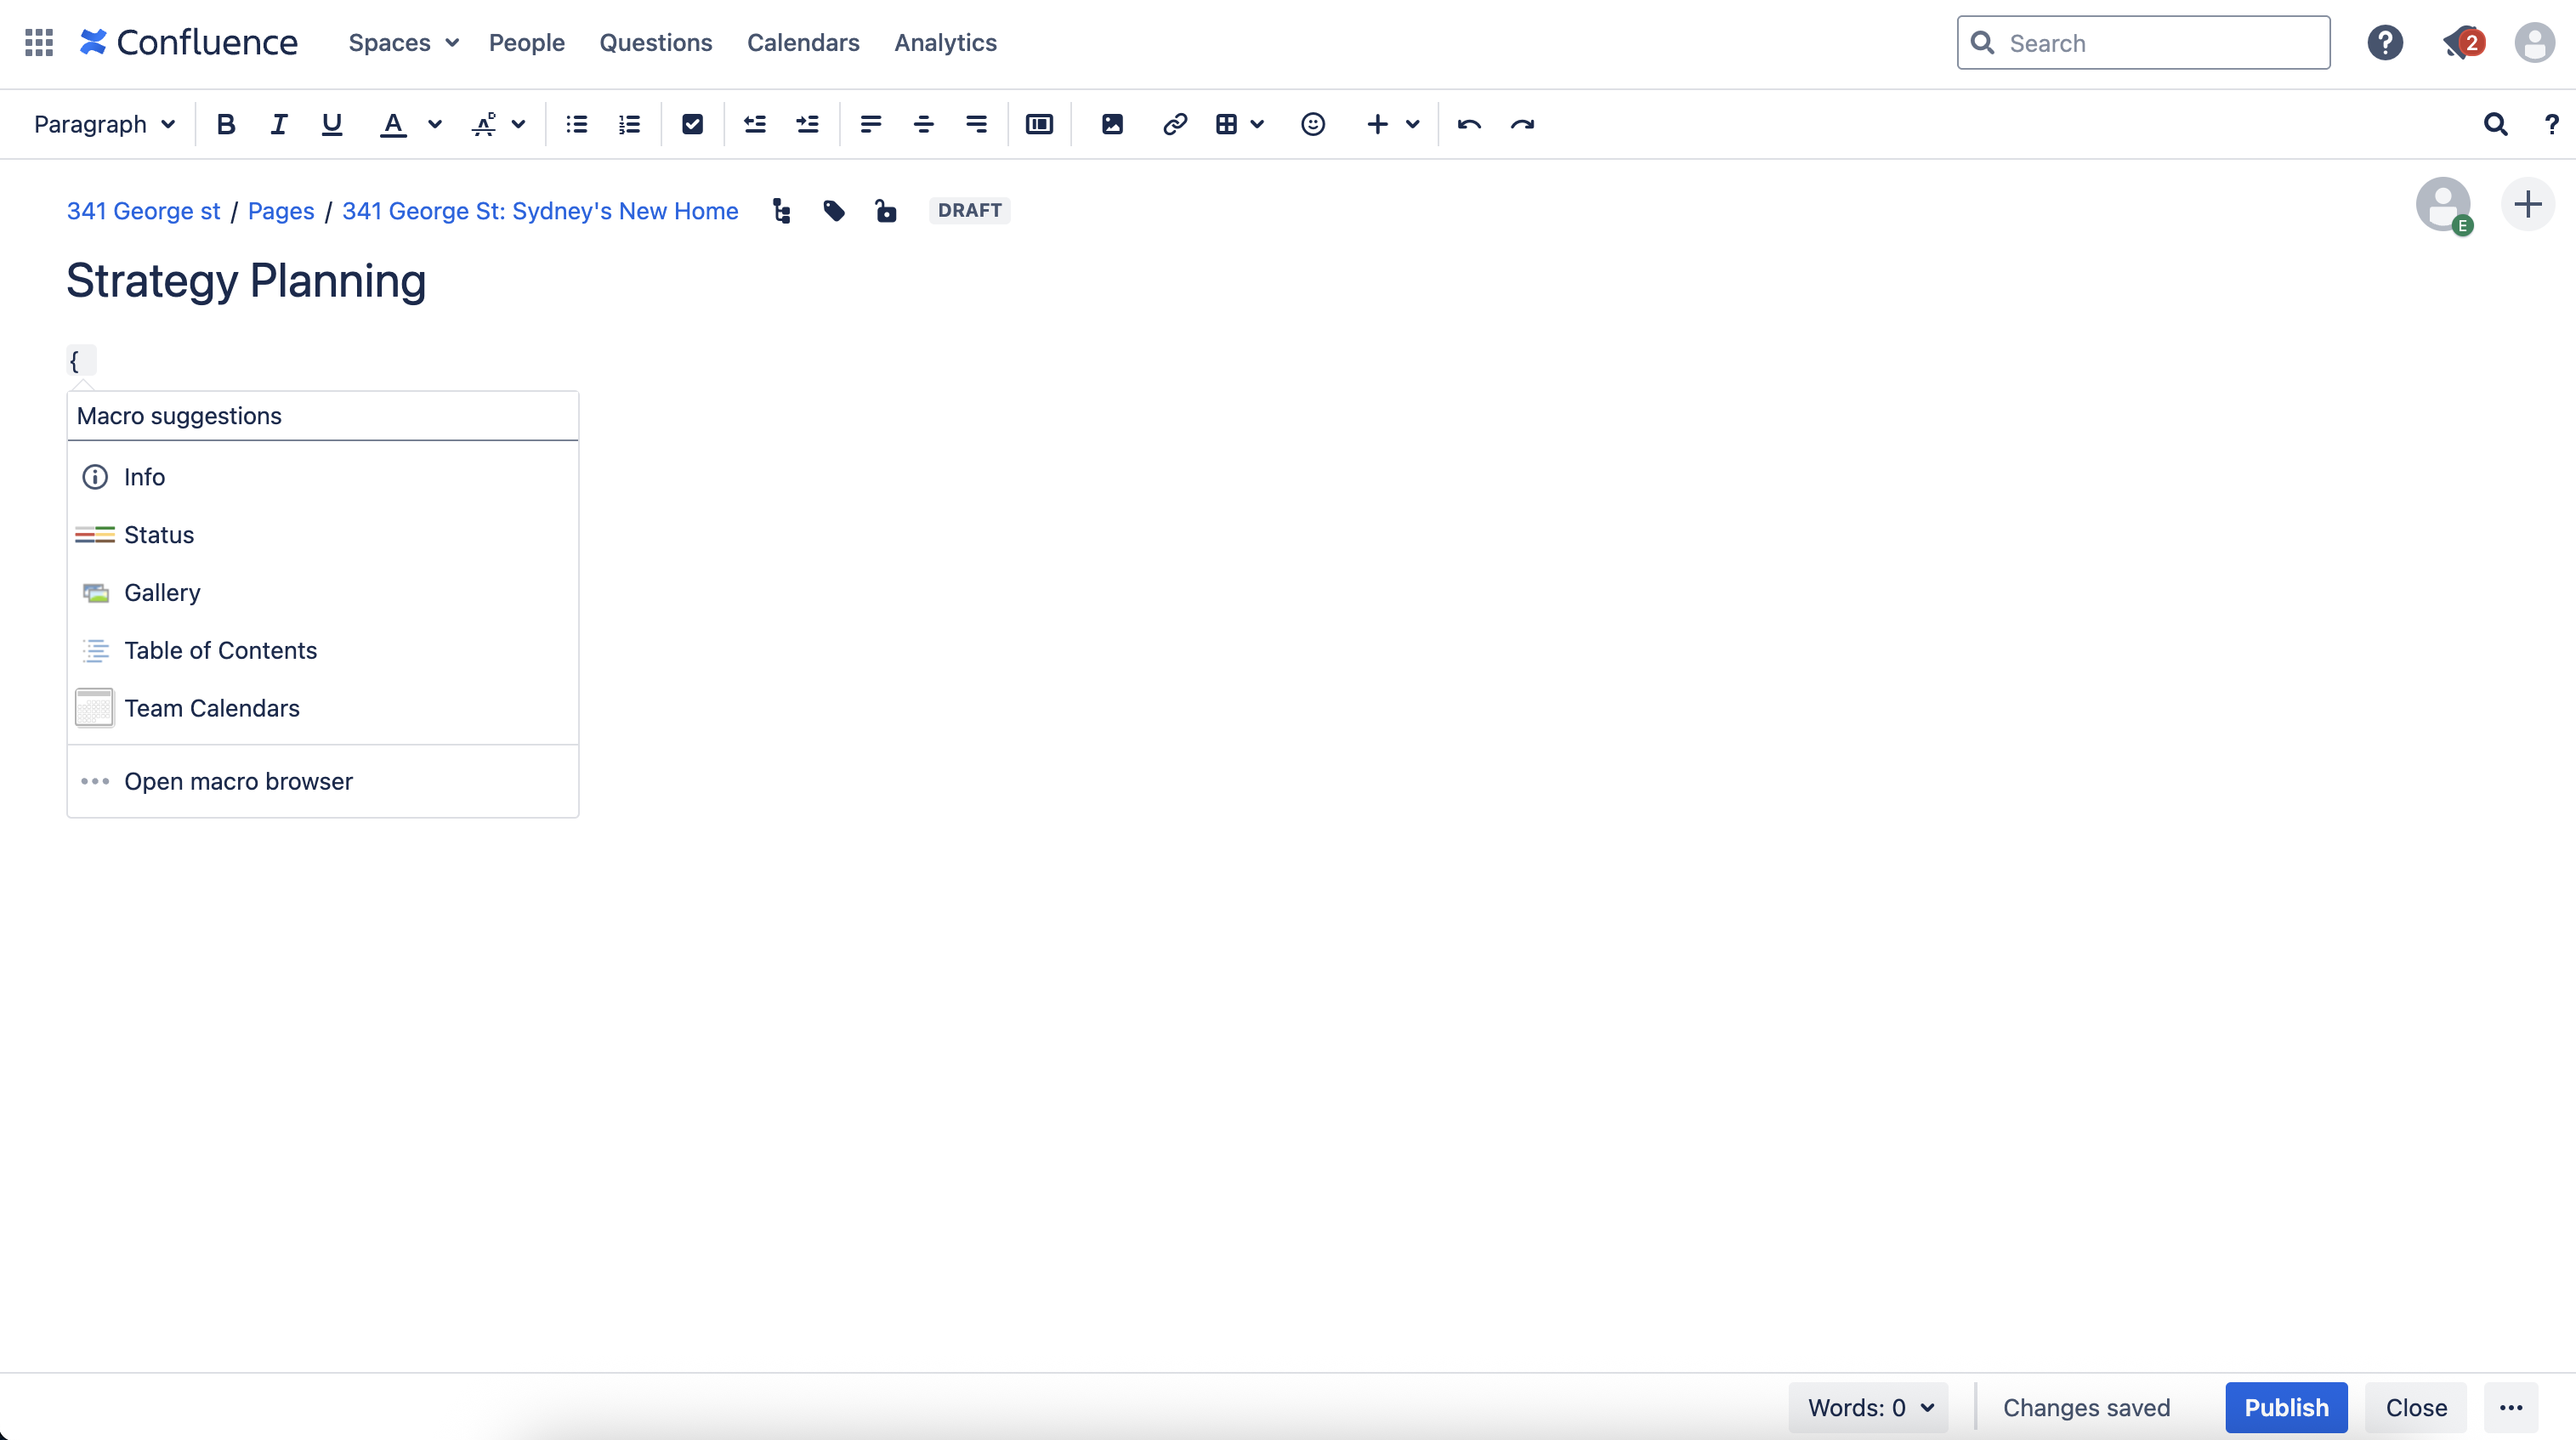
One of the biggest changes that power users will pick up on are the autocomplete shortcuts used in the editor. Those accustomed to the data center editor may be very familiar with the { wiki markup notation to insert macros. In cloud, you’ll switch to using the / slash command—a single, streamlined way to access macros, elements, and tools as you type.
Action | Cloud autocomplete character | Server/Data Center autocomplete character |
|---|---|---|
| Tables | Cloud autocomplete character / | Server/Data Center autocomplete character | |
| Links | Cloud autocomplete character / | Server/Data Center autocomplete character [ |
| Images | Cloud autocomplete character / | Server/Data Center autocomplete character ! |
| Macros | Cloud autocomplete character / | Server/Data Center autocomplete character { |
| Headings | Cloud autocomplete character # | Server/Data Center autocomplete character h1. |
| Lists (unordered) | Cloud autocomplete character * | Server/Data Center autocomplete character * |
| Lists (ordered) | Cloud autocomplete character 1. | Server/Data Center autocomplete character # |
TIP: Share the Confluence Cloud quick start guide with your users so they have easy access to the shortcuts above.
Other editor changes
- Inline comment: In cloud, adding inline comments works the same whether you're editing or viewing a page:
- Highlight the text you want to comment on.
- Click the 'Add comment' button that appears.
- Type your comment and hit 'Save' (Ctrl+S or ⌘+S).
- Anchor links: Anchor links are automatically created in cloud for headings. Non-heading links still need to be specified by the Anchor macro.
- Adding attachments: To add attachments in cloud, copy and paste the file’s link directly to the page. Note: Users familiar with embedding or linking attachments from shared file libraries may need to adjust their workflows.
- Editing tables: Table editing in cloud has been redesigned for a more intuitive experience. While this is designed to be easier in the long run, it may feel different at first—consider giving your team a heads-up.
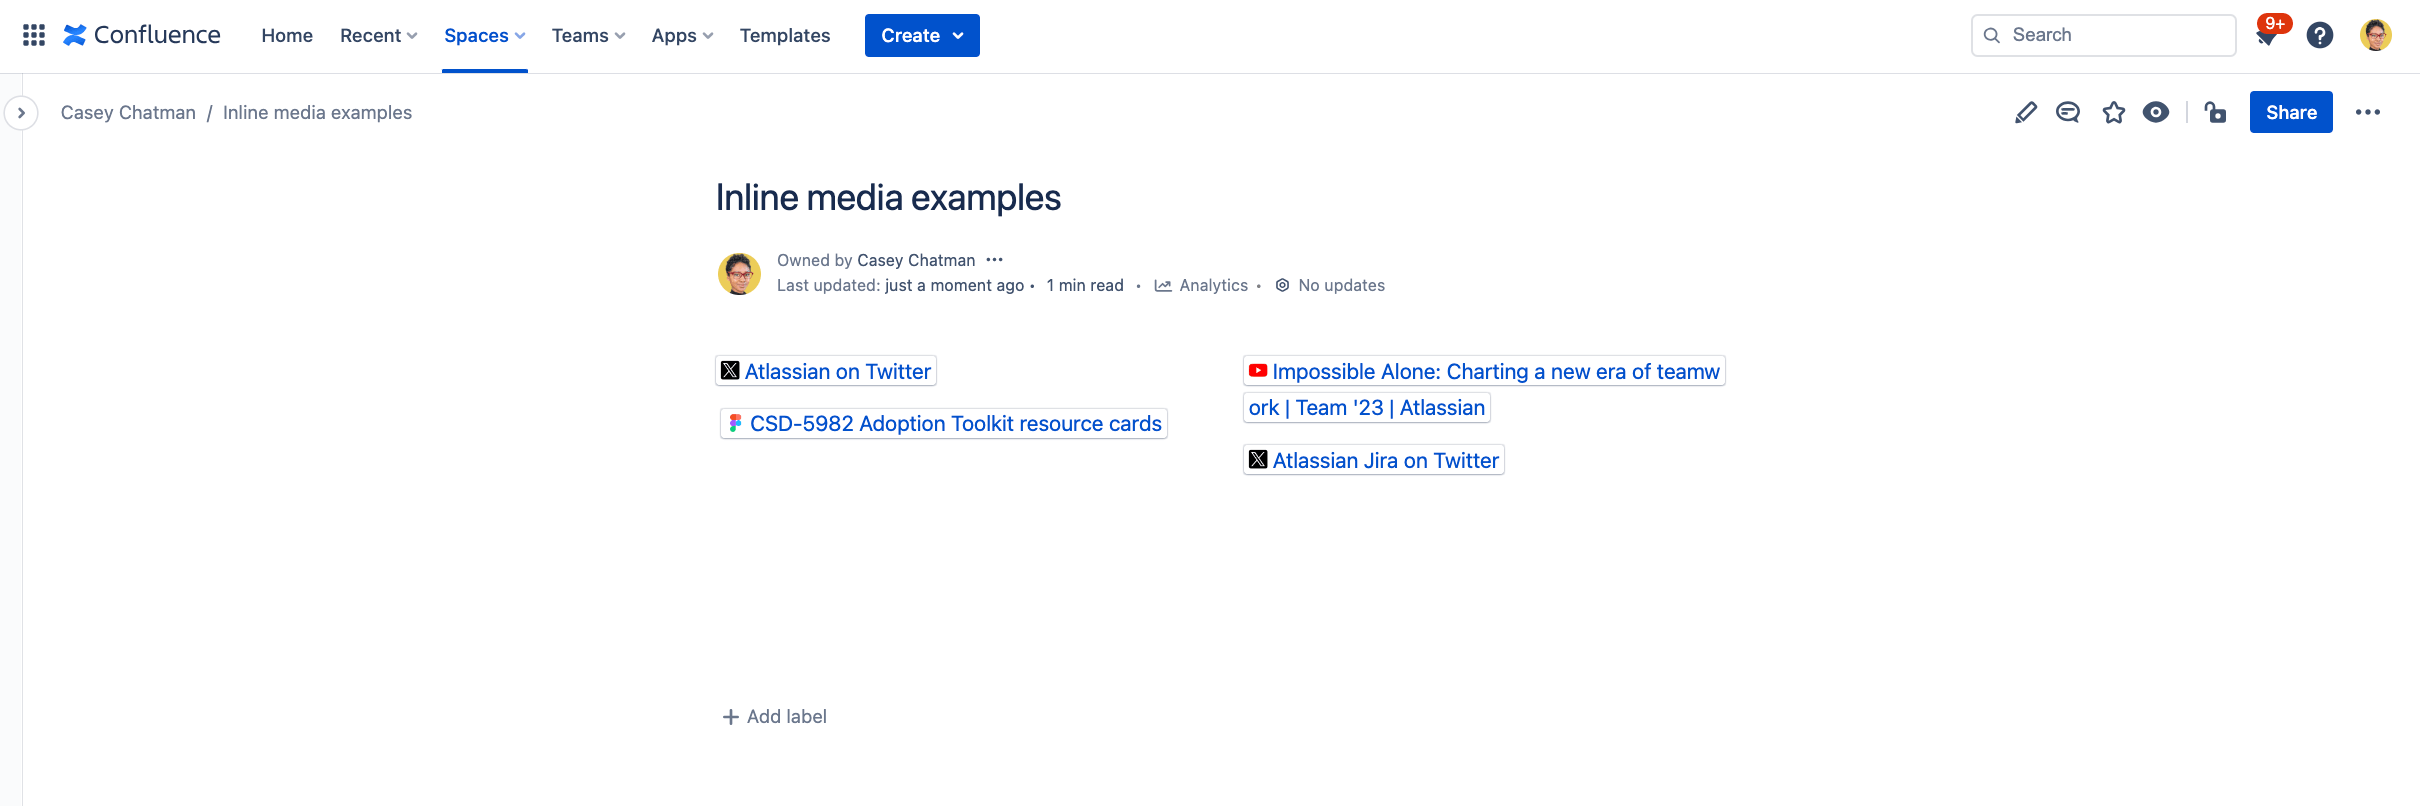
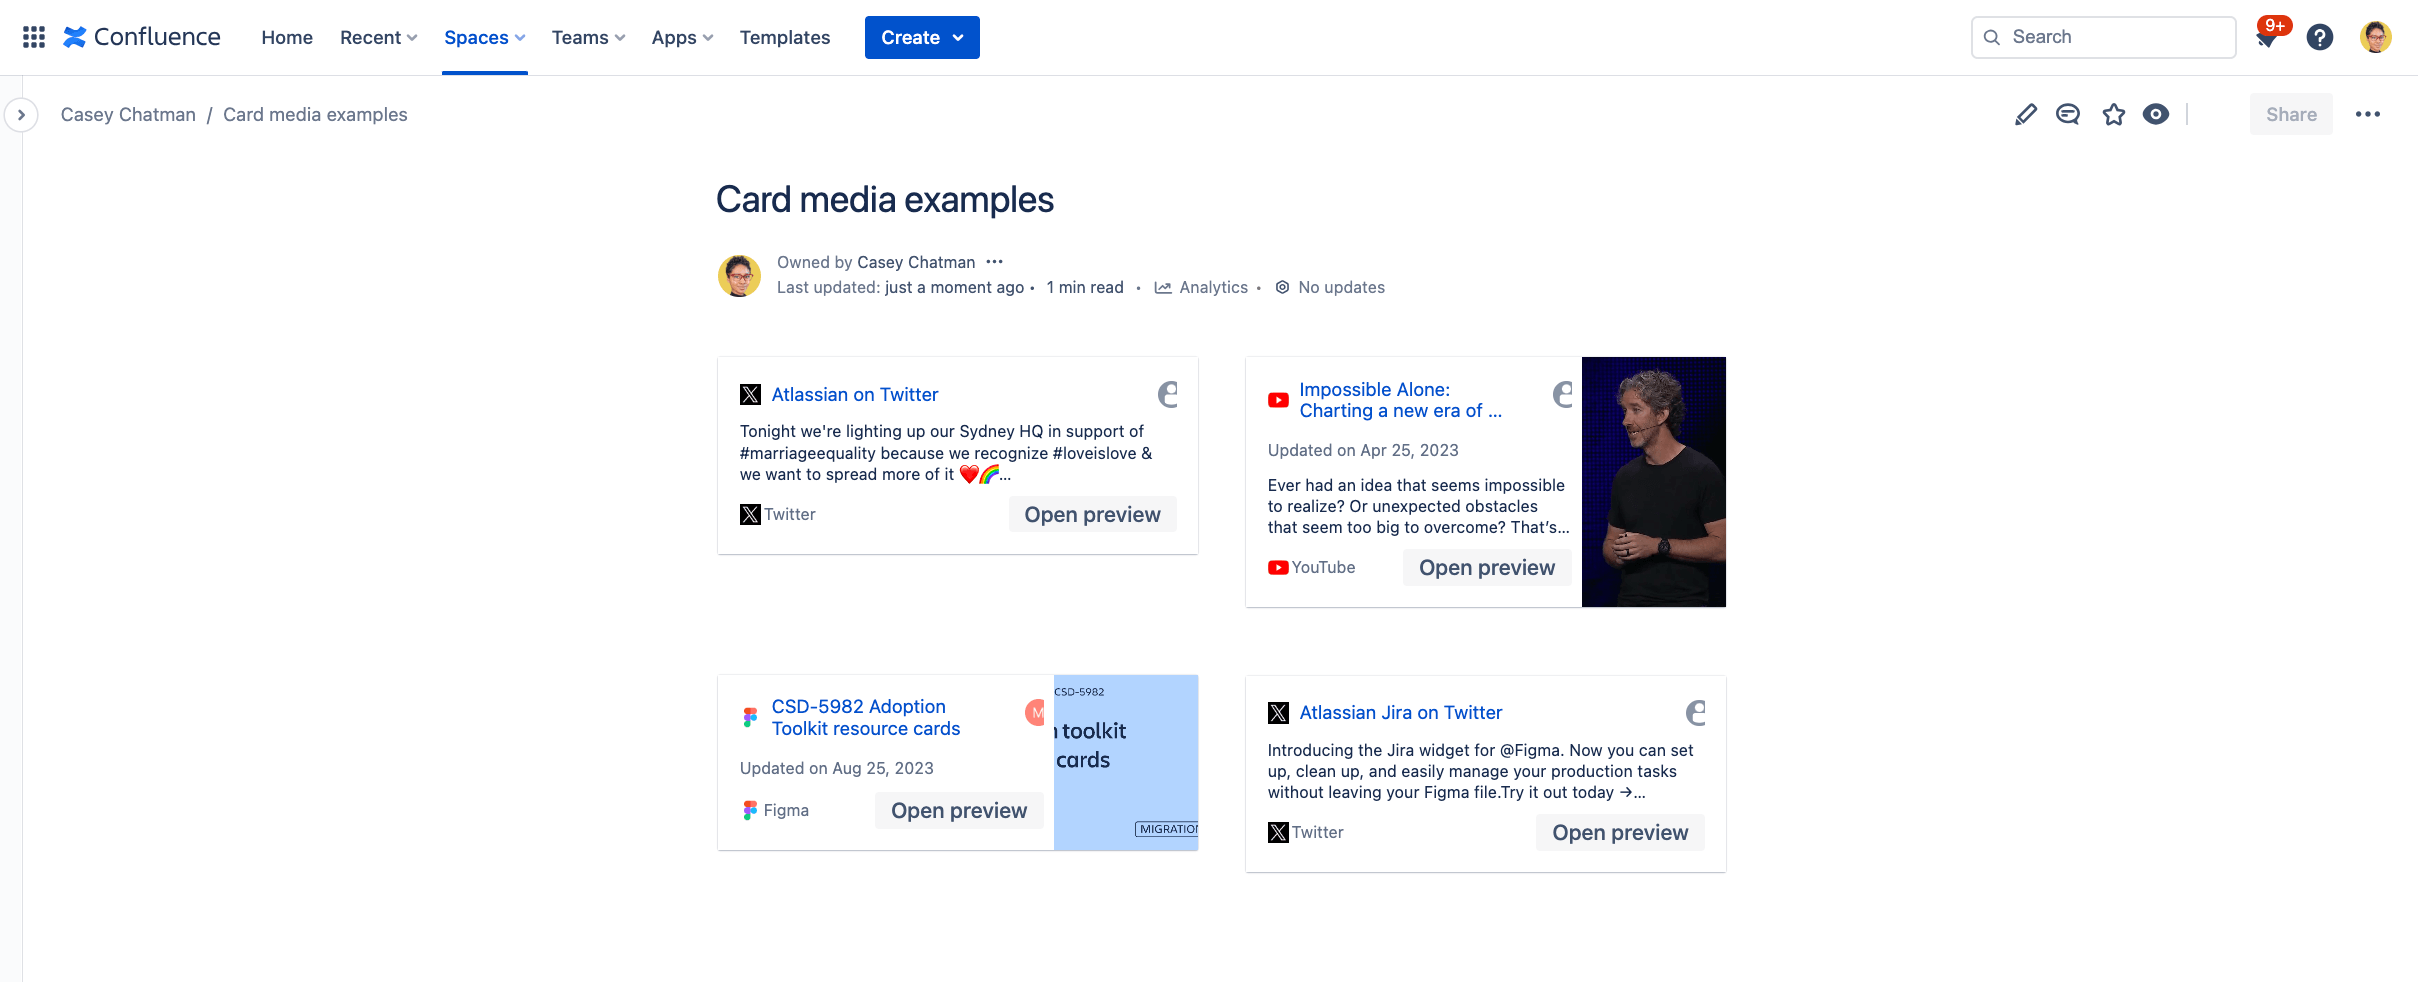
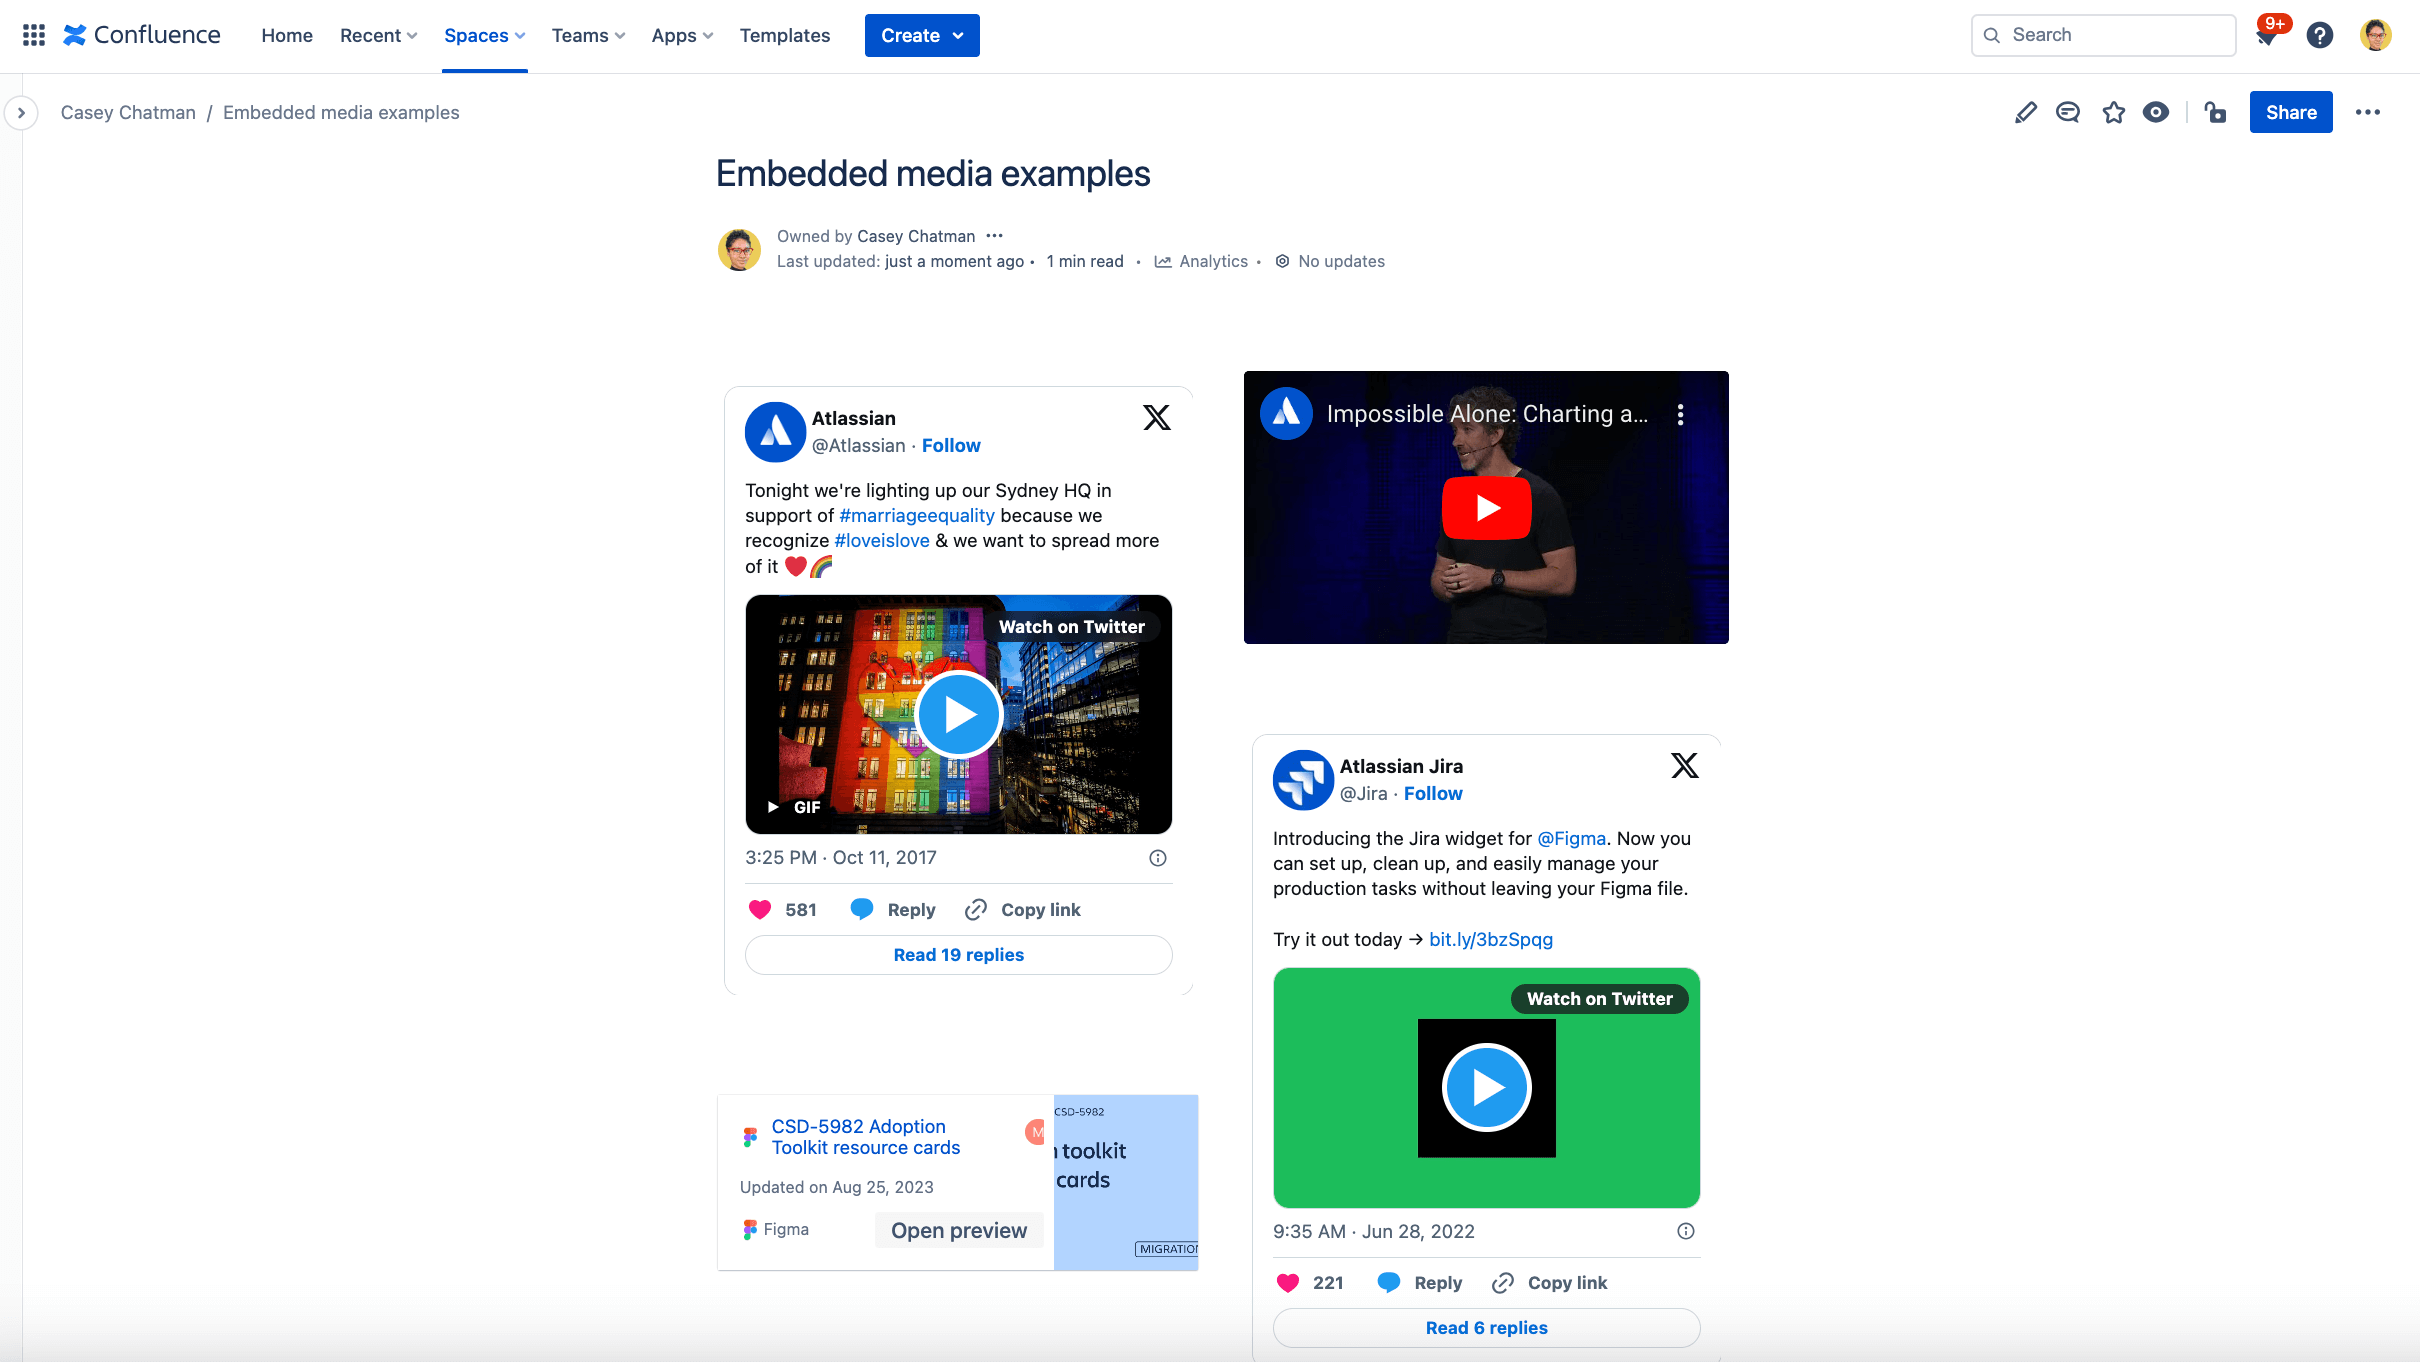
Smart Links
Smart Links reveal important context about links within a Confluence page (or Jira work item) without leaving that page. When you paste a supported link into the editor, it automatically converts into a Smart Link, giving you a quick preview of key details.
Smart Links work with Atlassian tools (like Confluence, Jira, Loom, Trello, and Bitbucket) and many third-party apps (like Google Drive, Figma, and Slack).
You can choose how each Smart Link appears—there are a few different display options:
To learn more about your options for hyperlinking content, read about Smart Links.
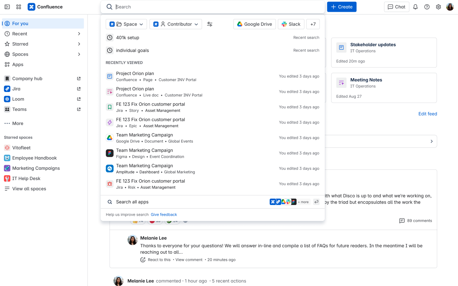
Search
Search in cloud is faster, more relevant, and flexible. If you are on a Paid subscription (Standard, Premium, Enterprise), your search is powered by Rovo AI once it is enabled, which enhances results with:
- Cross-app results from tools like Jira, Google Drive, and Slack
- AI-generated answers to natural language questions, complete with cited sources
Additional content types
Beyond pages and blogs, Confluence Cloud supports multimodal content creation to suit a variety of workflows:
- Live doc: Collaborate in real time—no need to publish.
- Whiteboard: A digital whiteboard for brainstorming, diagramming, and mapping ideas visually.
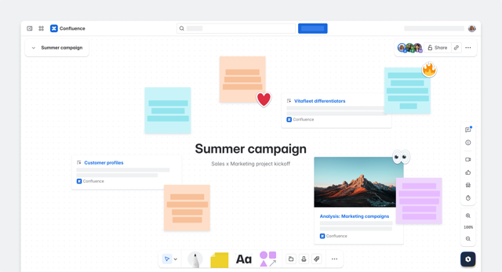
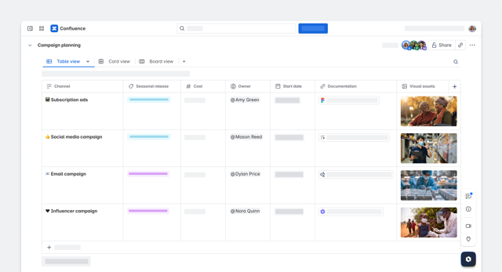
- Database: Organize structured information in a customizable, filterable view. Track deliverables, manage resources, and centralize knowledge from across tools.
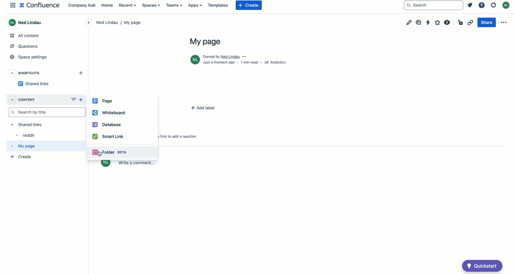
- Folders: Add folders to your space to keep related work together. Think of folders as simple containers that are used as a place to store all related work.
AI capabilities
With Rovo built-in, Confluence Cloud makes it easier and faster to share knowledge and collaborate across teams.
- Find information faster: Search across the Confluence knowledge base and ask Rovo Chat questions in plain language to surface pages and information within seconds.
- Automate routine work: Use out-of-the-box agents to draft content, manage tasks, and streamline workflows.
- AI-assisted editing: Highlight text in a Confluence page, then invoke the AI editor via ‘Improve writing’ to quickly change tone, correct grammar, and add polish to your written content.
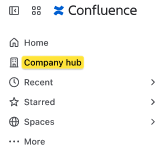
Company Hub
Available on Confluence Cloud Premium and Enterprise, Company Hub is a customizable central homepage where your entire organization can access key updates, announcements, and verified resources.
By default, only app and site admins can see and set up the Hub, but they can choose to delegate visibility and editing access to other trusted users.
To get started, eligible users can find Company Hub in the left sidebar and begin customizing it to reflect your company’s needs.
Key differences in Jira Service Management Cloud
New space types
In addition to the standard IT service management and customer service management templates, Jira Service Management Cloud also has space templates for other teams such as HR, Marketing, Finance, Sales and Legal that are not available in Jira Service Management Data Center.
Find your templates
Start your space off right with a pre-configured template. Or showcase how your team works. Submit your template idea here.

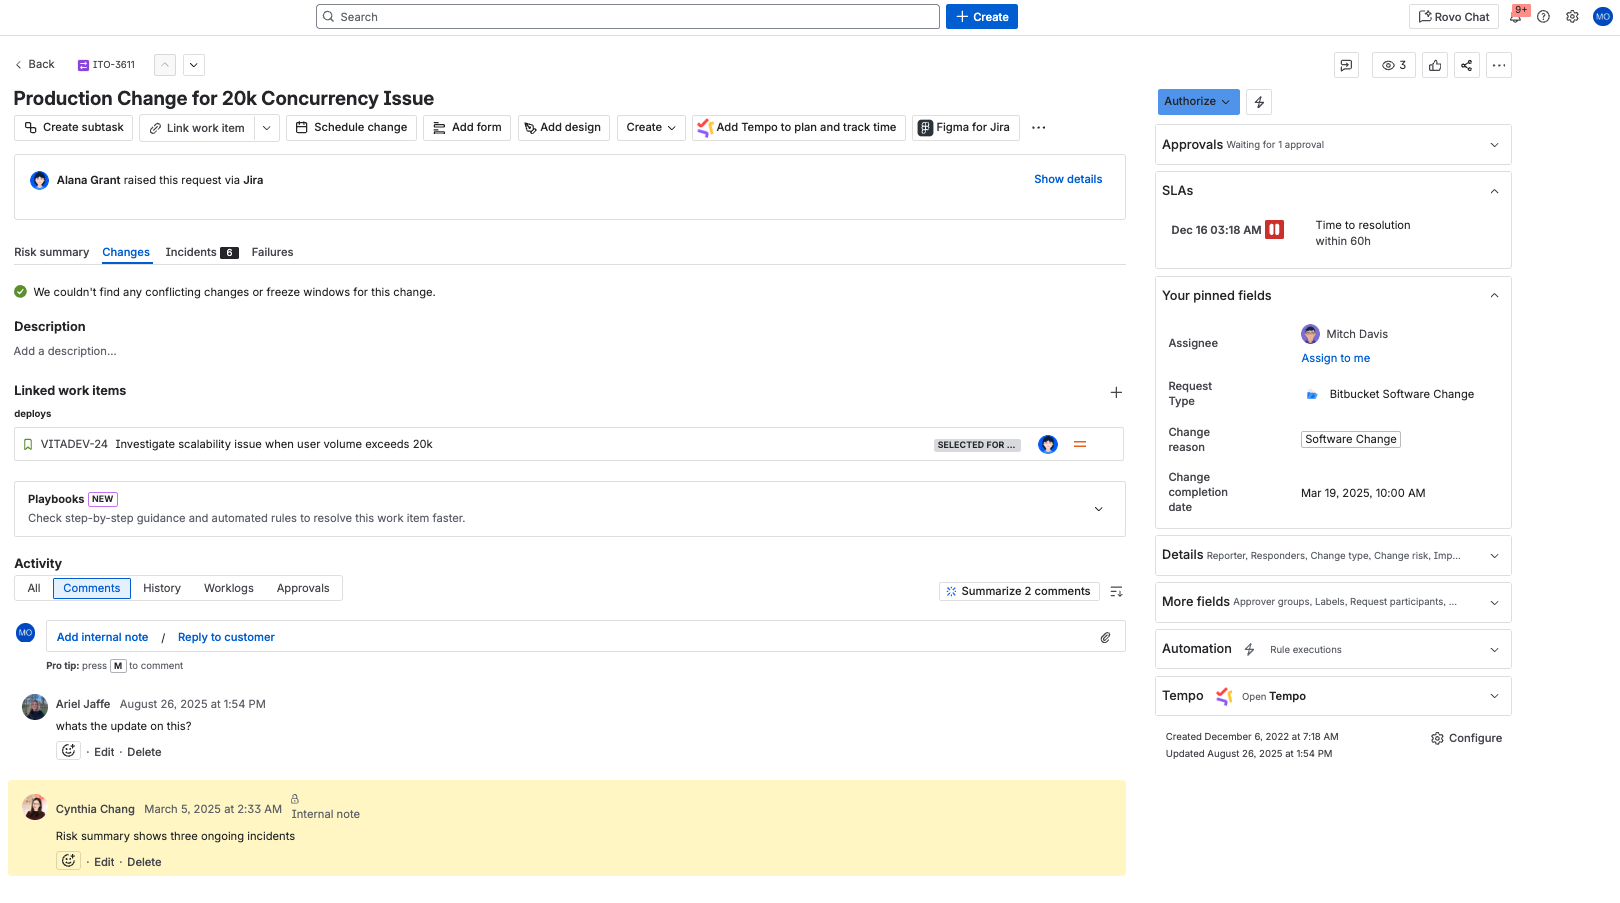
Changes to the work item view
The new Jira work item view experience outlined in the Jira section above is now available across all Jira apps, including Jira Service Management. This means a better and more consistent experience for users. Take a look at the screenshot below to see how it all comes together:
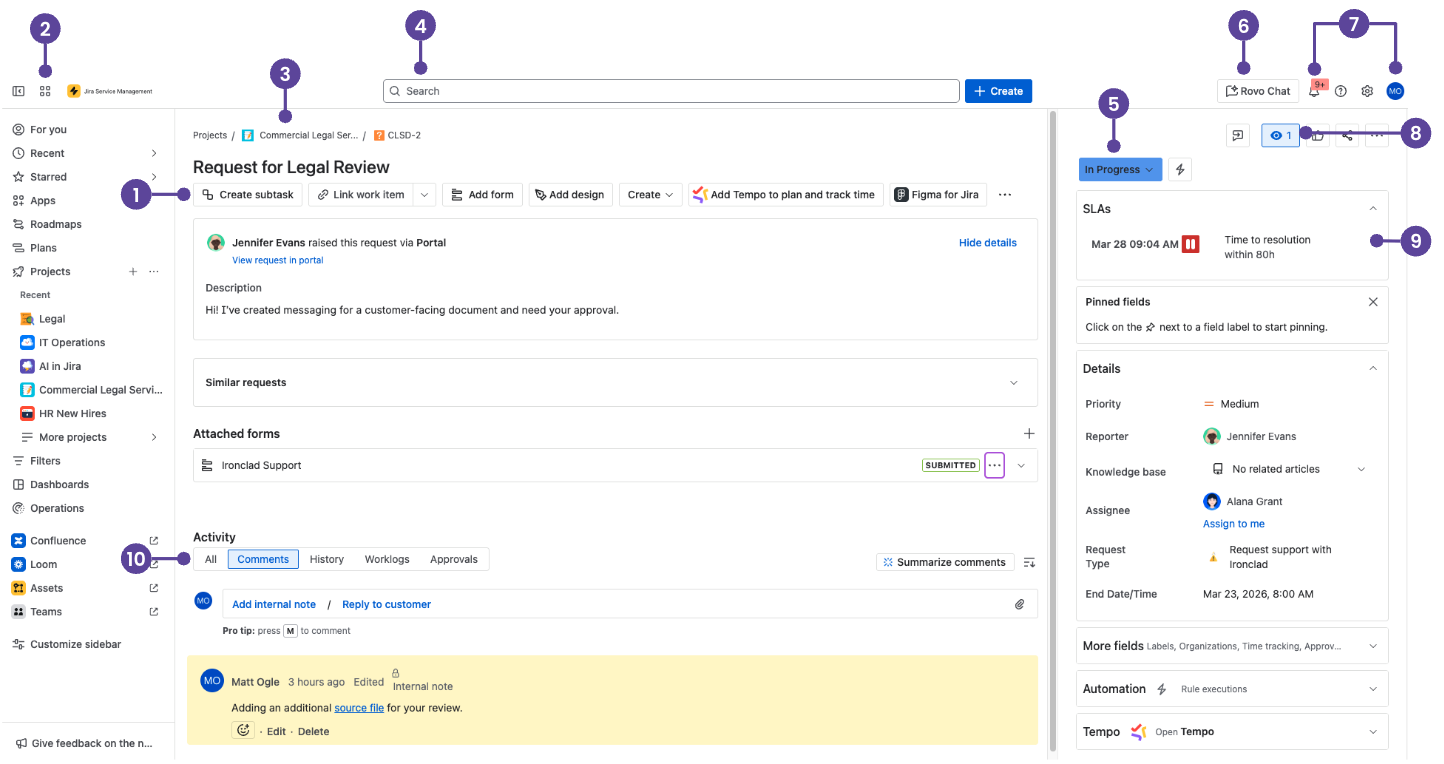
- Quick-add buttons: Create subtasks or link work items, add web or Confluence links, or add content from Atlassian Marketplace apps.
- App switcher: Switch between Atlassian and third-party apps, like Confluence, Talent, and Miro, or go to other sites.
- Back to queues: Go back to your queues with a single click.
- Search: Find work items, spaces, boards, queues, filters and people. If enabled, paid editions get AI-powered, cross-app search via Rovo.
- Work item status: Select the status, then choose a transition to change the work item status.
- Rovo Chat: Ask questions and explore your company’s knowledge through an AI-powered chat interface. Rovo chat is available on paid editions and must be enabled by admins.
- Notifications, Help, Settings, and your profile: See what's happening in Jira Service Management, get help, and customize settings (Jira Service Management admins only) and your personal settings.
- Watch, Share, and Actions: Watch the work item or perform other actions like move and clone via the Actions menu.
- Context fields: These can include SLAs, request participants, and other information to help describe the work item. Under context fields, select ‘Show more fields’ (or ‘More fields’ in team-managed spaces) to reveal empty fields that aren't always shown on the work item view.
- Comment bar: To add a comment, select ‘Add internal note’ to post a comment that only your team can see (highlighted in yellow), or ‘Reply to customer’ to include the person that raised the request. Select the ‘Attachments’ paperclip icon to add an attachment.
TIP: Share the Jira Service Management Cloud quick start guide with your users so they have easy access to the shortcuts above.
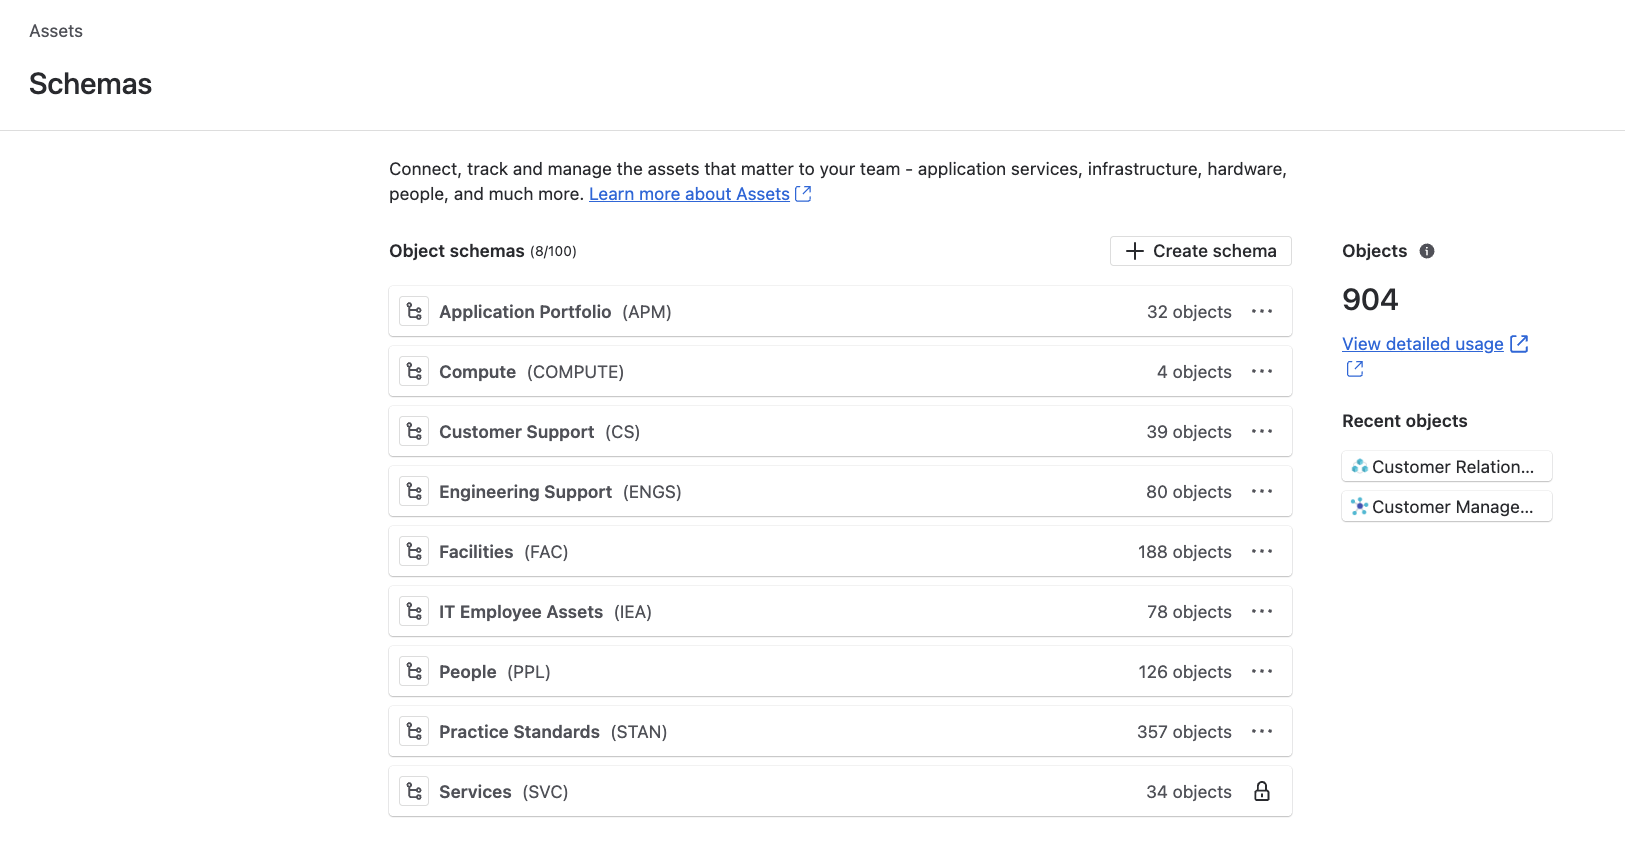
Assets in cloud
Assets are Jira Service Management’s native asset and configuration management tool (included in Jira Service Management Cloud Premium and Enterprise). Stored assets and CIs are referred to as objects, grouped by object type, and organized within schemas to visualize critical relationships. It is compatible only with company-managed spaces.
Queues and the new agent experience
With the new agent experience, service teams are now able to triage work items more effectively, scan request details at a glance, and deliver speedy responses to customers.
Replying to your customers is easy
Triaging is faster with queue actions
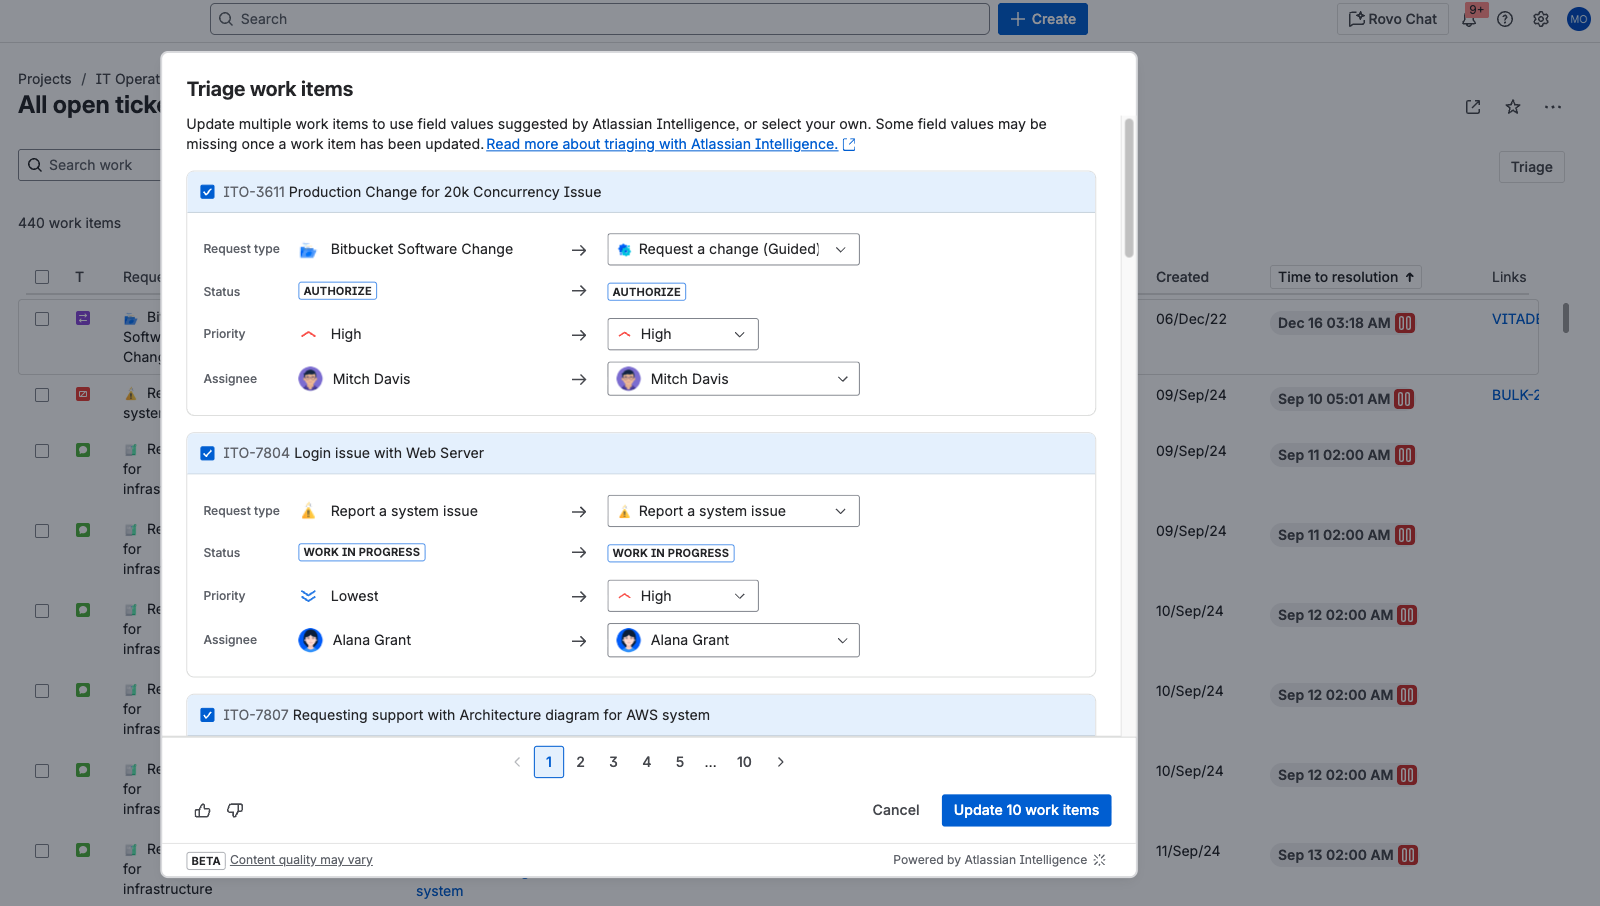
Agents can quickly navigate to favorites

NOTE: Read this Community post to learn more details on each improvement outlined above.
Differences in the Help Center and Portal
Cloud offers more branding and customization capabilities, including the ability to:
- edit the login screen message and Help Center layout
- customize the columns in your customers' Request lists (to quickly filter and find the requests they’re looking for a status update on)
-
implement dynamic forms, checklists, and specific validation rules using forms for Jira
Help channels
Just like in data center, requests in cloud can be created via the Help Center, email, and APIs.
In Jira Service Management Cloud, you can embed the portal widget on any page of your site/app to collect requests from your customers. See how the widget works in practice.
NOTE: Atlassian Cloud apps come with an internal SMTP server configured to send notifications. The internal SMTP server is not configurable, but you can configure Jira Service Management Cloud to send emails on behalf of your domain. For more information on how to use a custom 'space Email Address' with your domain, refer to Configuring Jira Cloud to send emails on behalf of your domain.
Incident management functionality
Opsgenie features such as alerts, on-call schedules, incident command center, post mortems, and heartbeats are bundled in Jira Service Management Cloud.
Change management features
Change management in cloud has additional features which can help teams better plan, schedule, and deploy changes to production. Change calendars and change management automation with connected CI/CD tools ensure that nothing falls through the cracks.
AI capabilities
Jira Service Management includes powerful AI features that help teams deliver exceptional service experiences more efficiently and with less manual effort. Here are some of the ways AI can accelerate your service management outcomes:
- Always-on, self-service support: Instantly resolve common requests by automating tier 1 support interactions and providing users with accurate answers from your knowledge base, reducing repetitive tickets and freeing up agent time.
- Accelerated triage and response: Boost service team productivity with AI-powered suggestions and actions. Automatically prioritize your queue, summarize work items, identify the best assignees, recommend troubleshooting steps, and draft responses for quick resolution.
- Intelligent incident management: Streamline incident detection and response with AIOps capabilities that prioritize critical alerts, surface related incidents and changes, suggest root causes, and route work items to the right team members for faster, more effective resolution.
AI in Cloud
Rovo is Atlassian’s AI that connects knowledge, people, and workflows so teams can move faster. Rovo is included for all eligible Standard, Premium, and Enterprise plans of Jira, Confluence, Jira Service Management, and the Teamwork Collection of apps.
TIP: Check out the AI community group and take our Rovo Agent Workshops to learn more about how you can use AI, Rovo, and Rovo Agents.
Powered by the Teamwork Graph, Rovo delivers relevant answers and detailed insights driven by your team’s knowledge, while also protecting data privacy and security every step of the way. Data never leaves your Atlassian environment, and admins control which apps and connectors are enabled.
Admin controls
Admins can manage Rovo and AI-enabled app preferences from ‘AI settings’ in Atlassian Administration (‘Apps’ > ‘Platform experiences’ > ‘AI settings’).
Rovo
Here you can connect Rovo to your organization’s sites and activate Atlassian Intelligence for your enabled Atlassian apps. You can also configure which data sources Rovo can access, such as Jira, Confluence, and connected third party data sources.

AI enabled apps
While Rovo is the interface for AI-powered experiences across your Atlassian apps, you must enable AI in the admin settings to unlock the full suite of advanced features. In other words, Rovo is always available for eligible customers, but it’s intelligence becomes more powerful when you both connect your Atlassian apps to Rovo (so it can use their data to search information, answer questions, and power agents) and turn on AI features like public web search.
Select which Atlassian apps can be accessed by Rovo and AI features. This allows you to tailor the AI experience to your organization’s needs and compliance requirements. Admins can also:
- Enable Beta features for each app, giving teams early access to new AI capabilities.
- Enable web searches, allowing Rovo to surface public web information alongside your internal content.

Rovo MCP Server
Manage which domains are allowed to connect to the Rovo MCP (Model Context Protocol) server.
- Automatically connect to AI tools that Atlassian partners with. You can block supported domains if you do not want them to access your Atlassian apps.
- Add and manage your own trusted domains to authorize access to the Rovo MCP server.

TIP: Changes made in AI Settings take effect immediately for all users in your organization. Review these settings regularly to ensure your Rovo and AI features align with your security and privacy policies.
Rovo apps
Rovo is made up of different experiences, including Search, Chat, Studio, and a growing set of Agents. Each is uniquely designed to help your teams work smarter, move faster, and break down silos.
- Rovo Search: Find relevant information quickly and efficiently across your Atlassian apps and connected third-party SaaS apps.
- Rovo Chat: Uncover personalized insights, get relevant answers, and take action through a conversational interface.
- Rovo Studio: Quickly create custom agents, build automations, model digital and physical assets, curate content hubs, and build Forge apps, with or without code.
- Rovo Agents: Create custom agents to map to every type of workflow by adding unique knowledge, skills, and popular external tools, including MCP servers, that fit your teams' needs.
Rovo Search
Rovo Search is your centralized interface for discovering relevant information across your Atlassian apps and connected third-party data sources. You can access Rovo Search:
- At the top of your Atlassian apps

-
In the app switcher

-
Through Rovo’s browser extension where the Rovo Search bar is displayed each time you open a new browser tab.

Using Rovo Search is simple. Just type your prompt into the search bar in plain language and Rovo indexes your connected data to generate contextualized, smart answers. You can also filter your results by last updated, type, and contributor to find the exact information you need.
Relevant information, insights, citations, and historical prompts are displayed via the Knowledge Card directly in the search interface. If you find something important or frequently referenced, you can use Bookmarks to save those results for quick access later.
Use Cases
- Quickly find Jira work items, Confluence pages, and information from third-party apps without switching tools.
- Get instant answers to “how-to” questions or policy lookups.
- Bookmark onboarding materials or key resources for new team members.
TIP: Use these search prompts for optimal search results and answers.
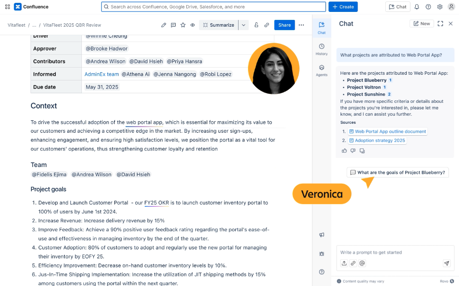
Rovo Chat
Rovo Chat is your conversational AI interface where you can ask questions, brainstorm, get personalized insights, speed up learning, and take action faster using your organization’s knowledge. You can access Rovo Chat in several ways:
- In the top navigation bar near your profile icon
-
In the app switcher

-
Through Rovo’s browser extension in the center of each new browser tab


Open the chat interface and type your question or select a suggested conversation starter. Rovo Chat responds with personalized, actionable insights and can suggest follow-up prompts or actions to keep the conversation going. You can also take direct actions right from the chat window, such as assigning Jira work items, generating Confluence pages, visualizing data, and identifying incident root causes.
For more complex needs, Deep Research allows you to request comprehensive reports that synthesize information from Atlassian apps, connected third-party data sources, and, if ‘Web search’ is toggled on in Administration, the public web!
Use Cases
- Onboard new users by answering “how do I…” questions or summarizing lengthy Confluence pages.
- Create Jira tickets or Confluence pages.
- Dig deeper into topics or company knowledge with deep research and in-line definitions.
TIP: Use these chat prompts for optimal search results and answers.
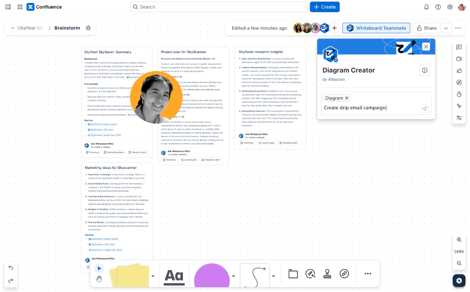
Rovo Studio
Rovo Studio is your no-code/low-code builder for creating custom AI agents, automations, hubs, assets, and more. You can access Rovo Studio directly from the app switcher.

To get started, describe what you want to build using natural language. Studio guides you through creating custom agents, automation rules, company hubs, and assets. You can add unique knowledge, actions, and integrations to your agents, set up automations that trigger processes across your apps, and centralize resources in dynamic hubs. Assets can be linked to Jira Service Management and other Atlassian tools to accelerate service delivery.
Use Cases
- Non-technical users can automate routine processes.
- Build custom agents for business teams like HR, Finance, and Marketing.
- Centralize onboarding resources or project documentation in a Hub.
TIP: Permissions for Rovo Studio features vary by role. Creating Company Hubs, Virtual Service Agents, or automation rules requires space, site, or organization admin permissions. Creating Jira Assets requires the Assets Admin role. All admin and user roles can build and configure Rovo Agents.
Rovo Agents
Rovo Agents are specialized AI assistants that enhance team productivity by collaborating in real time with users and other agents. You can access Rovo Agents in several ways:
- Within the Rovo Chat interface

-
In the Confluence or Jira editor by typing the shortcut /ai
-
Through Rovo’s browser extension via the Rovo Chat interface

Rovo offers a range of built-in agents that integrate seamlessly into your team’s workflows. You can also extend your capabilities with Marketplace partners (installed by admins), or create custom agents using Rovo Studio.
To get started, clarify your objective and find the right agent for your needs. Each agent has a profile that details its creator, instructions, knowledge sources, available actions (Skills), and conversation starters.
- Instructions define the agent’s behavior and functionality.
- Knowledge is the information that you provide to an agent to improve the accuracy and helpfulness of its responses.
- Skills allow the agent to perform tasks on your behalf.
- Conversation starters are suggested prompts or questions that help you initiate interactions.
After creating an agent, start a conversation with a prompt and start executing actions. Once you’re familiar with how they work, set up some automations to save time. If your agent proves to be high value, favorite it for later or share it with colleagues that would also benefit.
Use Cases
- Automate repetitive tasks like ticket triaging content drafting and reviews, and code analysis.
- Get workflow guidance and process recommendations.
- Accelerate incident response and change management.
TIP: Explore out-of-the-box agents and use Marketplace to discover agents that can accelerate your team’s work.
Governance in Cloud
As your organization embraces the transition from data center to cloud, naturally, you may be curious about the nuances of your new cloud environment and how your admin responsibilities will shift accordingly. This section will go over key responsibilities, permissions, and workflows associated with each Atlassian admin role in data center vs. cloud apps, highlighting each role’s impact on tool configuration, user management, security, and overall governance in cloud.
Admin roles in data center
Admin roles allow organizations to delegate different responsibilities among many admins instead of relying on just one person. What you can access and configure is determined by the type of admin you are. In data center, there are three admin roles: System admin, Product admin, and Space admin. See below how these roles relate to admin roles in cloud:
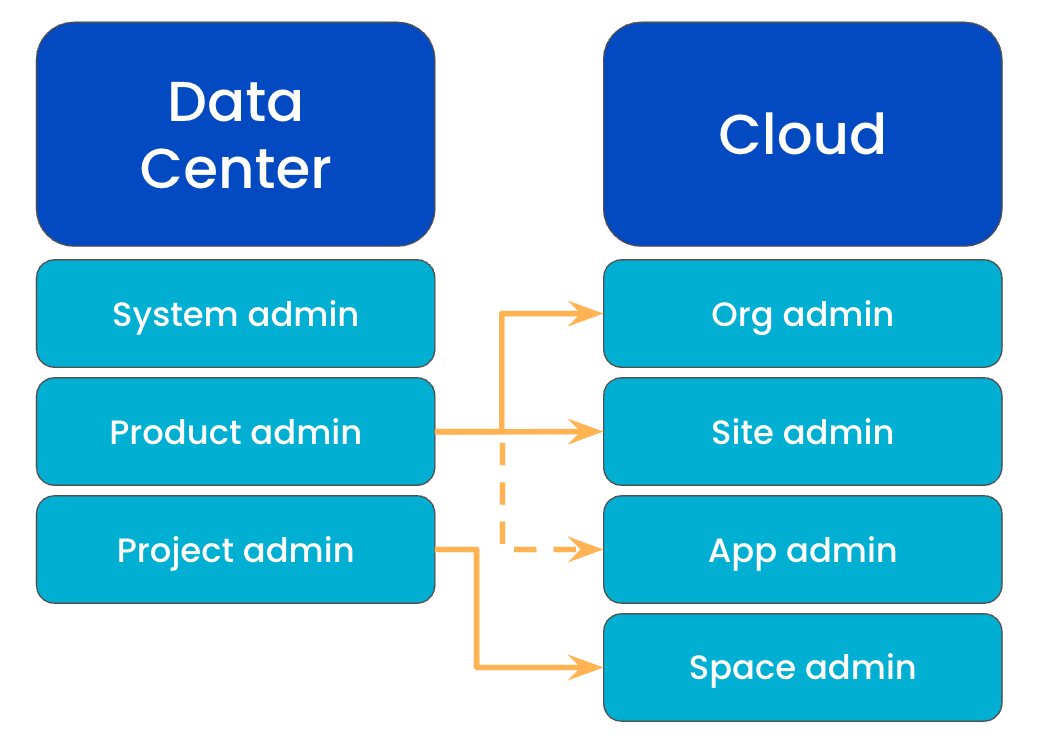
System admin
The system admin is responsible for managing the physical servers, hardware, and planned/unplanned downtime. They have the same permissions as the product admin plus access to the hardware, servers, and the ability to modify all system settings.
Product admin (or Jira admin)
The product admin can modify most of the system settings in the app(s) they administer. They can also simultaneously serve as the system admin, as both admin roles have overlapping permissions. Product admins can assign permissions via group control and are able to create new spaces, fields, and users and change workflows.
Project admin
The project admin is assigned to a single person by role assignment in the respective project. They have the capability to modify various configurations of the project.
Extended project administration rights are also available to project admins and allow them to adapt workflows and screens under certain conditions. For example, they can add a status if it is already contained in an active app instance. New statuses cannot be created, and existing statuses cannot be edited. The project admin can also add, rearrange, or remove, but not create, custom fields.
Admin roles in cloud
Similar to data center, there are several types of admin roles in cloud and it’s possible to have multiple admin roles at the same time. The admin roles you can have and assign to other members within your organization depend on whether you are using the original user management experience or the centralized user management experience within Atlassian Administration (admin.atlassian.com).
TIP: Atlassian Administration (admin.atlassian.com) is a centralized app for managing your cloud organization - from managing user access and adding services to implementing robust security policies and tracking usage and billing.
NOTE: This section only outlines admin roles granted through Atlassian Administration. If you want to know more about other admins, read the documentation for:
Which user management experience do you have?
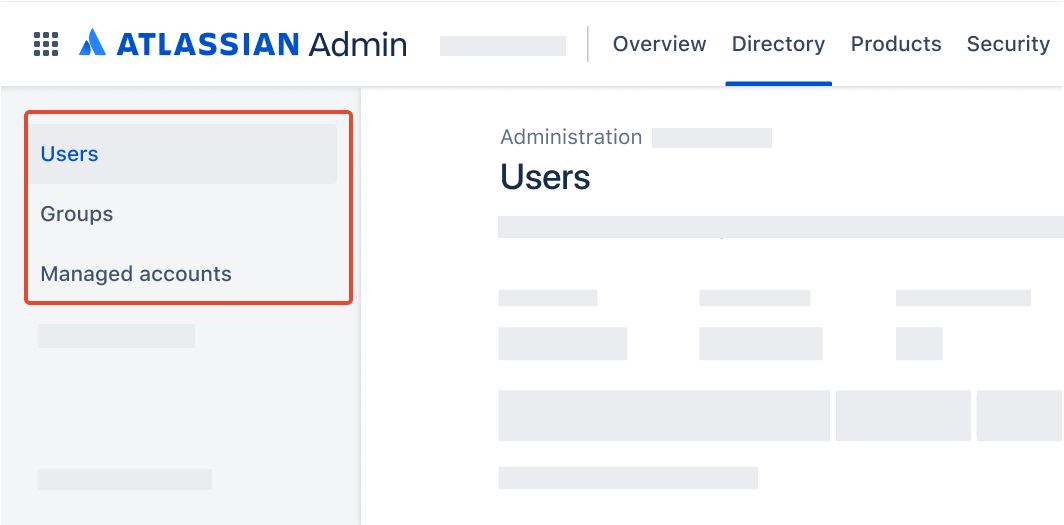
To check, go to your organization at admin.atlassian.com and select Directory. If the Users and Groups lists are found here, then you are using the centralized user management.
As a site administrator or organization admin, Users is found under Product site.
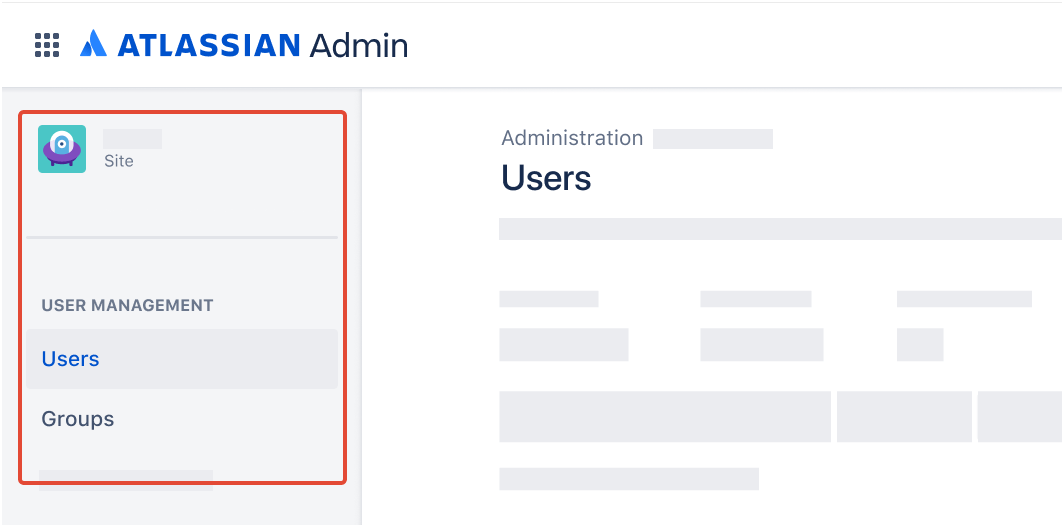
As an organization admin, Users is found under Directory tab.
Admin roles available in both the original and centralized user management experiences
Organization admin
When you create an organization, you automatically become an organization (or org) admin - the highest level of admin - and can complete any administrative task in Atlassian Administration. We recommend you have more than one org admin in case one account is lost or compromised.
TIP: Take this learning course to ramp up quickly as an org admin!
Site admin
For the original user management experience, a site admin manages the users, groups, and administration settings of the site they’ve been assigned to (as well as any apps that sit within this site). Site admins have access to any content within their assigned site. The role allows limited access to manage billing.
For the centralized user management experience, a site admin can complete tasks related to the specific site they are administering including adding new apps to the site and managing apps installed on the site, and have limited access to manage billing. Site admins in the centralized user management experience cannot manage users or groups.
Read this to learn more about the site admin differences.
App admin
An app admin can manage administration settings for a specific app. They don’t have access to Atlassian Administration. With the exception of Jira admins, app admins can access the content within the app they administer. It’s possible to be an app admin for one or more Atlassian apps.
Space admin
A space admin can manage administration settings for a specific space. They don’t have access to global or site-wide administration. Rather, space admins control the permissions, content visibility, and configuration within their scope, such as assigning user or group access, updating settings, or customizing look and feel. They cannot view locked content or override global defaults. It’s possible to be a space admin for one or more spaces.
User access admin
Unlike an organization admin, a user access admin has limited access to Atlassian Administration. Their main task is to manage user access to the apps they administer. For example, an organization might have a user access admin that manages app access for Confluence, and another user access admin managing app access for Jira.
A user access admin can be assigned to one or more apps, but can’t log in or use those apps. This means user access admins won’t count as billable users for the apps they administer, unless they’re granted an additional role that gives access to that app.
TIP: Read this article to learn which features are available to each admin role in Atlassian Administration.
Keep governance processes and practices up to date
To effectively manage admin access requests, minimize unauthorized changes, and maintain a compliant administrative environment, consider establishing an approval process for users seeking org, user, app, and space administrative permissions. You can streamline this process by creating a dedicated request type or a user-friendly form where users can provide essential details about the access they require and the purpose behind their request.
Within Atlassian Administration, org admins can also configure user access settings. This allows admins to specify domains that can gain access to apps without an invitation, or with an admin’s approval. When configured to require approval, users from that domain can request access to an app and include more details about their request for admins to then approve or deny.
By implementing this process, admins like yourself can stay in control and ensure adherence to your organization's app governance practices.
To keep up with evolving needs, be sure to regularly review and update your app governance policies, scheduling periodic check-ins (e.g., annually or bi-annually) to align them with your organization's growth and changing requirements.
When embarking on a space to review and enhance governance practices, Atlassian provides valuable resources to support you along the way. Check out the following plays from our Team playbook to align with internal stakeholders who share cloud governance responsibilities and may be impacted by changes:
To capture and document discussions and agreements made during the process, ensure clarity, consensus, and success in governance-related endeavors, use the following Confluence templates: