Articles
Tutorials
Interactive Guides
Automatically transition issue status in Jira and GitLab

Kev Zettler
Full stack web developer, DevOps
This guide demonstrates how to create a Jira automation rule that integrates with GitLab.
Time
5 Minute Read.
Audience
You’re an experienced user of Jira Software and GitLab.
Prerequisites
You are an existing GitLab customer. Get the GitLab for Jira integration here.
If you’re new to GitLab, get started here.
You have an active Jira project with the GitLab application installed and configured. Get started with Jira here.
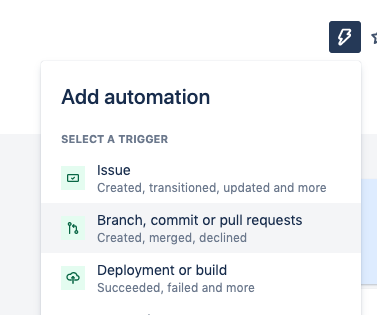
Step 1. Add automation
On your Jira project page, click the add automation button. Then, select the Branch, commit or pull requests option.
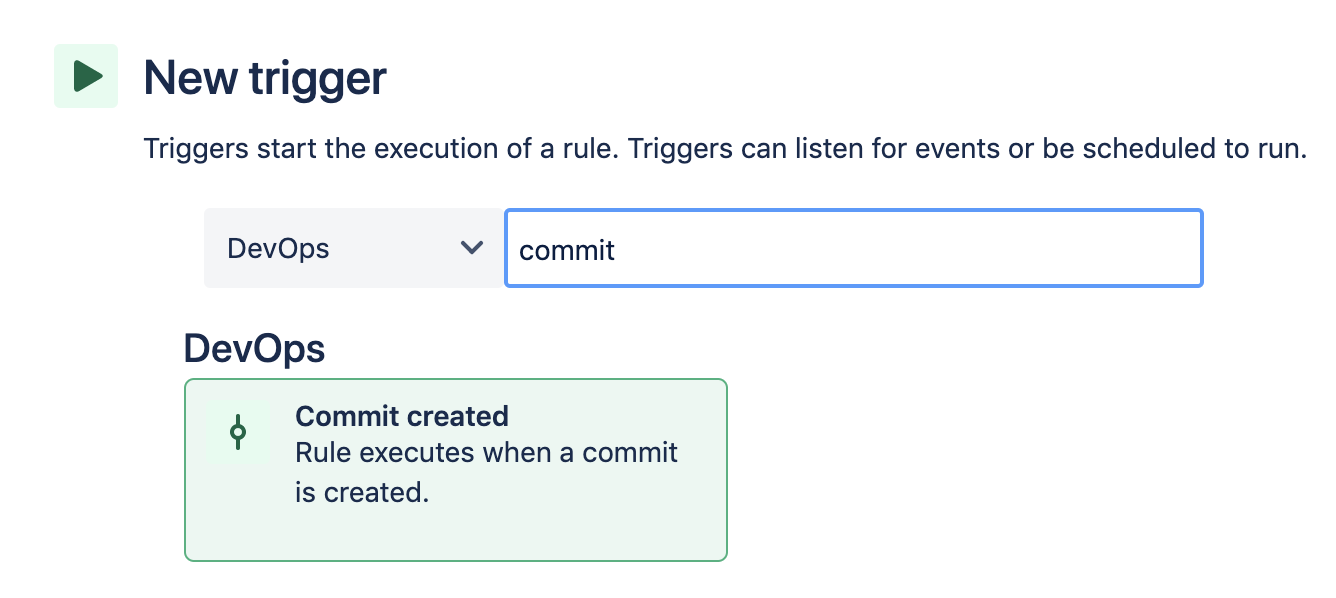
Step 2. Create a new trigger
Search for and select the Commit created trigger. This will trigger the rule when a commit happens.
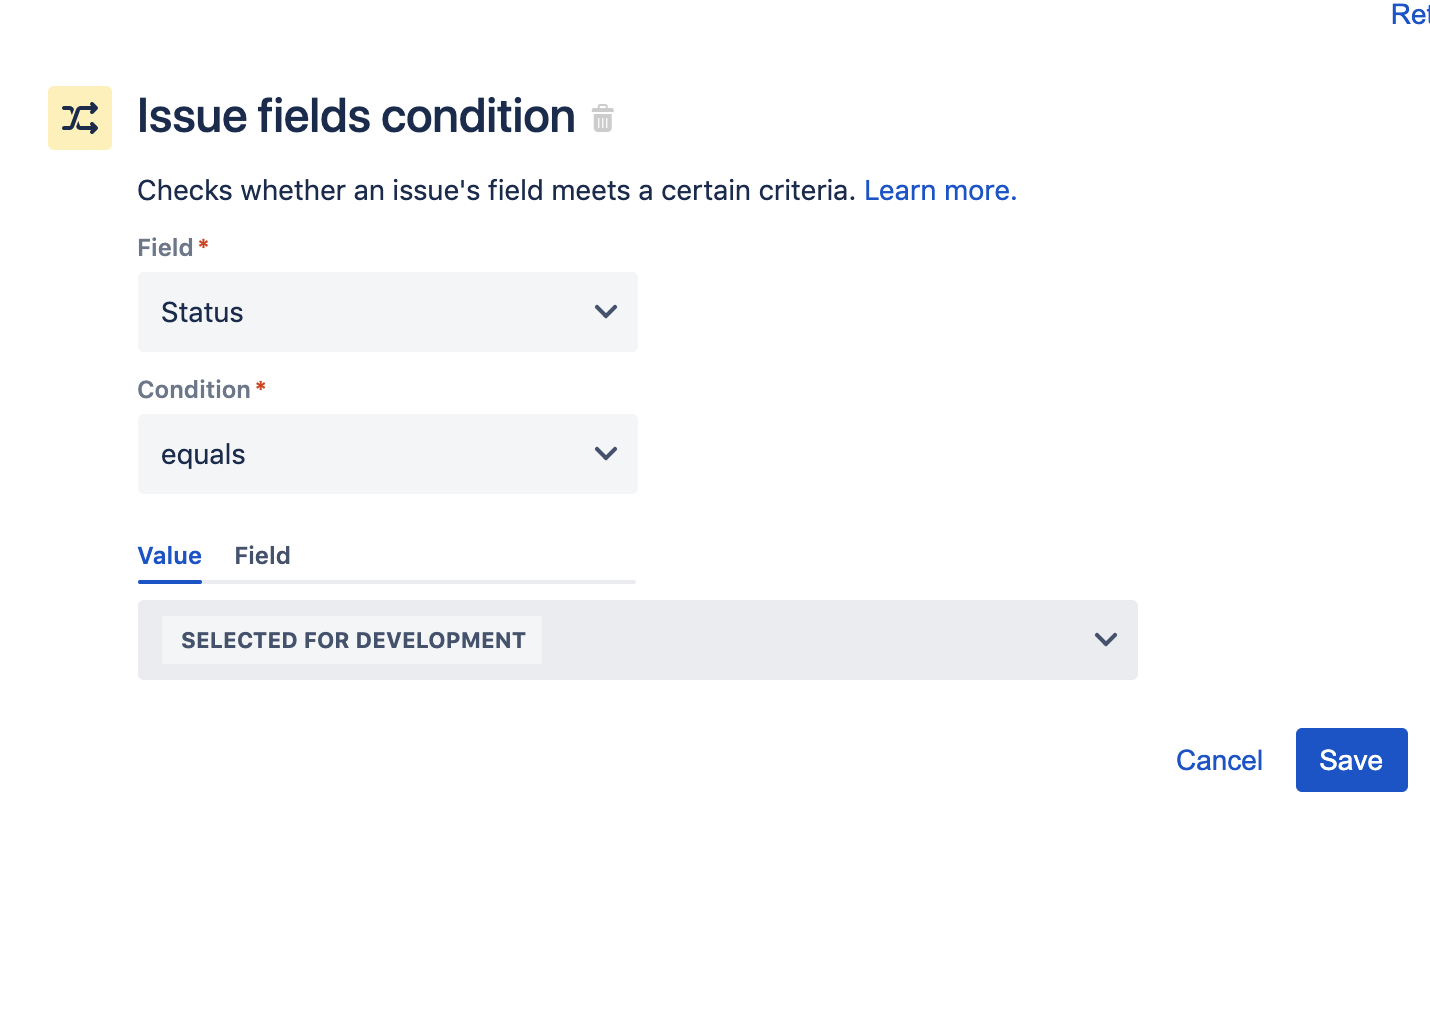
Step 3. Create a new condition
Search for and select the Issue fields condition. This will restrict the actions performed to issues that match certain field conditions.

Set the condition so the Status field equals “selected for development”. This status may not exist in your project and you may need to create it or use an alternative. Click Save to continue.
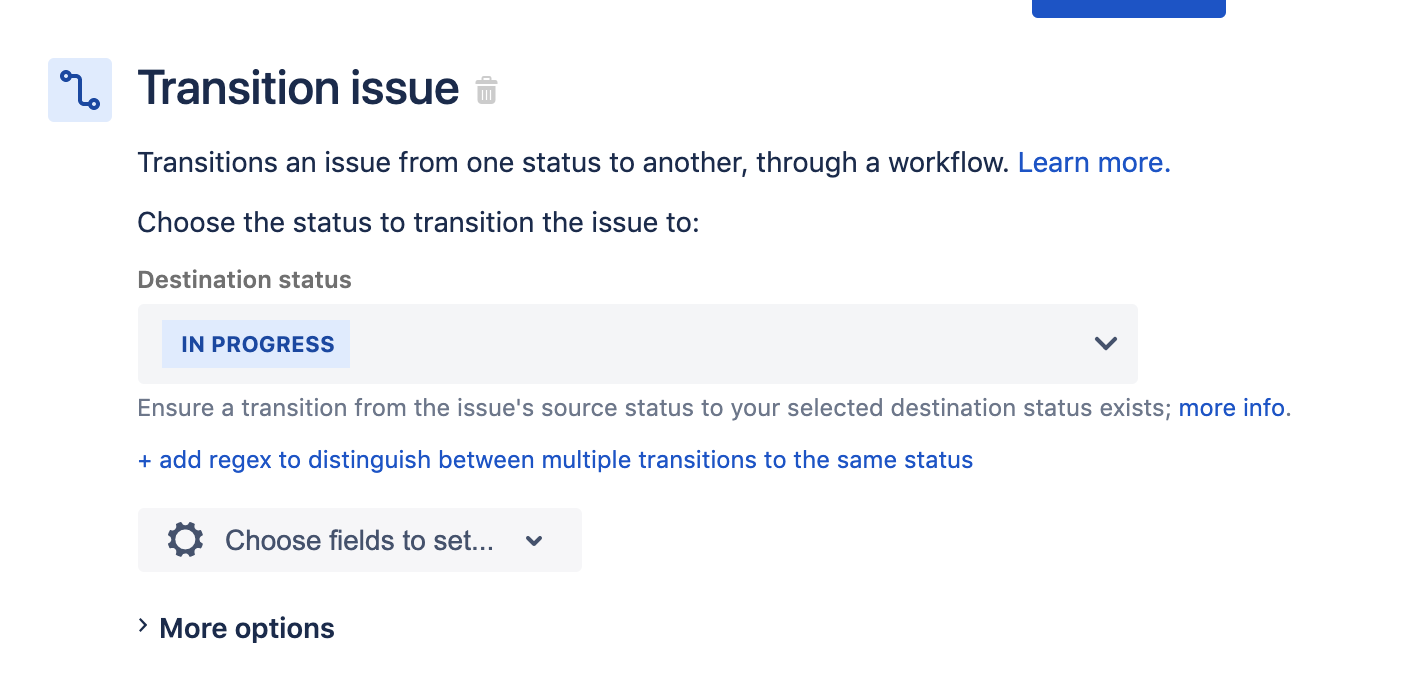
Step 4. Create a Transition issue
Search for and select the Transition issue action, which will transition the issue to a new status.

We will configure the Transition issue action so that the destination status updates to “in progress”. Click Save.
Step 5. Enter a name
Now enter a name for the rule. We used “Transition issue on commit”. Click the Turn It On button. The final rule summary should look like the following:
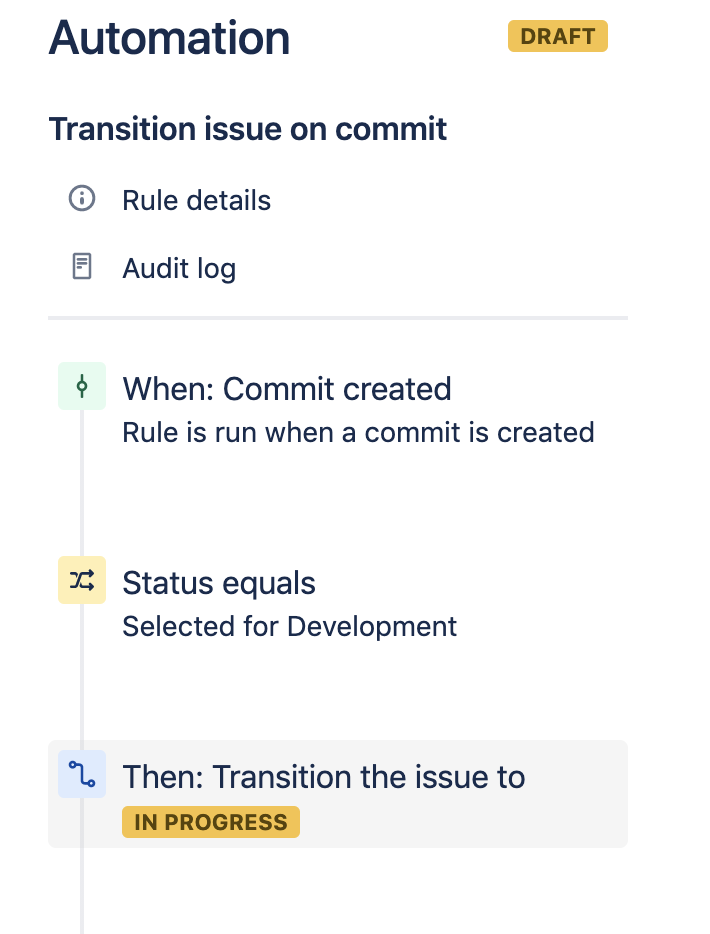
The rule is complete and can be triggered by the following steps:
- Create an issue with the status “Selected for development” in Jira.
- Create a commit and push to GitLab that references the issue key.
Once these actions are taken, the rule will trigger and move the issue to “In progress” status. You can monitor the rule by visiting the Audit Log, which will indicate any configuration errors with the rule and help with debugging.
Be sure to check out hundreds of other rules in our Automation Template Library.
Share this article
Next Topic
Recommended reading
Bookmark these resources to learn about types of DevOps teams, or for ongoing updates about DevOps at Atlassian.

DevOps community

DevOps learning path