Master the whiteboard
Confluence has always been about making collaboration and knowledge sharing easier for teams, especially remote ones. We also know that our customers love tools that offer a more visual approach to collaboration. So, why not create a visual workspace of our own?
And since whiteboards are, arguably, the single most popular visual collaboration and learning tool of all time, that’s what we decided to build.
If you’re new to Confluence whiteboards or virtual whiteboards in general, here’s a rundown of what they are, along with some tips and best practices you can use to level up team collaboration with whiteboards throughout every stage of your project.
What are Confluence whiteboards?
Confluence whiteboards offer your team a visual, highly collaborative way to ideate and instantly turn your ideas into actionable tasks.
Use virtual whiteboards to map out concepts, diagrams, and workflows using digital lines, shapes, and stamps, or ready-made templates. Add text, images, and comments to further clarify your ideas.
When would you use them?
Whiteboards can be used to kickstart discussions and foster creativity in any project phase. You can use them in the ideation stage to brainstorm ideas, plan project milestones, or outline strategies.
Whiteboards aid in planning and executing projects, allowing you to easily map out workflows, process diagrams, or system architectures. Sketch out wireframes, user interface (UI) mockups, or conceptual designs for new features.
They’re even perfect for supporting projects through to completion and beyond, offering plenty of ready-made templates for running engaging and collaborative Scrum meetings, standups, and retrospectives.
And since whiteboards are a native content type that is deeply connected with all of your other Confluence documents, they can easily be used to provide context, improve training, streamline onboarding, and facilitate knowledge-sharing.
When would you use them?
Confluence whiteboards facilitate remote collaboration by allowing team members to work together in real-time or asynchronously, making it easier to capture and share creative insights across distributed teams.
Most importantly, they give your team a seamless way to connect the planning and execution stages of your projects by integrating Confluence and Jira together.
Turn your whiteboard concepts and other meaningful ideation into a Jira ticket with just a click. Now, your entire project management process is truly connected and easily accessible since everything lives in one convenient place.
Tips & tricks for getting the most out of whiteboards
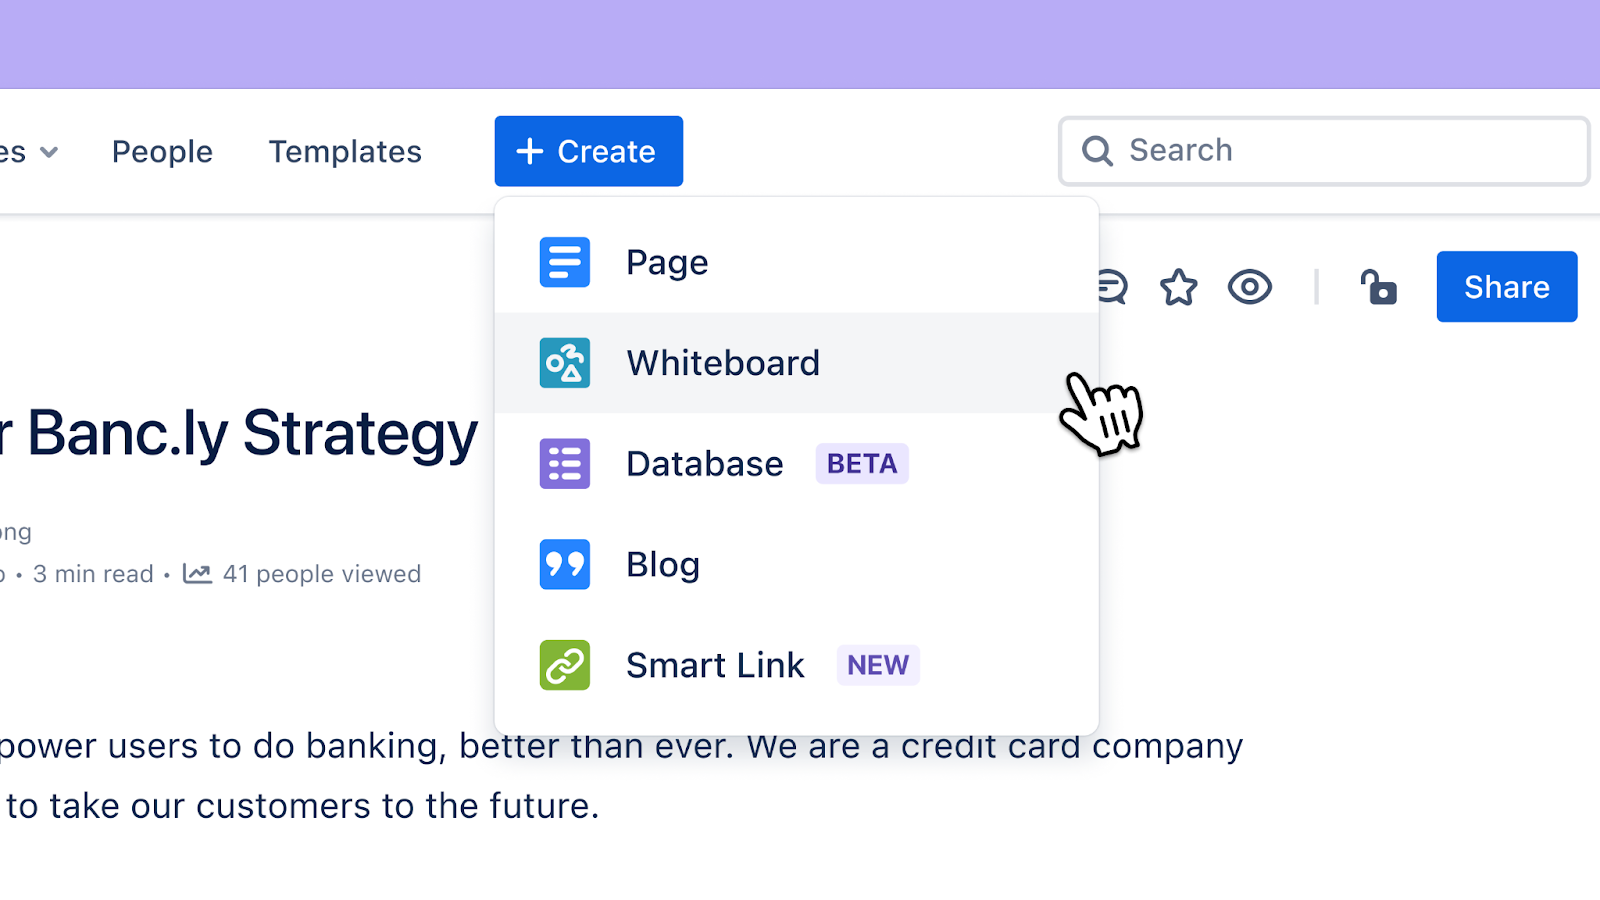
Getting started with whiteboards is a breeze — they’re super intuitive. To create a whiteboard, select the “Create” button in the Confluence navigation and select “Whiteboard.”
Let’s look at how you can use several key features to get rolling with whiteboards right off the bat to see their value quickly.
Templates
Templates include prompts, questions, or visual aids that stimulate creative thinking and encourage you to explore new ideas or perspectives. They also provide a structure or framework that can help guide you to great ideas and keep your ideation sessions on track.
Upon creating a new whiteboard, you’re immediately prompted to select a template from our template picker.
We’ve created dozens of whiteboard templates for every project management stage, including ideation & brainstorming, discovery & research, planning, meetings & workshops, retrospectives & evaluations, and more.
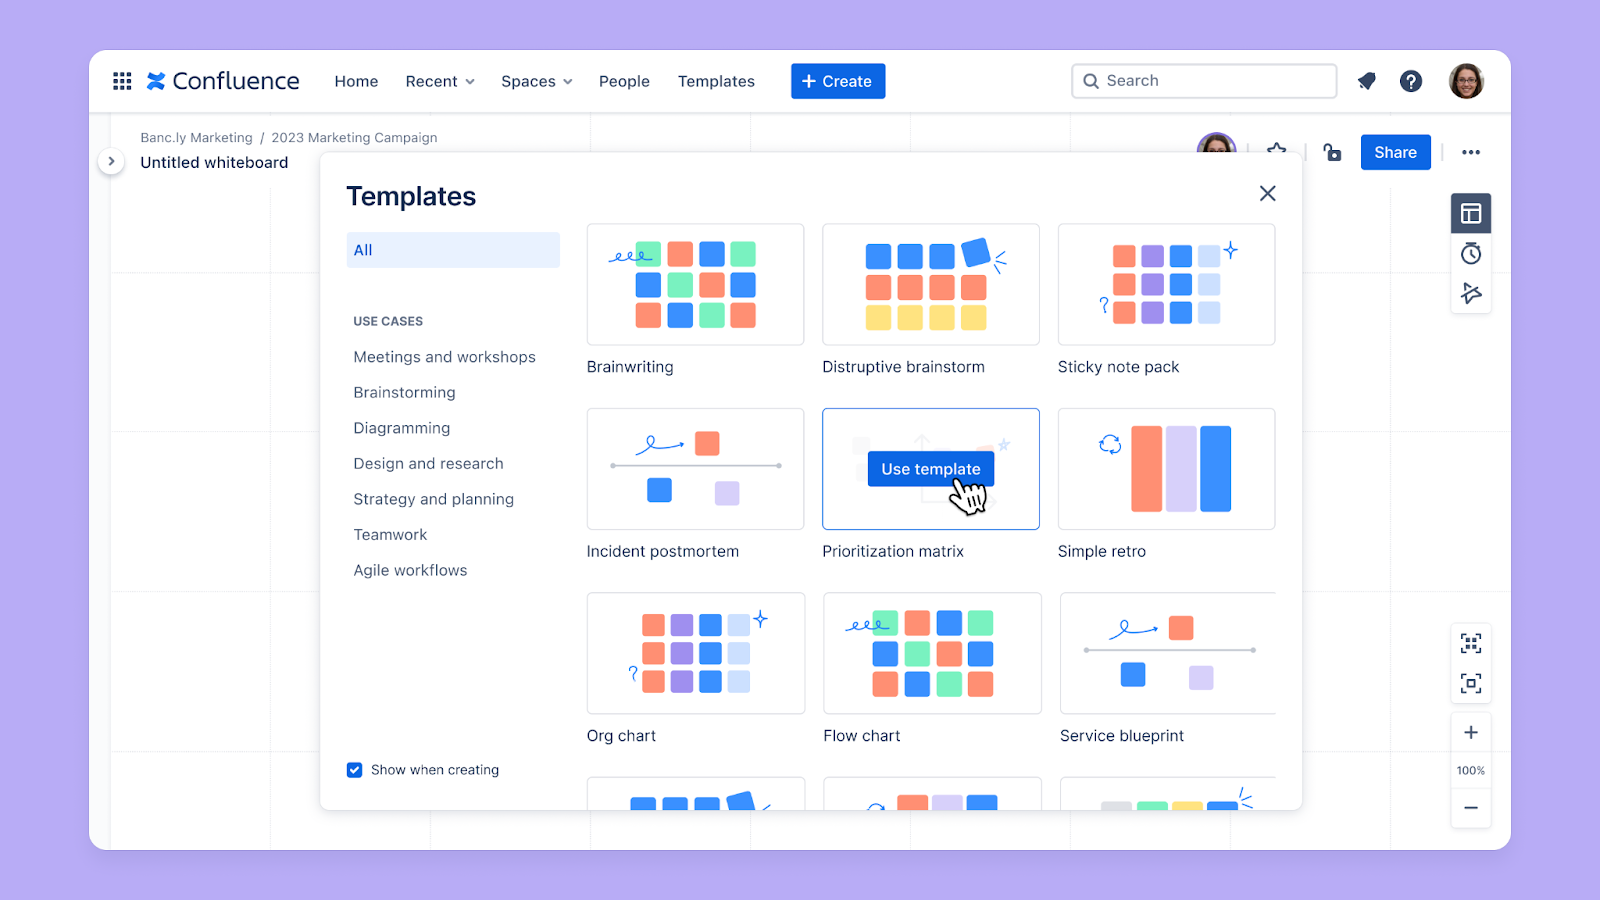
Choose from a wide range of templates depending on the stage of your project and the task at hand:
- Retrospective
- Prioritization Matrix
- Brainwriting
- Incident postmortem
- Daily sync
- Disruptive brainstorm
- Team formation guide
- Concept map
- Gap analysis
- Product vision board
- And many more
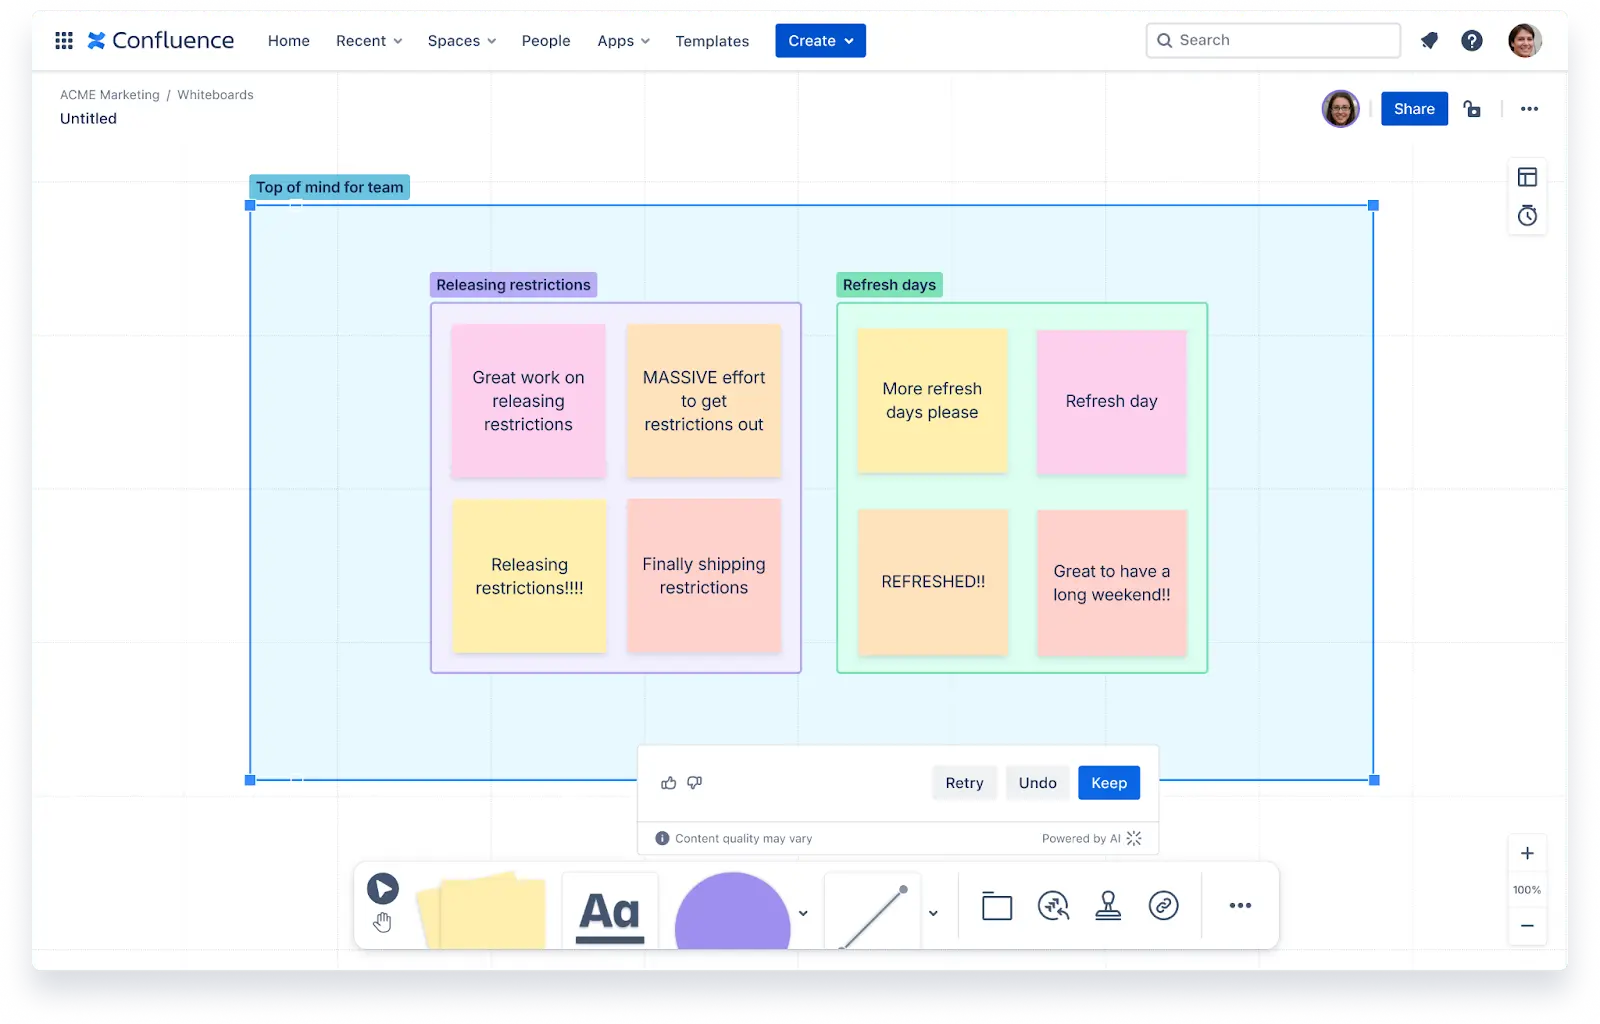
AI-powered whiteboards
Atlassian Intelligence within Confluence helps you turn ideas into action easily and efficiently. AI helps you get started with new ideas by generating new stickies, and organizing your ideas by grouping similar ideas together on your whiteboard. When you’re ready, you can advance your projects by summarizing the whiteboard with AI and turning the summary into a Confluence page.
Keyboard shortcuts
If you’re already a Confluence and Jira user, then you’re probably a keyboard shortcuts wizard. Confluence and Jira have long offered keyboard shortcuts and autocomplete options that help you navigate your workspace without touching your mouse.
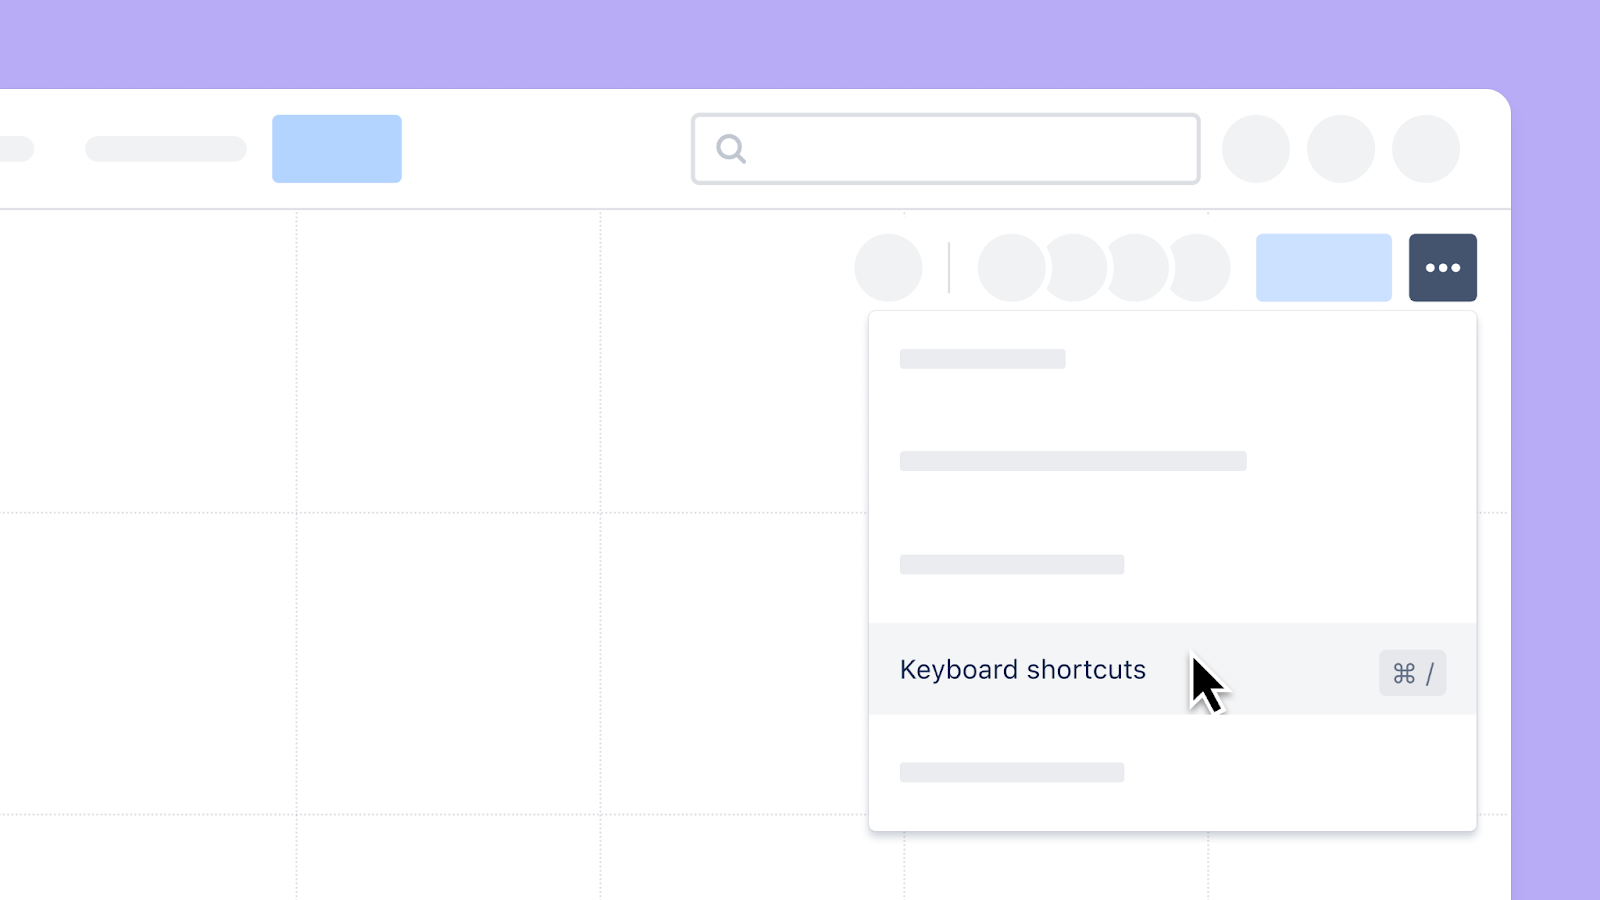
Whiteboards also offer keyboard shortcuts to help you edit, navigate, and perform actions quickly. To view and familiarize yourself with the whiteboard keyboard shortcuts in the shortcuts panel, select the “More” menu in the top right corner, then select “Keyboard shortcuts.” The shortcuts “H” and “V” make it easy to navigate your whiteboard by quickly switching between the hand and select tool.
Smart Links
The power of Confluence whiteboards is truly unlocked by connecting them with your Jira, Confluence, and Trello workflows. Smart Links enable you to embed your whiteboards into Jira and Confluence, or to embed content from 3rd party apps (like Figma, Google Docs, and YouTube) into your whiteboards.
Import Jira work items onto your whiteboard
To import Jira work items onto a whiteboard, simply copy and paste the work item’s link onto your whiteboard.
If you’re using cloud versions of Jira Software (Jira Work Management, Jira Service Management, Jira Product Discovery), you can also use the Jira work item import dialog to find and insert Jira work items into your whiteboard.
To find the Jira work item you need, you can use both plain search and JQL search options. Check out this JQL search resource to learn more.
If you’re using the plain text search, enter your query into the search field, select as many work items as you want from the list, and then select “Import work items.” Enter your query into the search field.
Create Jira work items from your whiteboard
You can also take ideas from your whiteboard and turn them into actionable Jira work items.
Select your whiteboard element (sticky note or shape with text inside it) and then select “+ Create” from the floating toolbar. Select a site, project, and work type from the options in the picker, fill in all required fields, and then select “Create.” Congrats! Now you can manage Jira work items directly from your whiteboard.
Best practices for keeping your whiteboards organized
Once you start creating whiteboards, it might be hard to stop! Thankfully, you can use the following best practices to make organizing and keeping tabs on your whiteboards incredibly easy.
Finding your whiteboards
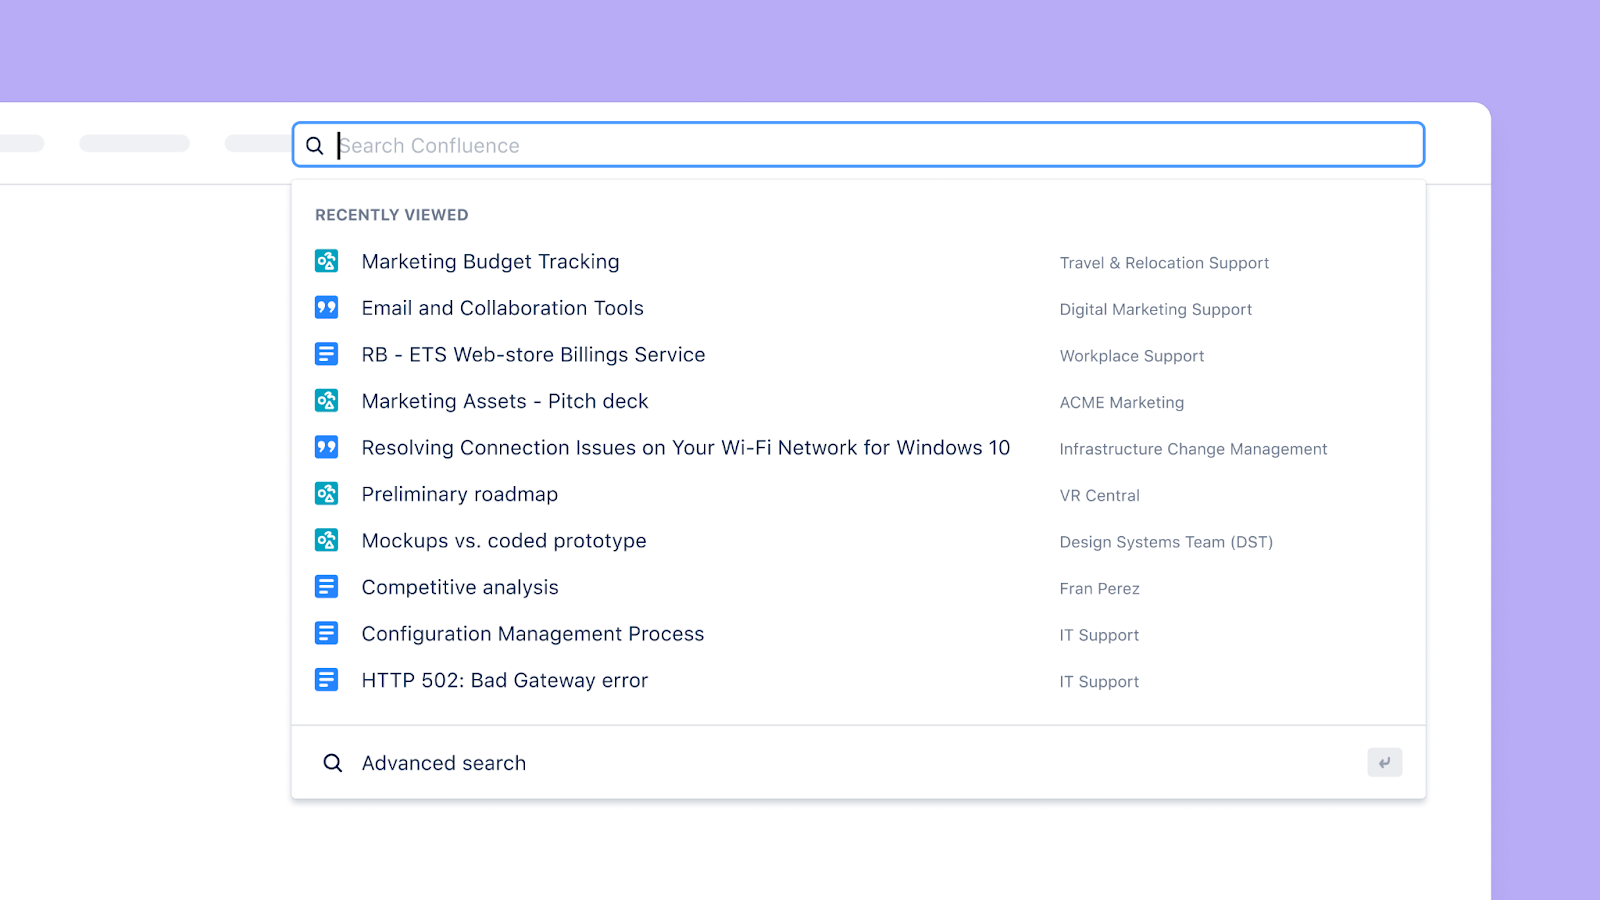
There are a few different ways to easily find the whiteboards you’re looking for in Confluence: Quick search, Advanced search, and browsing your Recent activity.
Quick search
No matter where you are in Confluence, you can use the slash (/) shortcut key to open the search browser.
Focus on the search field and enter the title of the whiteboard you want to find.
Your most recently updated whiteboards show up first in the query results.
Advanced search
If you can’t find what you’re looking for with the quick search option, press “Enter” or select the “Advanced search” option at the bottom of your quick search results.
Advanced search shows data beyond the name of your whiteboard, offering you plenty of filtering options to find your whiteboards more easily, especially if many of them are named similarly.
To see a complete list of filtering options, check out this advanced search resource.
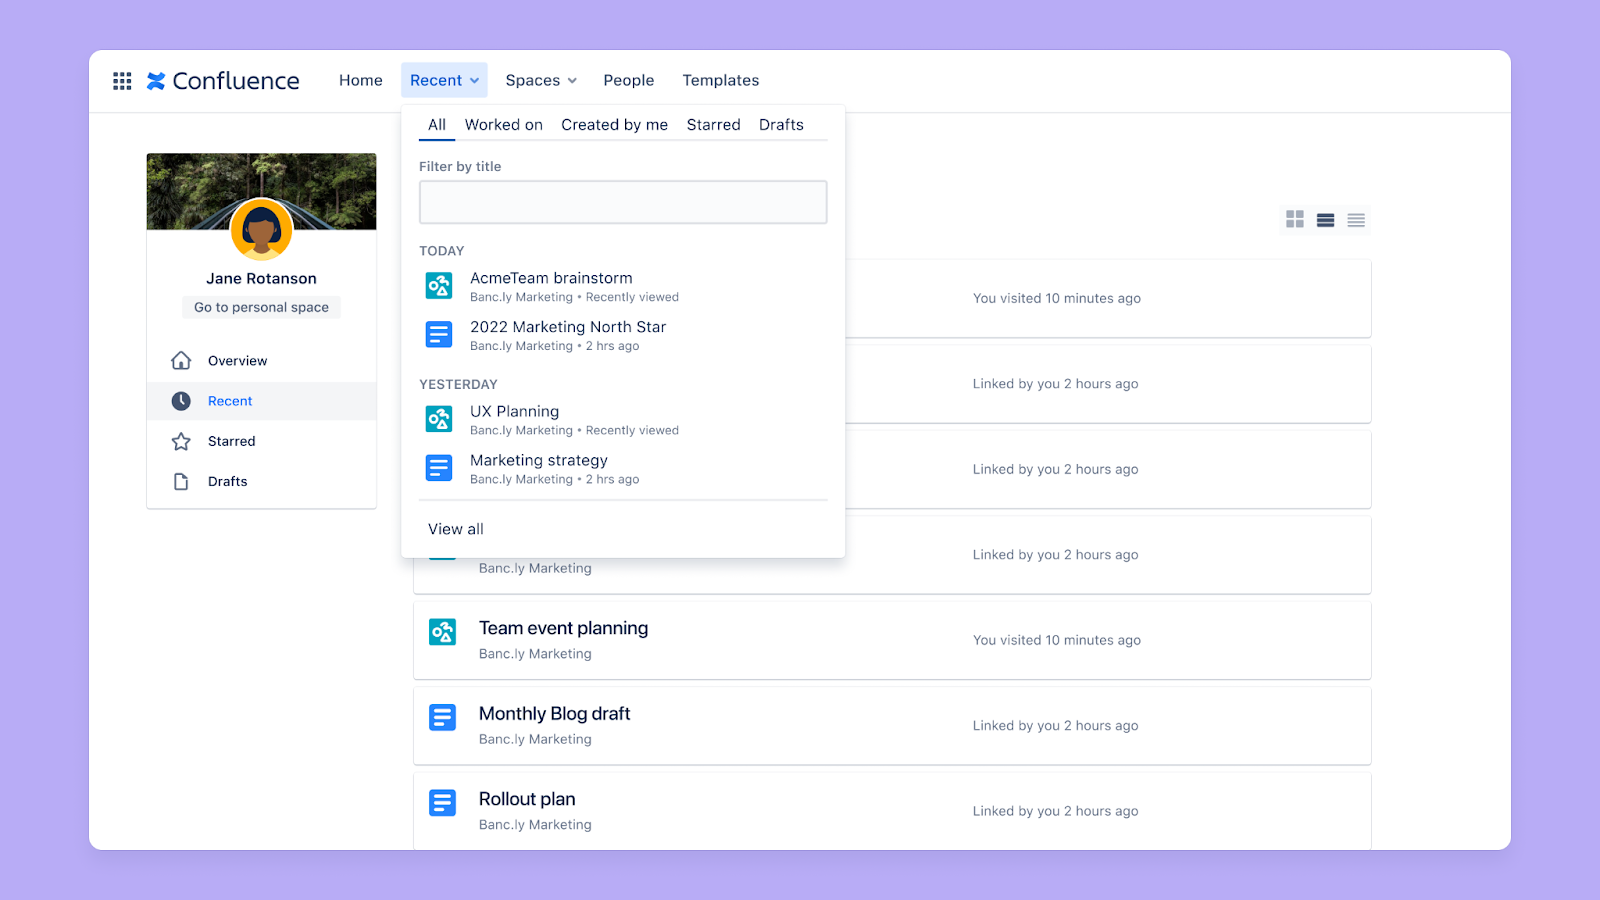
Recent activity
If you’re looking for a whiteboard you’ve recently worked on, the easiest way to find it is through the Recent menu.
To see recent whiteboards via the navigation, select “Recent” in the navigation, then select “Worked on” or “Created by me” to see a list of whiteboards and pages you’ve accessed and edited.
Taking bulk actions with smart sections
Smart sections supercharge your project management efforts by enabling you to make updates to your Jira work items in bulk directly from your whiteboard. With smart sections, you’ll be able to turn initiatives created during planning sessions into actionable Jira tasks in seconds.
To add a section to your whiteboard, select the section element from the global toolbar. Once it’s created, select the section to trigger the element/floating toolbar.
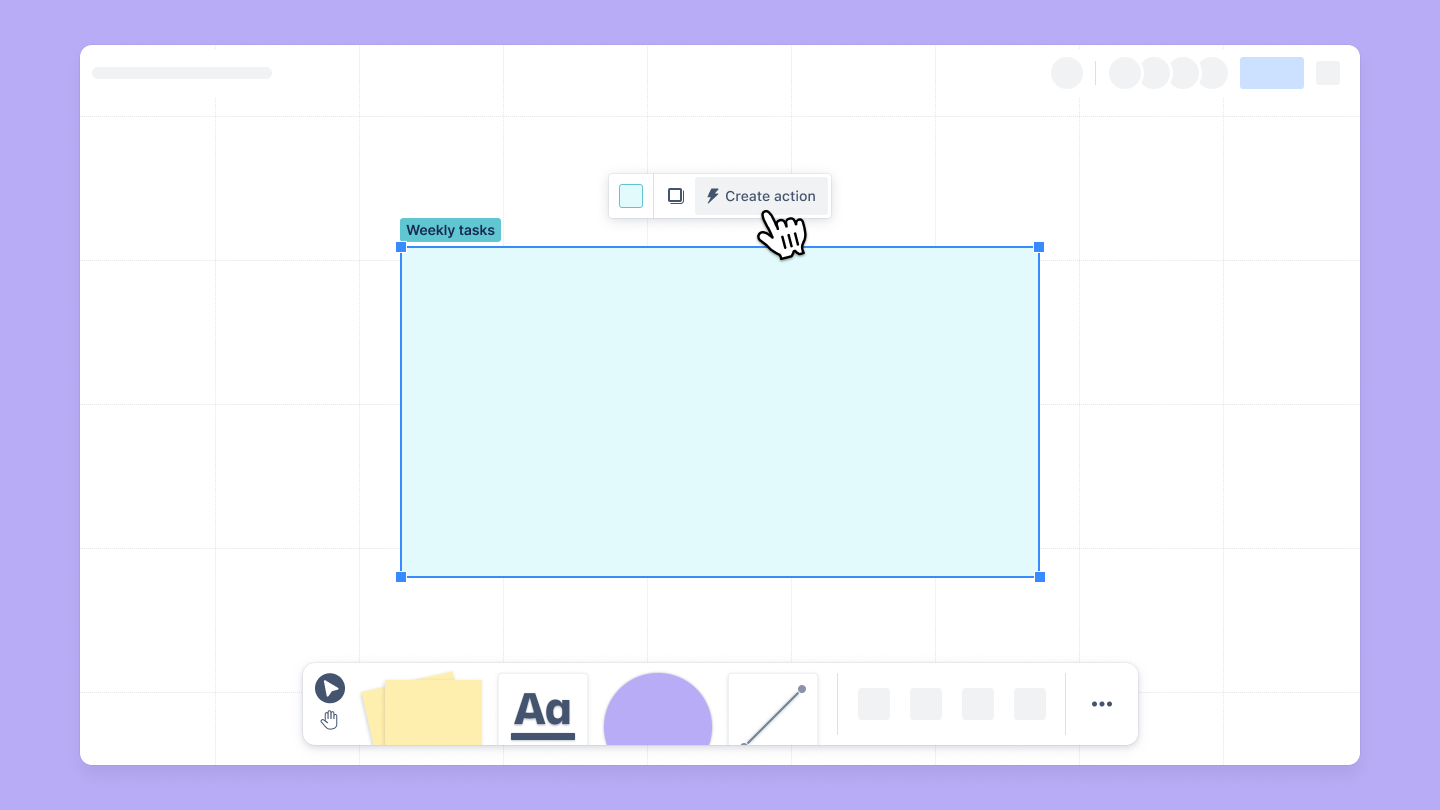
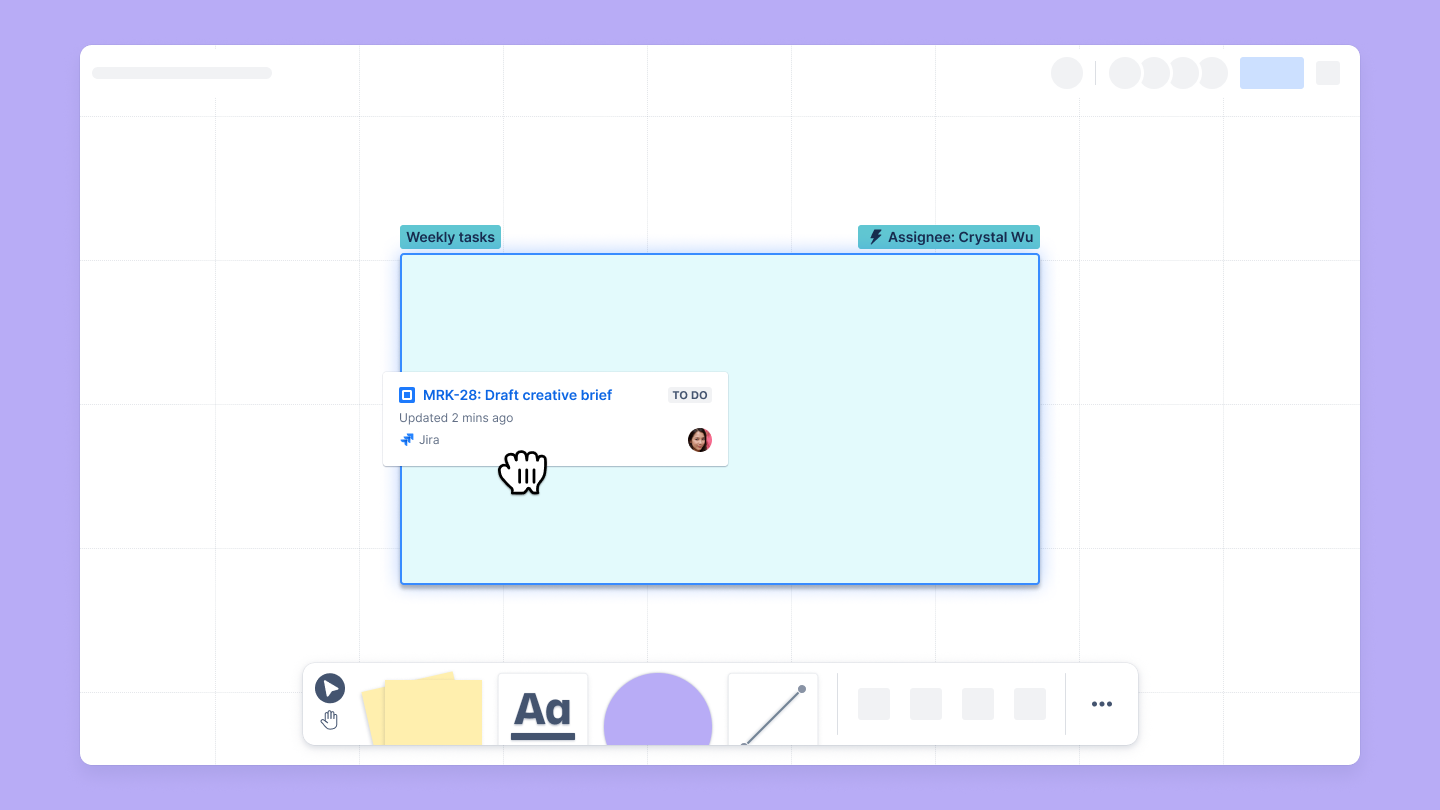
Now select the “create action” button to open the configuration panel.
Choose a site, project, and work type from the options in the picker to configure an action, then fill in all the fields and select “Save.”
Now, you can start dragging Jira work items into the section. All updates will be reflected in Jira in real time.
For a full tutorial on not just creating smart sections but also editing and deleting them, check out this smart sections resource.
Using the content tree to organize whiteboards
In Confluence, the "tree structure" is used to organize content within spaces. Pages live in a tree structure within a space. Just like pages, whiteboards can be moved throughout the content tree and across different Confluence spaces.
You can move your whiteboards freely through spaces without worrying about their content changing — the entire hierarchy of incoming links associated with the whiteboard is maintained in the move. This means that Confluence automatically redirects all links to the new location.
To reorder your whiteboards in the content tree, go to the space home and expand the sidebar to locate the content tree. Now, expand the branches to locate the whiteboard you want to move. Finally, drag and drop the whiteboard to a new position in the tree.
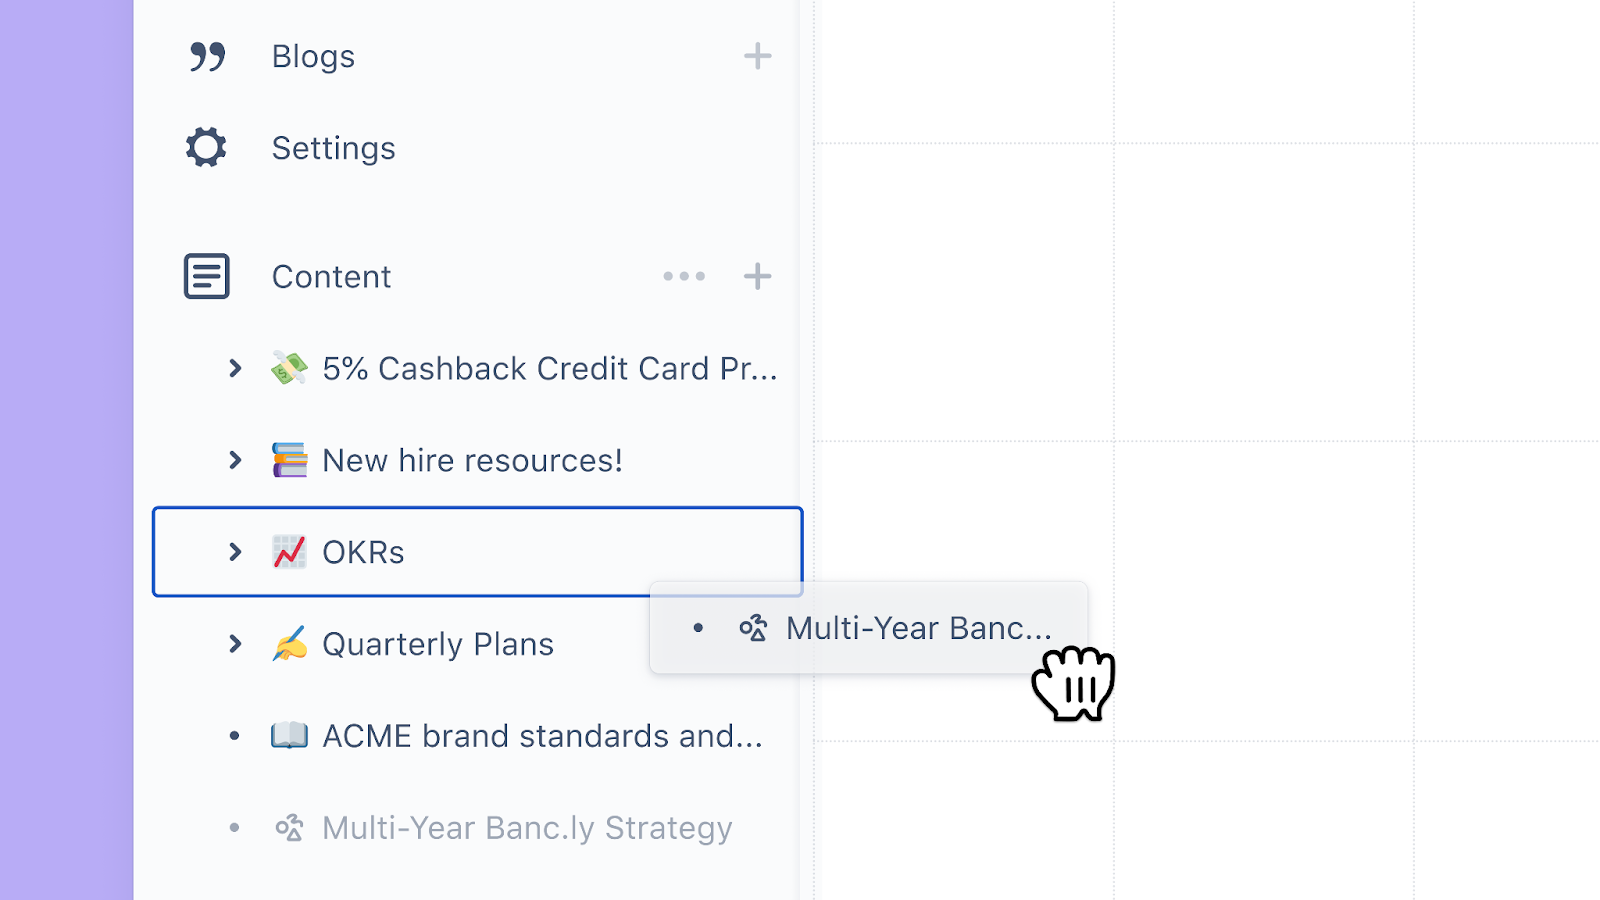
For a complete guide to moving whiteboards within and across spaces, check out this resource on organizing whiteboards in the content tree.
Take Confluence whiteboards for a spin
The best way to truly understand how whiteboards can boost your project management process is to hop right in and start using them.
Whiteboards seamlessly integrate into your Jira and Confluence workflows, giving you enhanced visualization and collaboration options that can make your Agile processes more dynamic and engaging.
To give whiteboards a spin, sign up today to try Confluence for free.
Make quick work of tables
Learn how to create and format tables in Confluence.
Team posters for better teamwork
Learn how to create team posters in Confluence to foster collaboration.