Service management for HR teams
.png?cdnVersion=3496)
How HR teams get started with Jira Service Management
Get up and running quickly with the HR service management template
If you haven’t already done so, you’ll need to create your first HR service project. We highly recommend you use the HR service management template as it includes out-of-the-box request types and workflows for processes such as employee onboarding and offboarding, change requests, and general questions for HR.
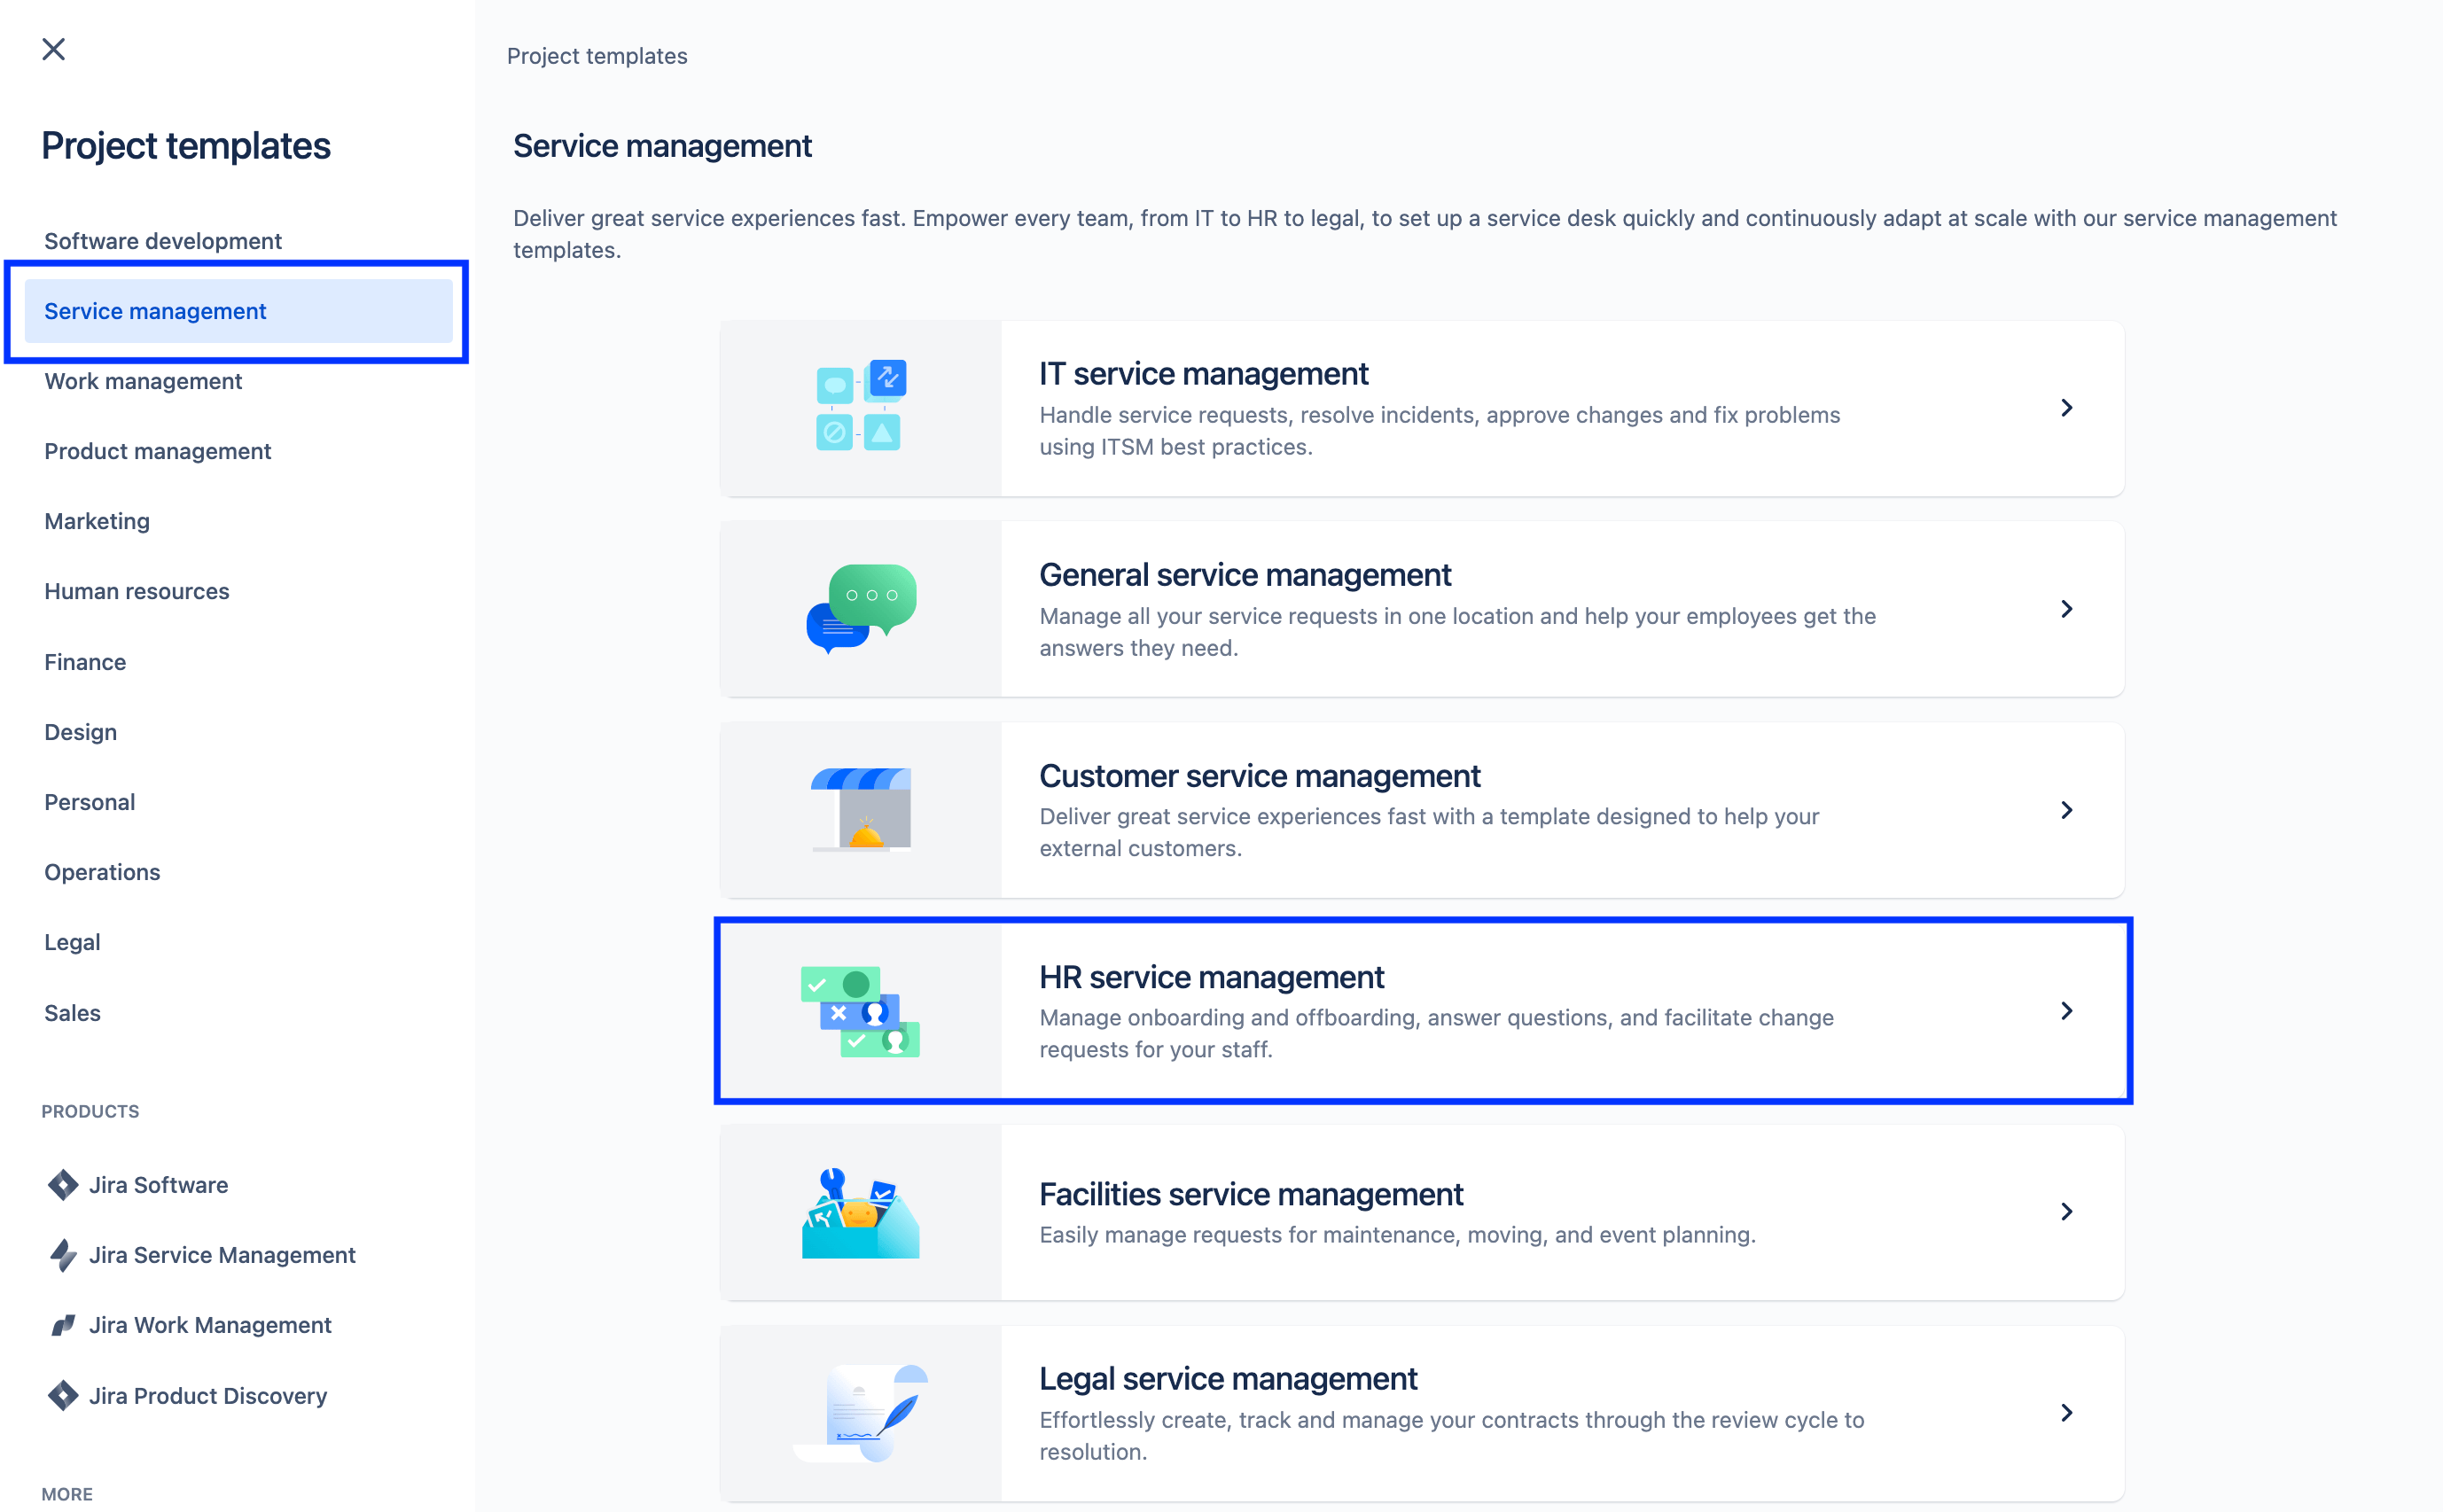
To create a project with the HR service management template:
1. Select Projects in the top menu bar > Create a project.
2. Select the HR service management project template > Select Use template to get started.
3. Name your project. A project key is automatically generated based on the project name, or you can create your own project key if you wish.
4. Choose if you want to share settings with an existing service project. If yes, specify the name of the existing project.
5. Select Create project.
Set up your HR request types and fields
Request types help you define and organize incoming requests so your team can capture relevant information and help employees more efficiently.
In addition to the default request types that come with the HR service management template, you can also create your own request types for all of your HR needs for things like internal transfers, recording certifications, vaccination status, and even recognizing coworkers for their hard work-- the sky is the limit!
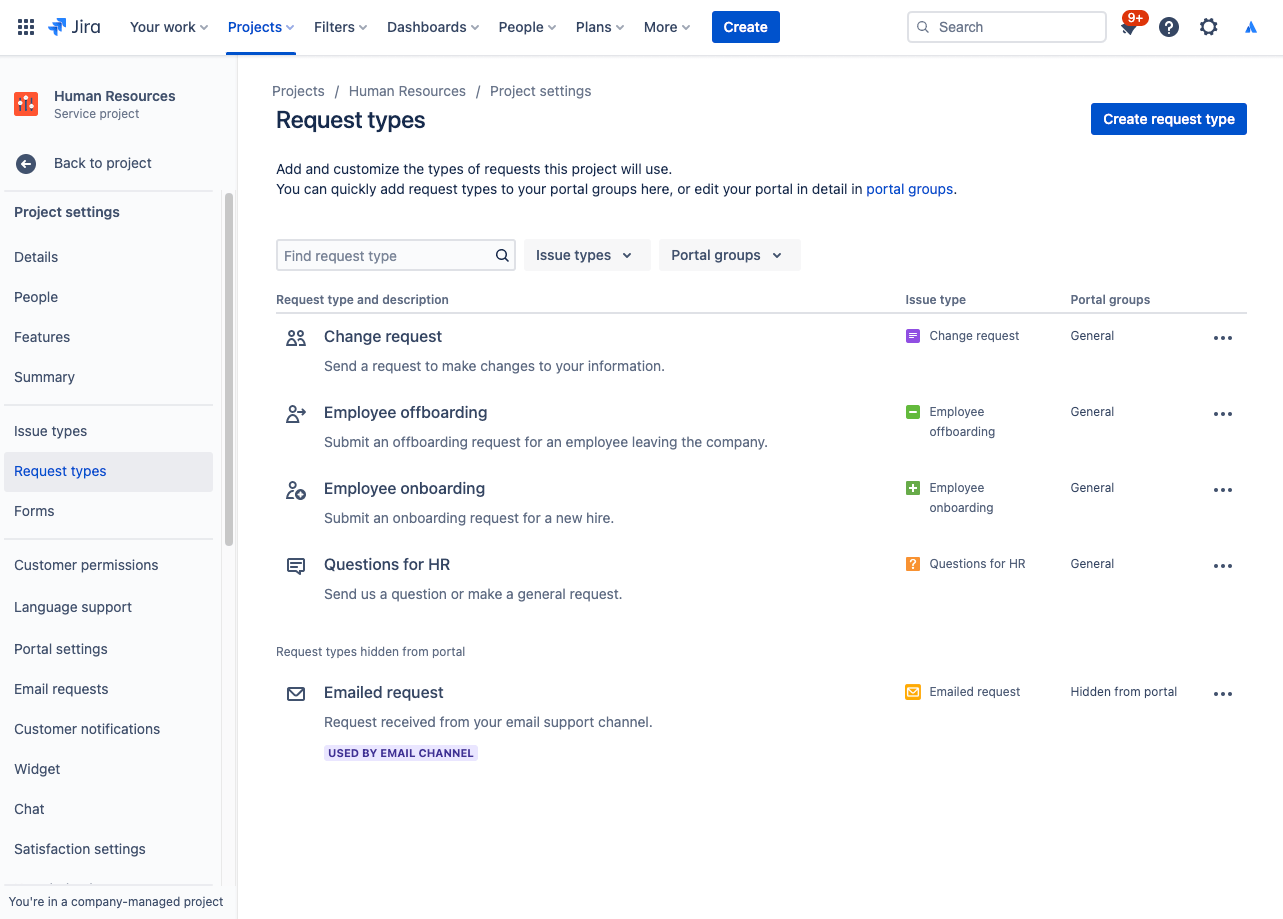
To access your default request types or create your own:
1. From your HR service management project, select Project settings in the left-hand menu.
2. Select Request types.
3. Select an existing request type to edit or create a new one by selecting Create request type.
Add fields to your request types
Request types are automatically configured with multiple fields (e.g., Assignee, Reporter, Request type, Description, and more). Fields allow you to customize the information captured from help seekers and used by your agents. You can also add custom fields, which provide additional information that’s helpful to your team.
After your desired HR request types are created, simply drag and drop fields as needed to ensure you capture all the necessary information for a request. Field values can also be edited by simply selecting the field.
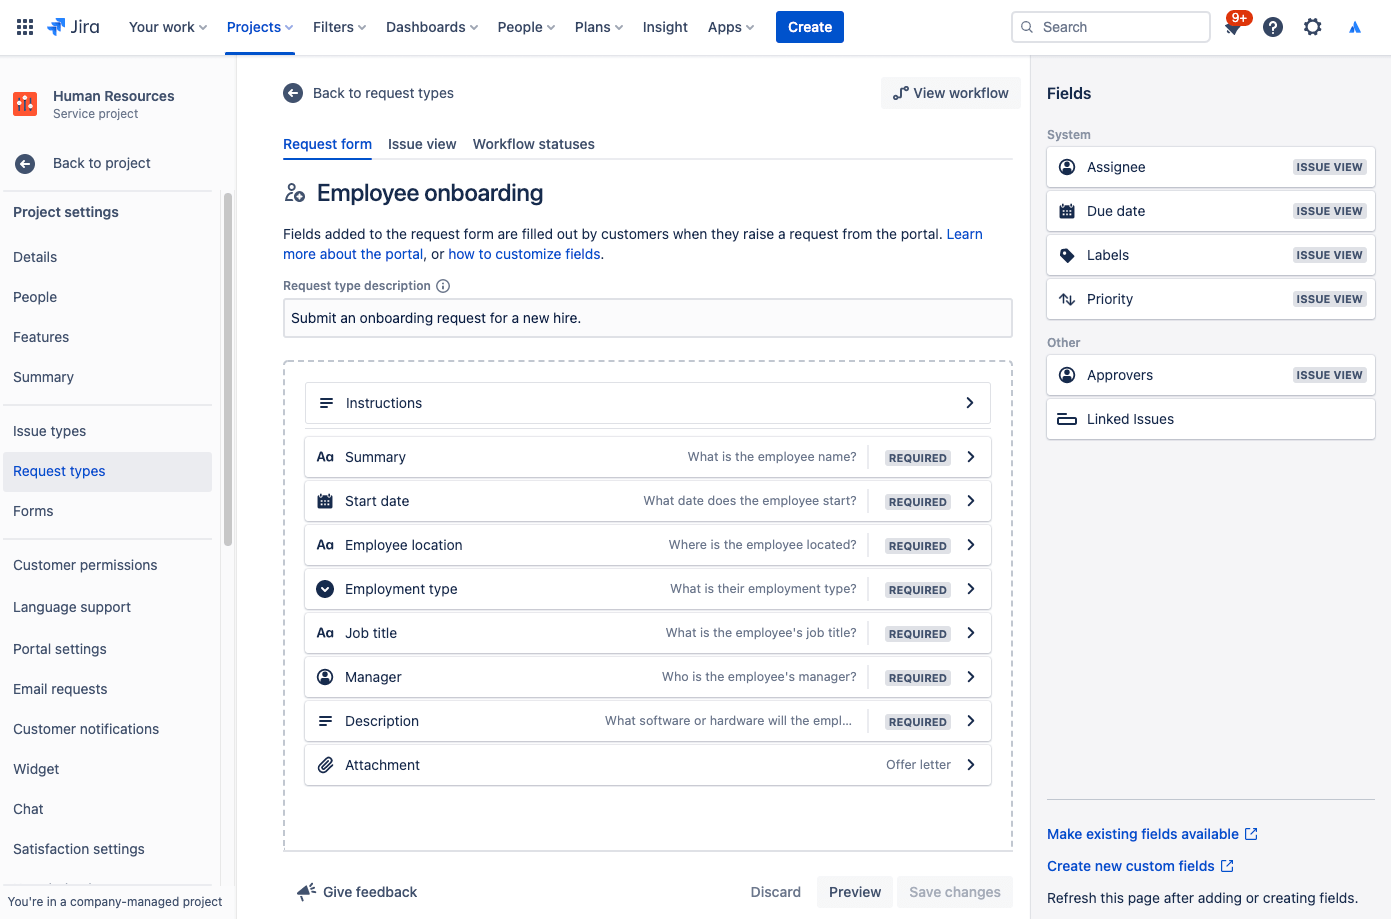
When you add fields to your request types, they appear in the portal request form. Fields can be required or optional for help seekers. You can also add issue view fields for your agent’s eyes only.
If the fields you’re trying to add aren’t available, you’ll need to create them first.
Capture more relevant information faster with forms built for HR teams
Forms can use conditional logic to dynamically show or hide fields, and can include headings, field validation, tables, and rich formatting. Forms include all of the fields you need in one form to ensure employees know exactly what info to provide.
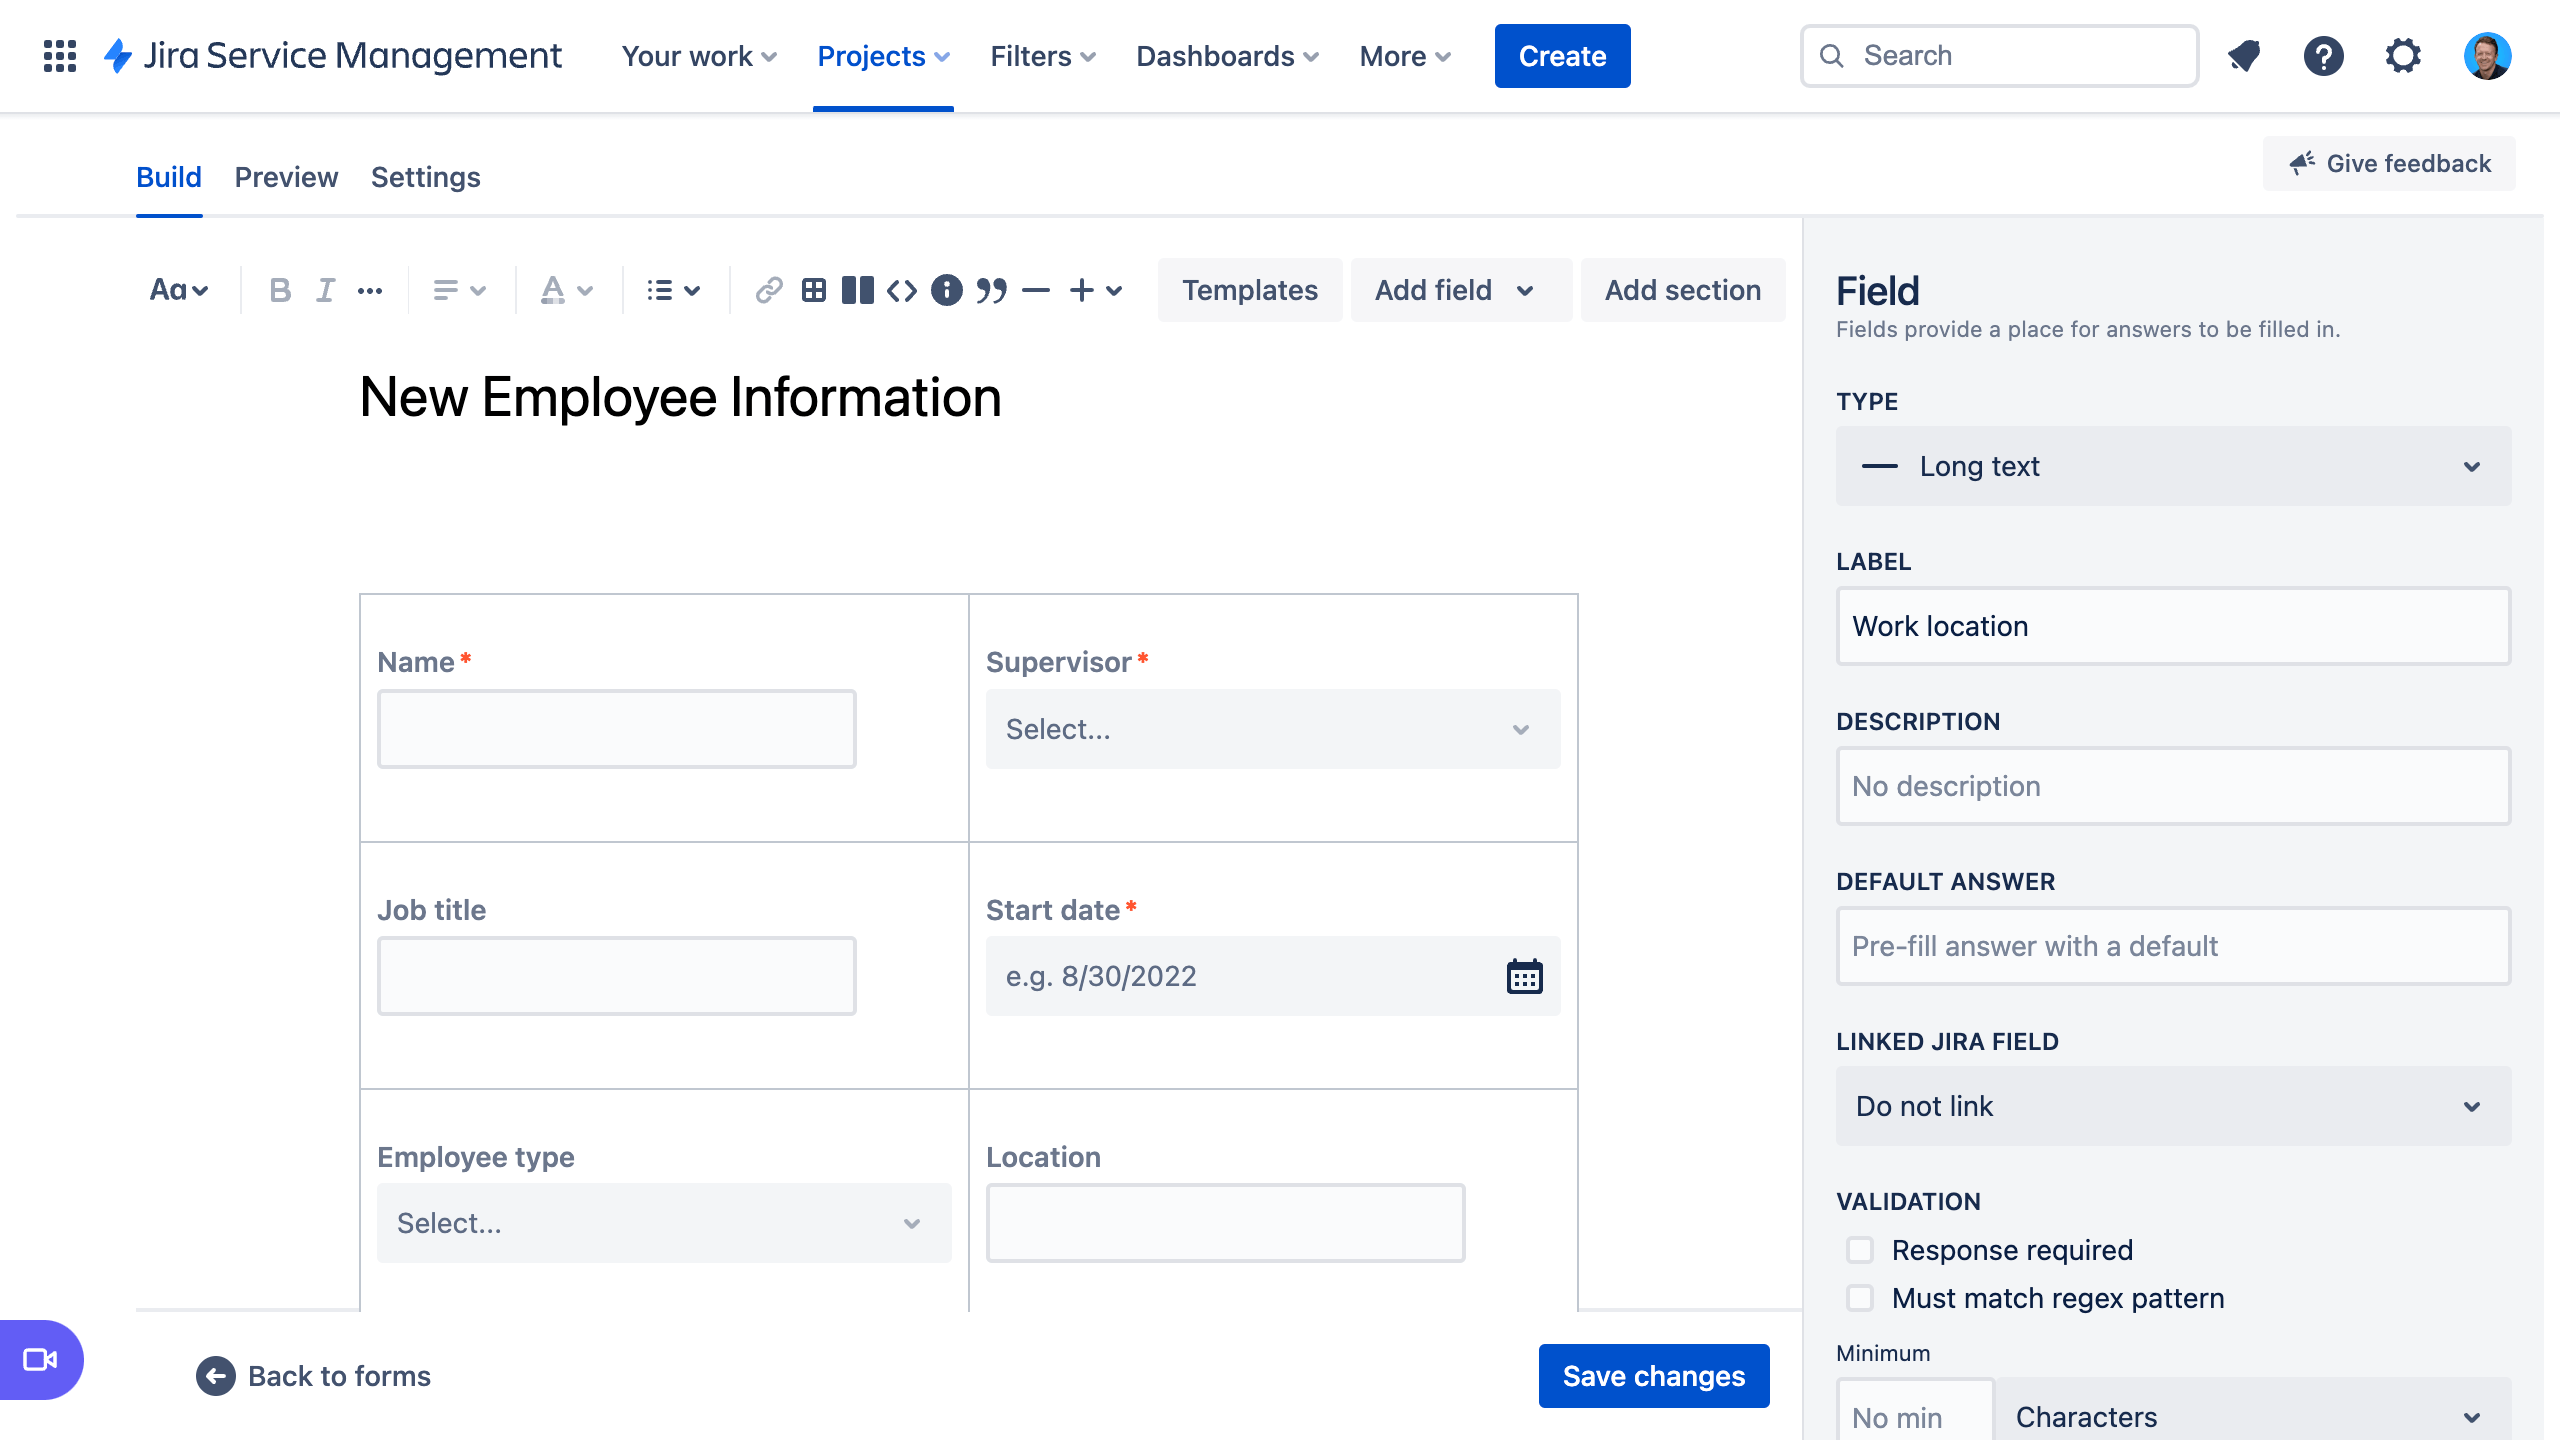
Another way to get started quickly with request types is to utilize the pre-built form templates in Jira Service Management.
You can use forms in the portal to get more structured information from customers when they raise a request, or use a form to create an issue. Forms can also be added to existing issues to act as checklists or to gather new data from customers or team members as an issue progresses.
To access your forms in Jira Service Management:
1. From your HR service management project, select Project settings in the left-hand menu.
2. Select Forms.
3. Create a new form by selecting Create form.
4. Click HR from the form template list and find a form to get you started.
Set up your HR request channels
Does your HR team have a dedicated email address or chat channel for communicating with employees? Connect those channels to Jira Service Management in addition to the included help center portal so you can streamline request intake and maintain work in one central location. Below is an overview of the channels available to your team in Jira Service Management:
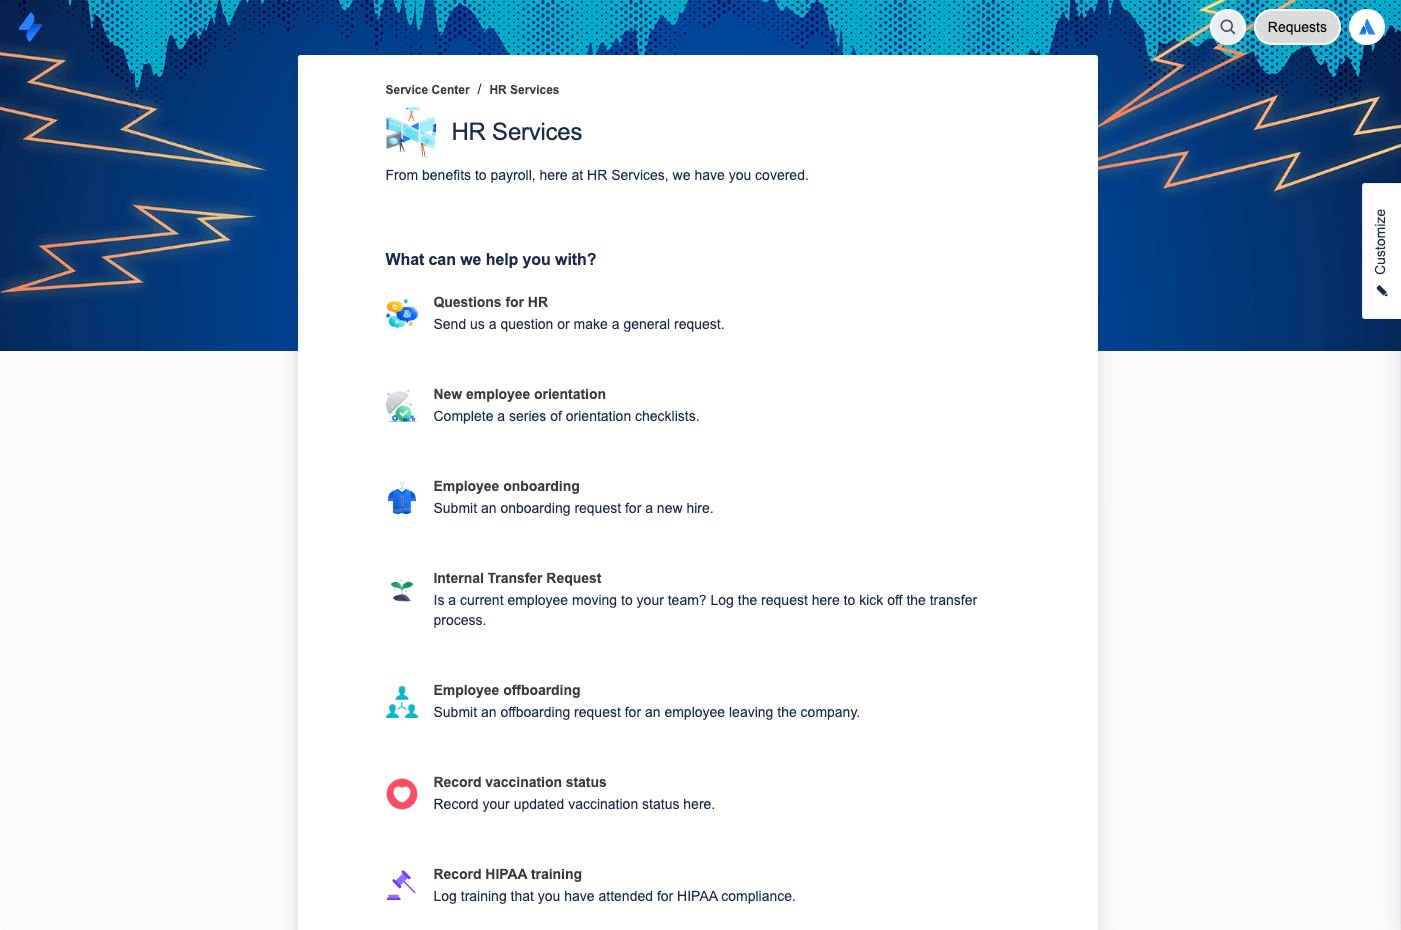
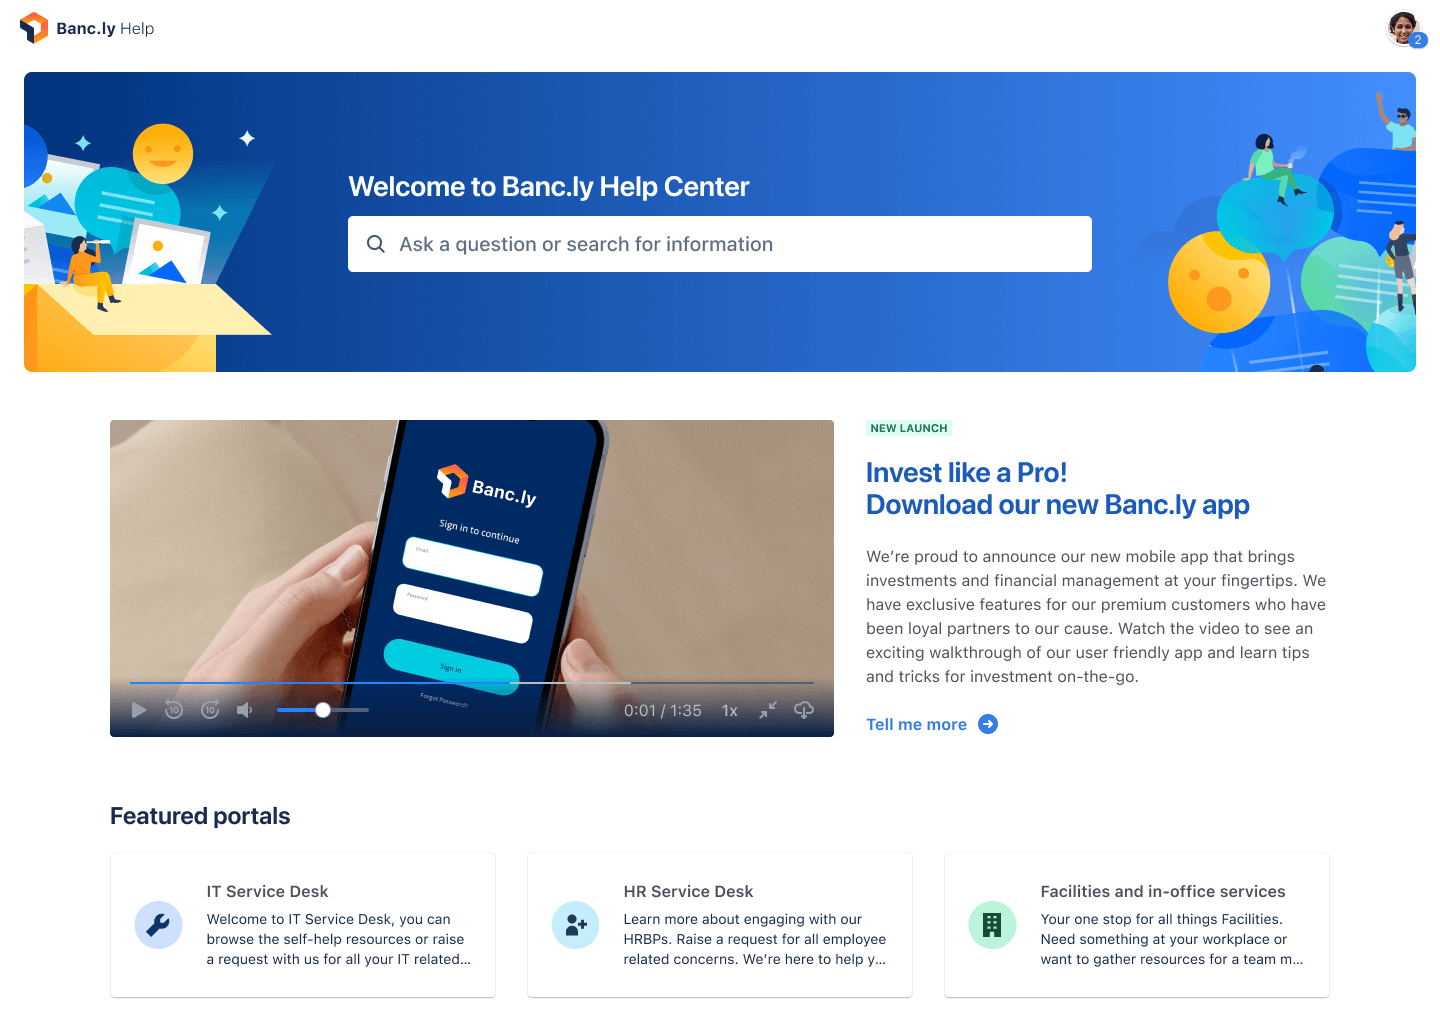
The help center portal
Your HR service project has a customizable online help center for your employees. From the help center, employees can browse all the service project portals they have access to, submit requests, and search your embedded knowledge base to help themselves, potentially deflecting incoming requests. Employees can also reference their requests via the "My Requests" section of the help center, providing greater transparency with the status of their requests.
Your service project comes with a pre-configured cloud email address that you can send to employees to start using right away. You can also add one custom email address to link to an existing email account used by your HR team. Requests sent to your service project’s email address are automatically added to your queues, so your team can focus on employees without worrying about missing requests or managing multiple inboxes.
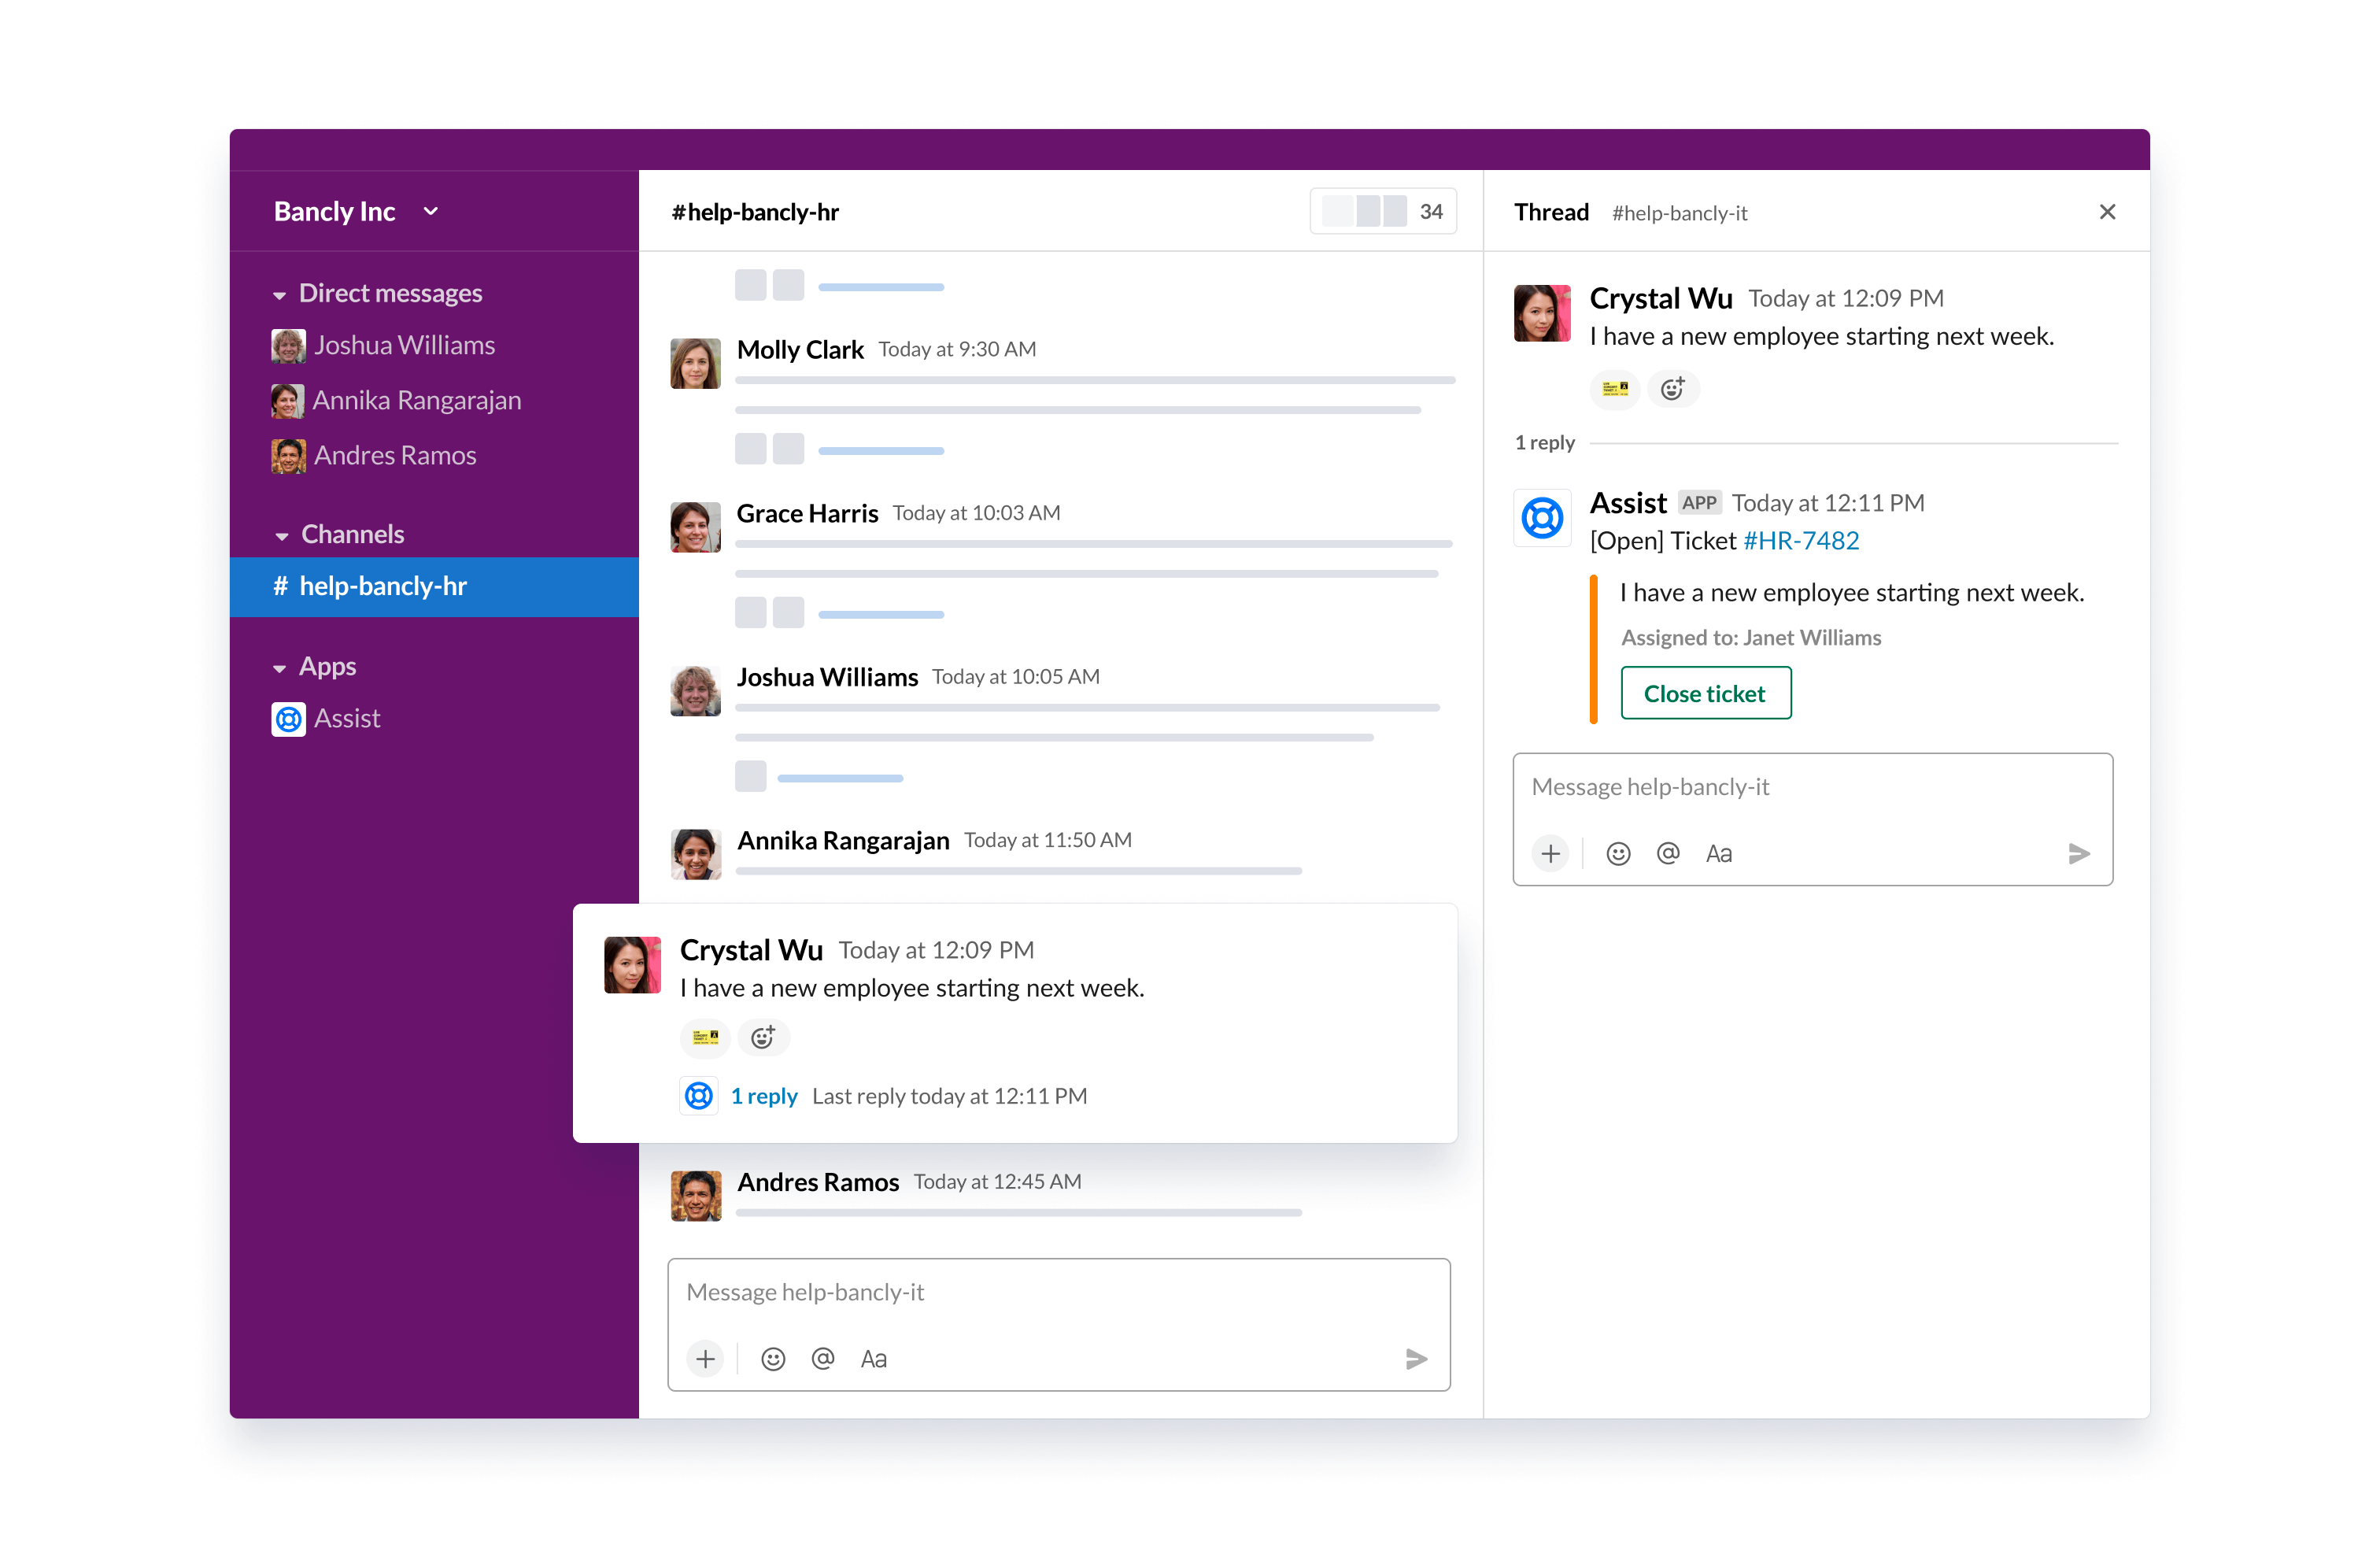
Chat
HR teams can create a two-way sync between conversations in Slack or Microsoft Teams (coming soon) and Jira Service Management. Employees never have to leave chat tools to get the help they need, and agents get all the information they need right in Jira Service Management.
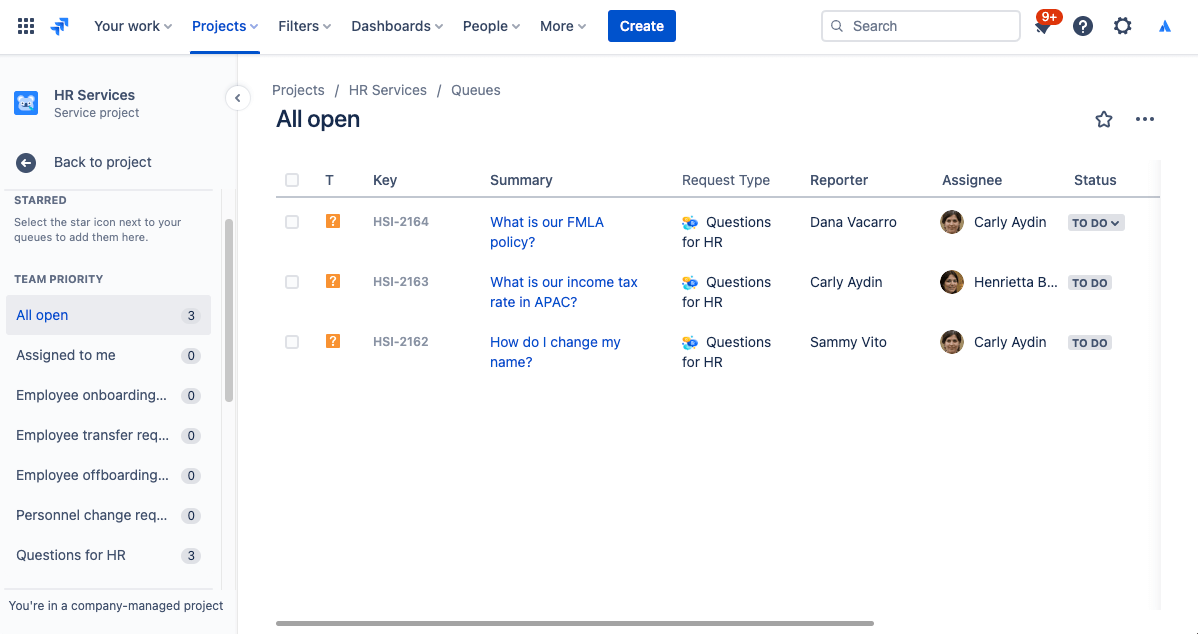
Queues and Service Level Agreements (SLAs)
Queues and SLAs in Jira Service Management are critical features that ensure organized and efficient HR service delivery. Employee requests are organized into queues which let you quickly view, triage, and assign requests as they come in.
Jira Service Management comes with out-of-the-box queues for requests such as onboarding and offboarding. You also have the flexibility to create queues that organize requests in a way that makes sense for your team. For example, your team can create escalation queues or queues for requests that have breached SLAs. The possibilities with queues are endless, so you can easily find a setup that works best for your team.
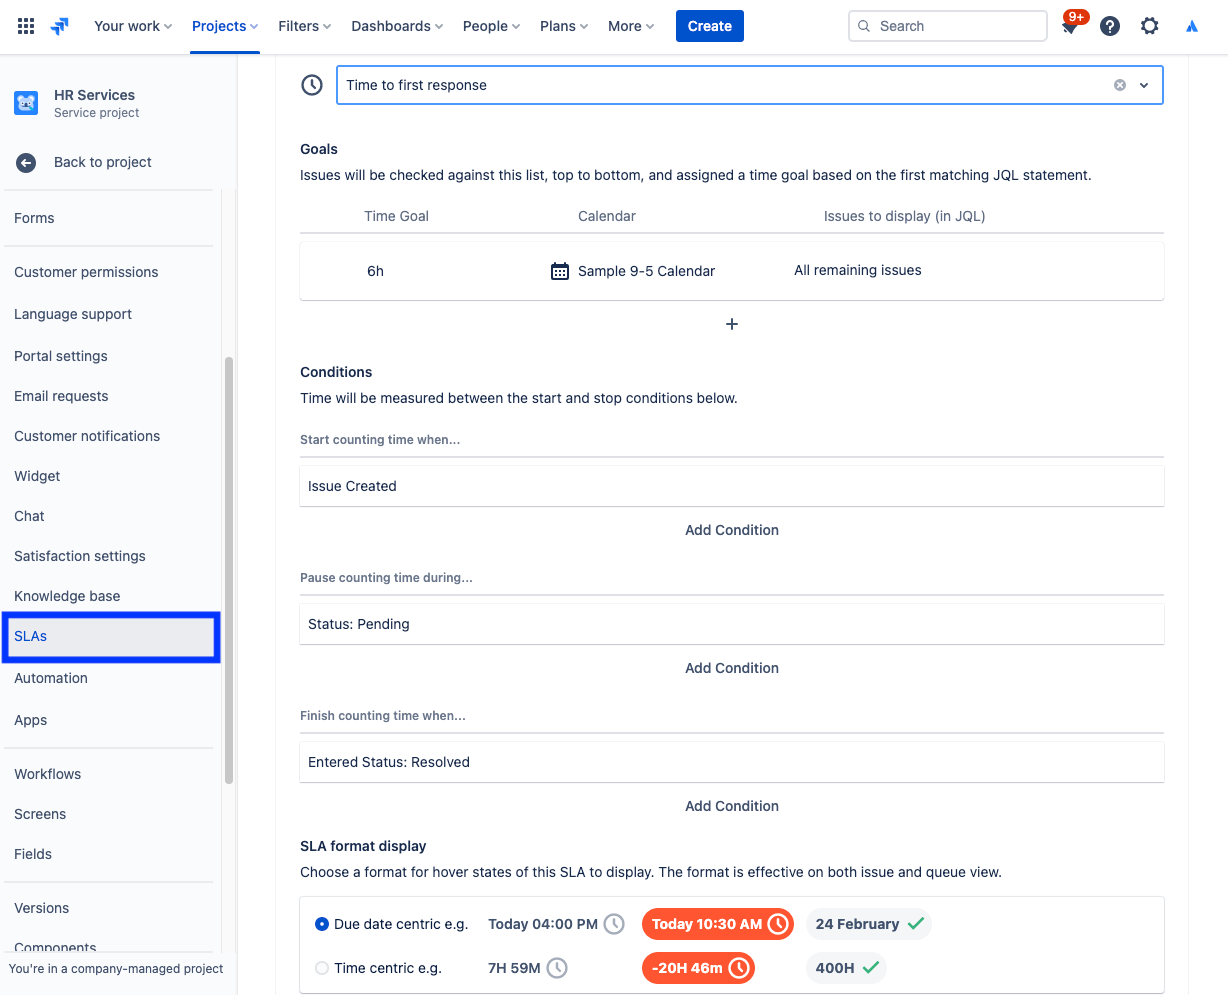
Queues are typically sorted by an SLA. Project admins can create SLA goals that specify the types of requests you want to track and the time it should take to resolve them. From there, you can define the conditions and calendars that impact when SLA measurements start, pause, or stop (for example, stopping when your office is closed for a public holiday). Once you have set up SLAs for a project, agents can view their SLAs and plan which tasks need to be resolved first and the timeframe in which they should resolve them.
To access the SLA settings:
1. From your HR service management project, select Project settings in the left-hand menu.
2. Select SLAs.
Add your HR team to your project
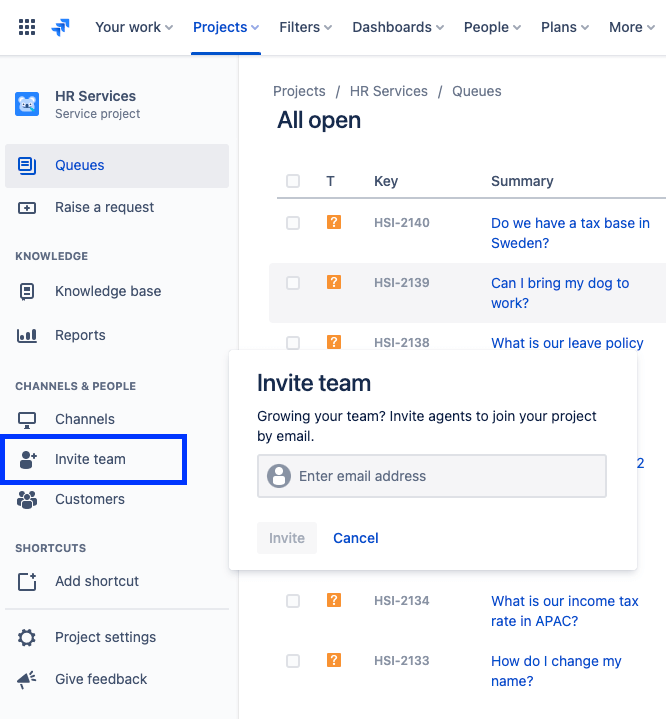
Ready to get the rest of your HR team involved? Once you have your new project set up, start inviting team members by adding each team member as an agent to your service project.
To add team members:
1. From your service project sidebar menu, select Invite team.
2. Enter the email(s) of the users you would like to add as an agent.
3. Select Invite.
4. Your agent is added to the Service Project Team role and receives an email with a link to the service project.
Tips and tricks for HR teams
Establish your knowledge base for self-service
One common service management practice that is hugely beneficial for HR teams is creating a knowledge base. With a knowledge base, HR teams can gather responses to all of the common questions they frequently are asked about (e.g., payroll, holiday leave, ID cards, and more) in one place to encourage self-service. When employees start to submit a request through the Jira Service Management customer portal, recommended articles from the knowledge base appear with helpful information, potentially deflecting requests from reaching agents.
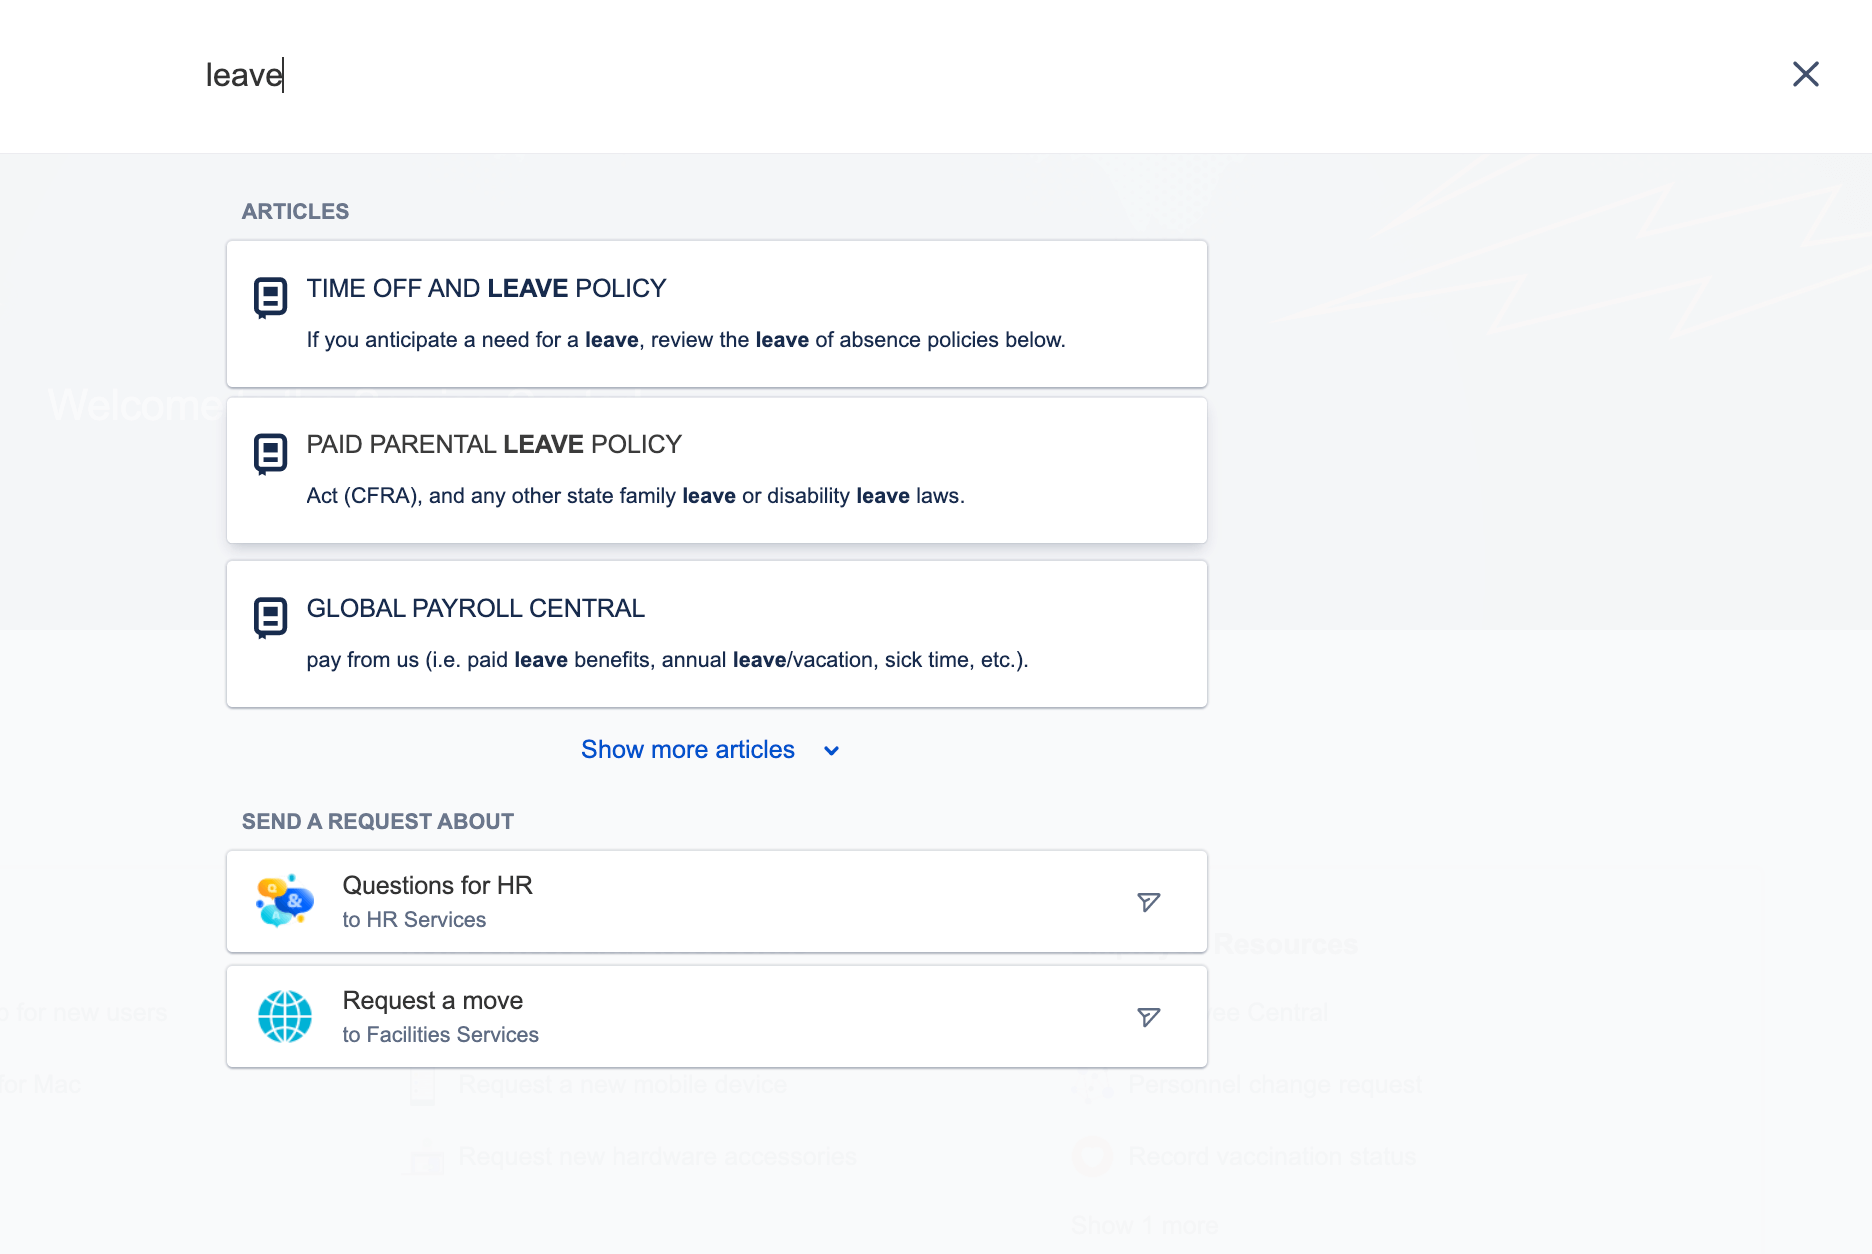
To access and set up your knowledge base:
1. From your HR service management project, select Project settings in the left-hand menu.
2. Select Knowledge base.
Automate your HR service desk
Automation in Jira Service Management is a “low-code/no-code” capability that only takes a few clicks to set up. By automating your processes and workflows, you remove the need for you and your team to perform manual, repetitive tasks – and you can focus on the work that matters.
Example: HR teams can automate the onboarding process by setting up a series of triggers to help staff prepare for new arrivals. Once an onboarding request is initiated, it can trigger the provisioning of a new laptop, installation of the required programs, creation of an email account, and notification of facilities to find a desk. All of this can be done with automation and workflows customized to suit your HR team’s needs to create consistency in how onboarding is delivered to all new employees. Multiple departments like HR and IT are connected together to create one sequenced flow, with each step kicking off the next task.

To access automation in Jira Service Management:
1. From your HR service management project, select Project settings in the left-hand menu.
2. Select Automation.
Reports and customer satisfaction
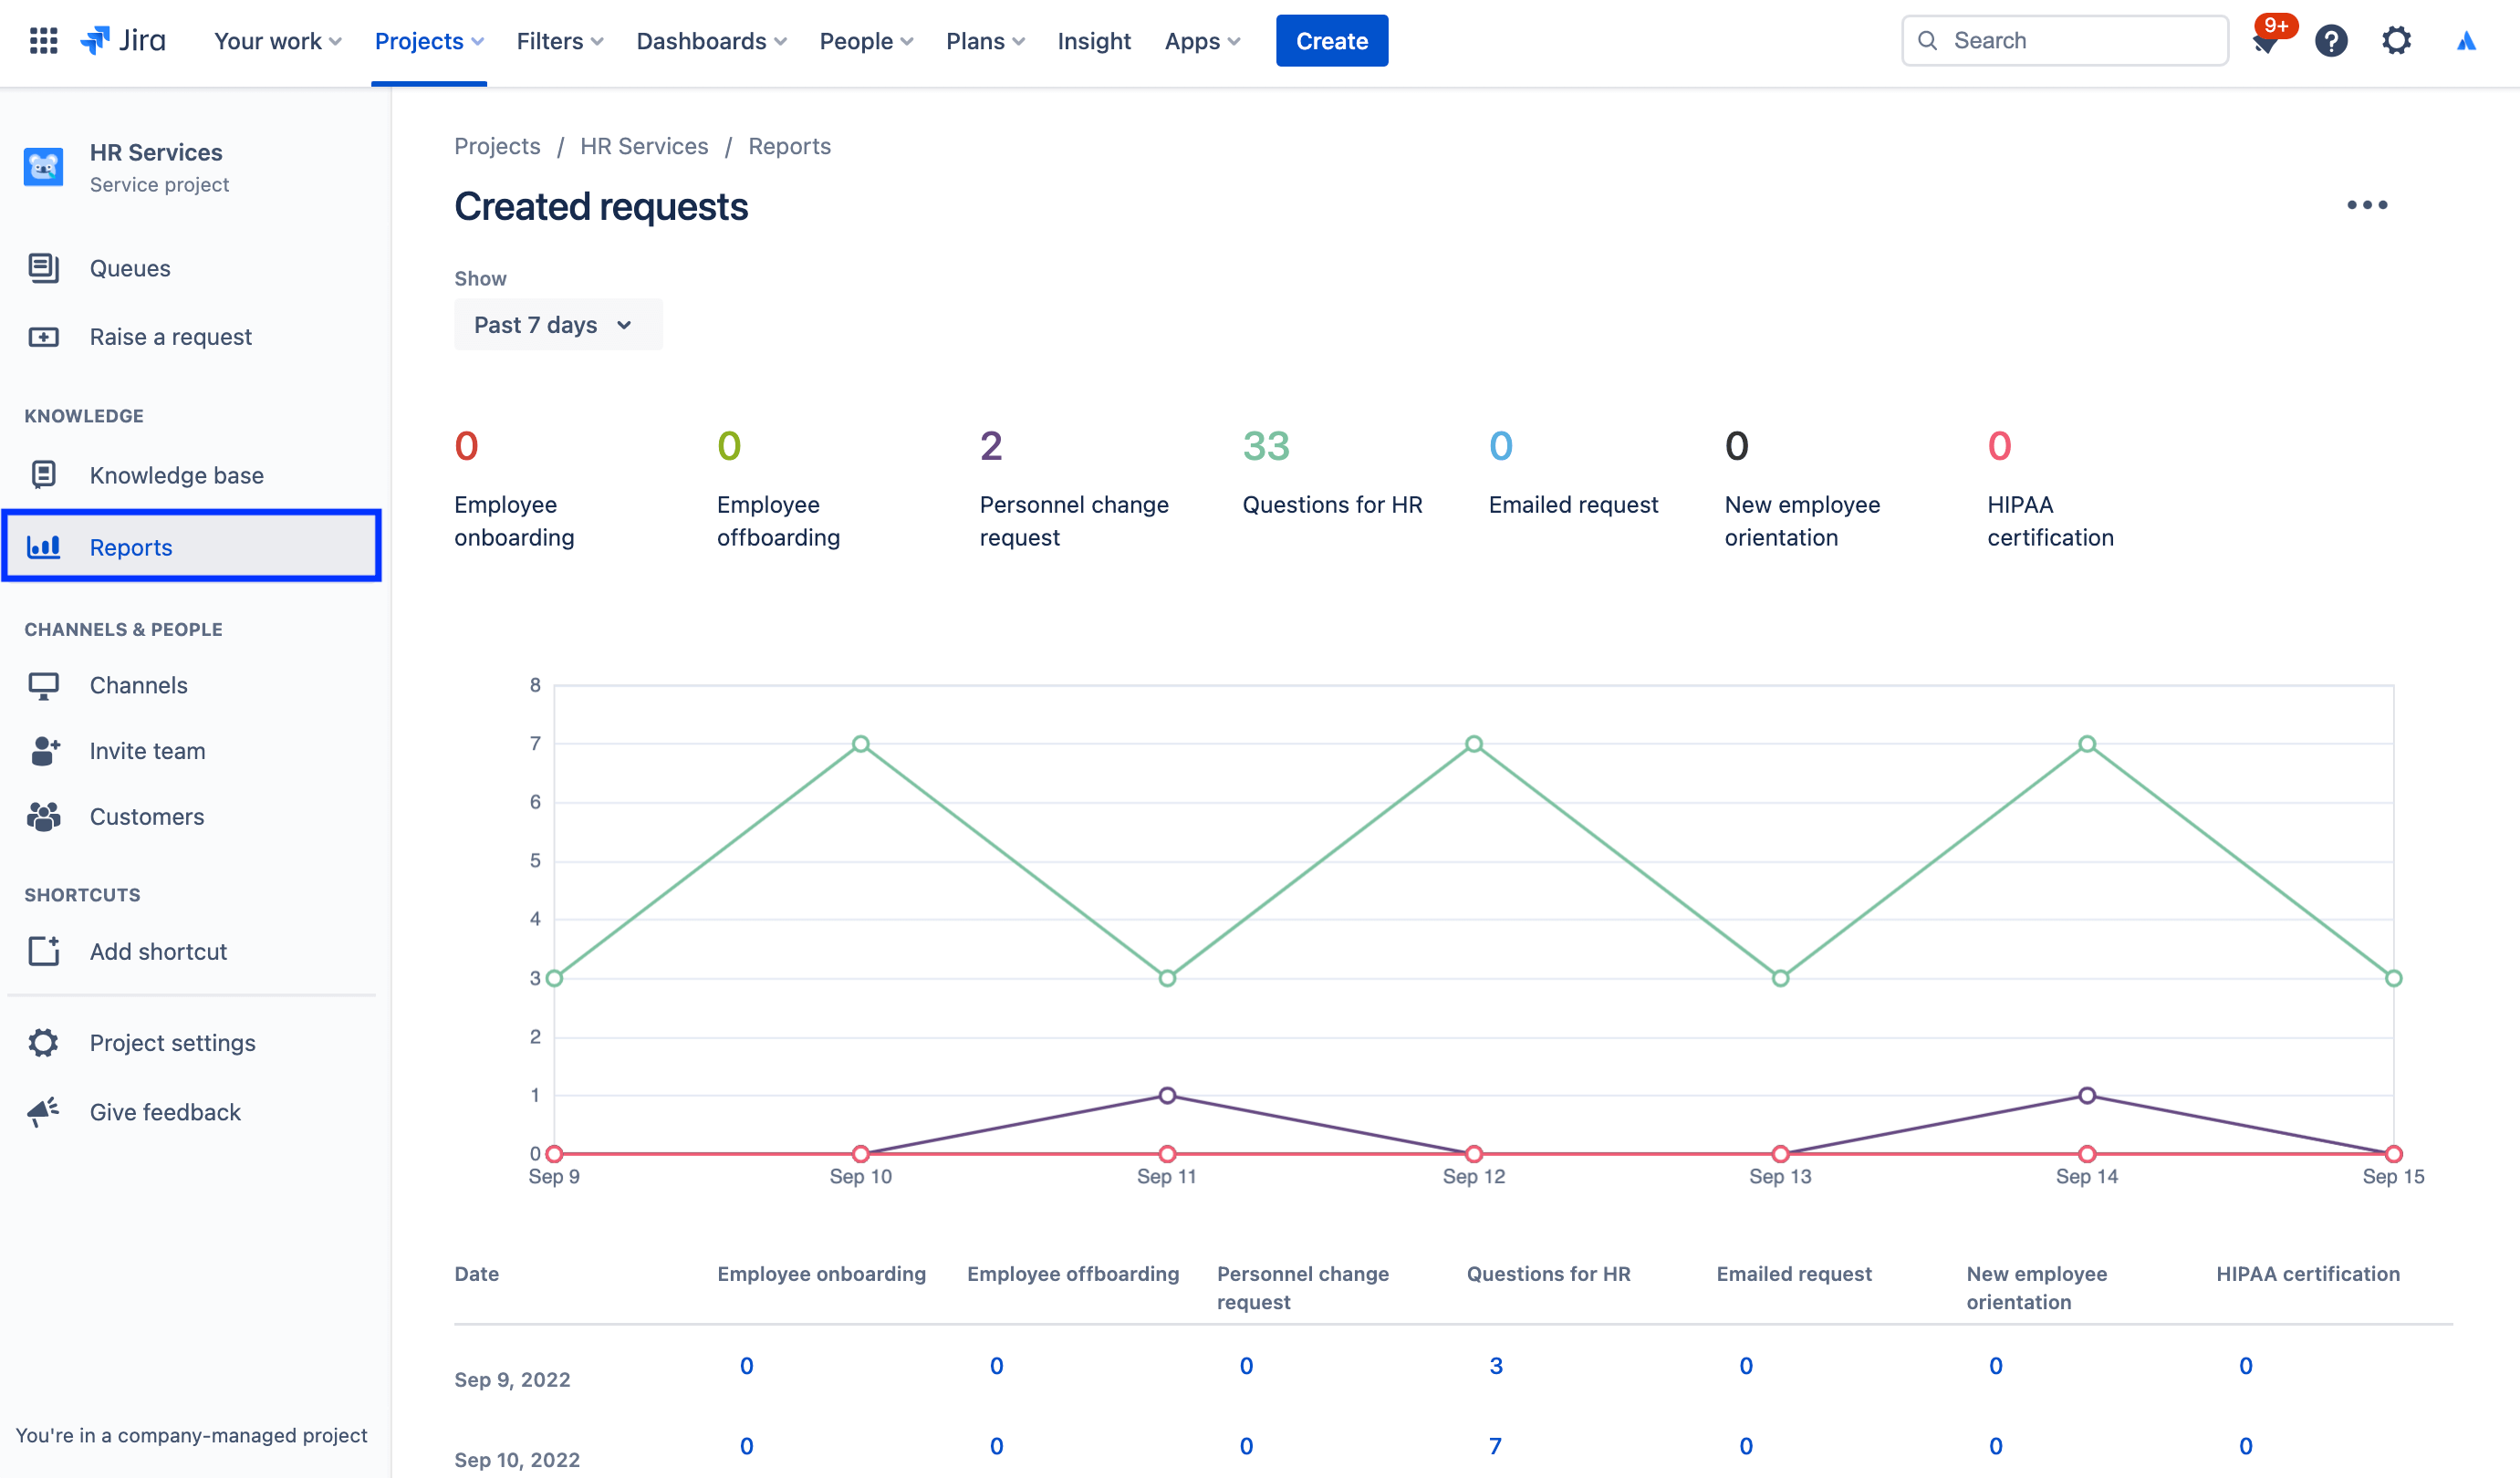
Monthly reporting becomes easy when HR managers can understand the volume of requests coming in, how many employees have successfully onboarded, and what each of their team's workloads is - all at a glance. HR managers can use data in Jira Service Management to make informed decisions about scaling their team or knowing where to improve.
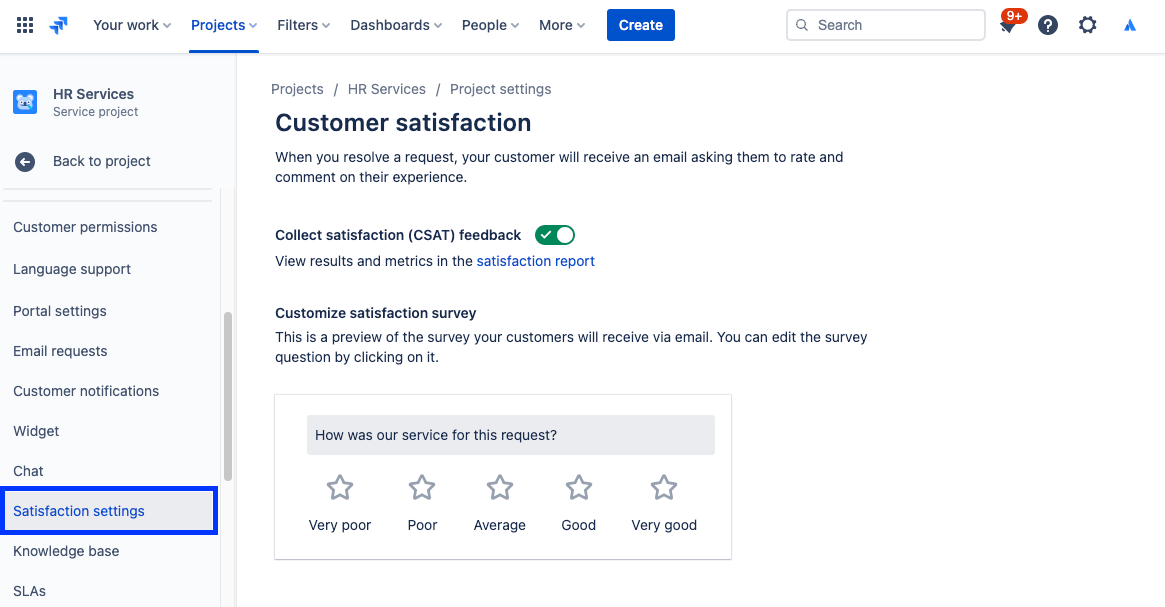
For example, Jira Service Management offers a customer satisfaction survey to collect feedback. When a request is resolved, an email is automatically dispatched to the customer. If customer satisfaction surveys (CSATs) are enabled for your service project, this email will include a form that allows customers to leave a rating and some written feedback about how their request was handled. Once submitted, these customer surveys live in the satisfaction report.
To access reports:
1. From your service project sidebar menu, select Reports.
2. Select the report you want to view.
To access the customer satisfaction survey settings:
1. From your HR service management project, select Project settings in the left-hand menu.
2. Select Satisfaction settings.
Use permissions to protect sensitive information with HR case management
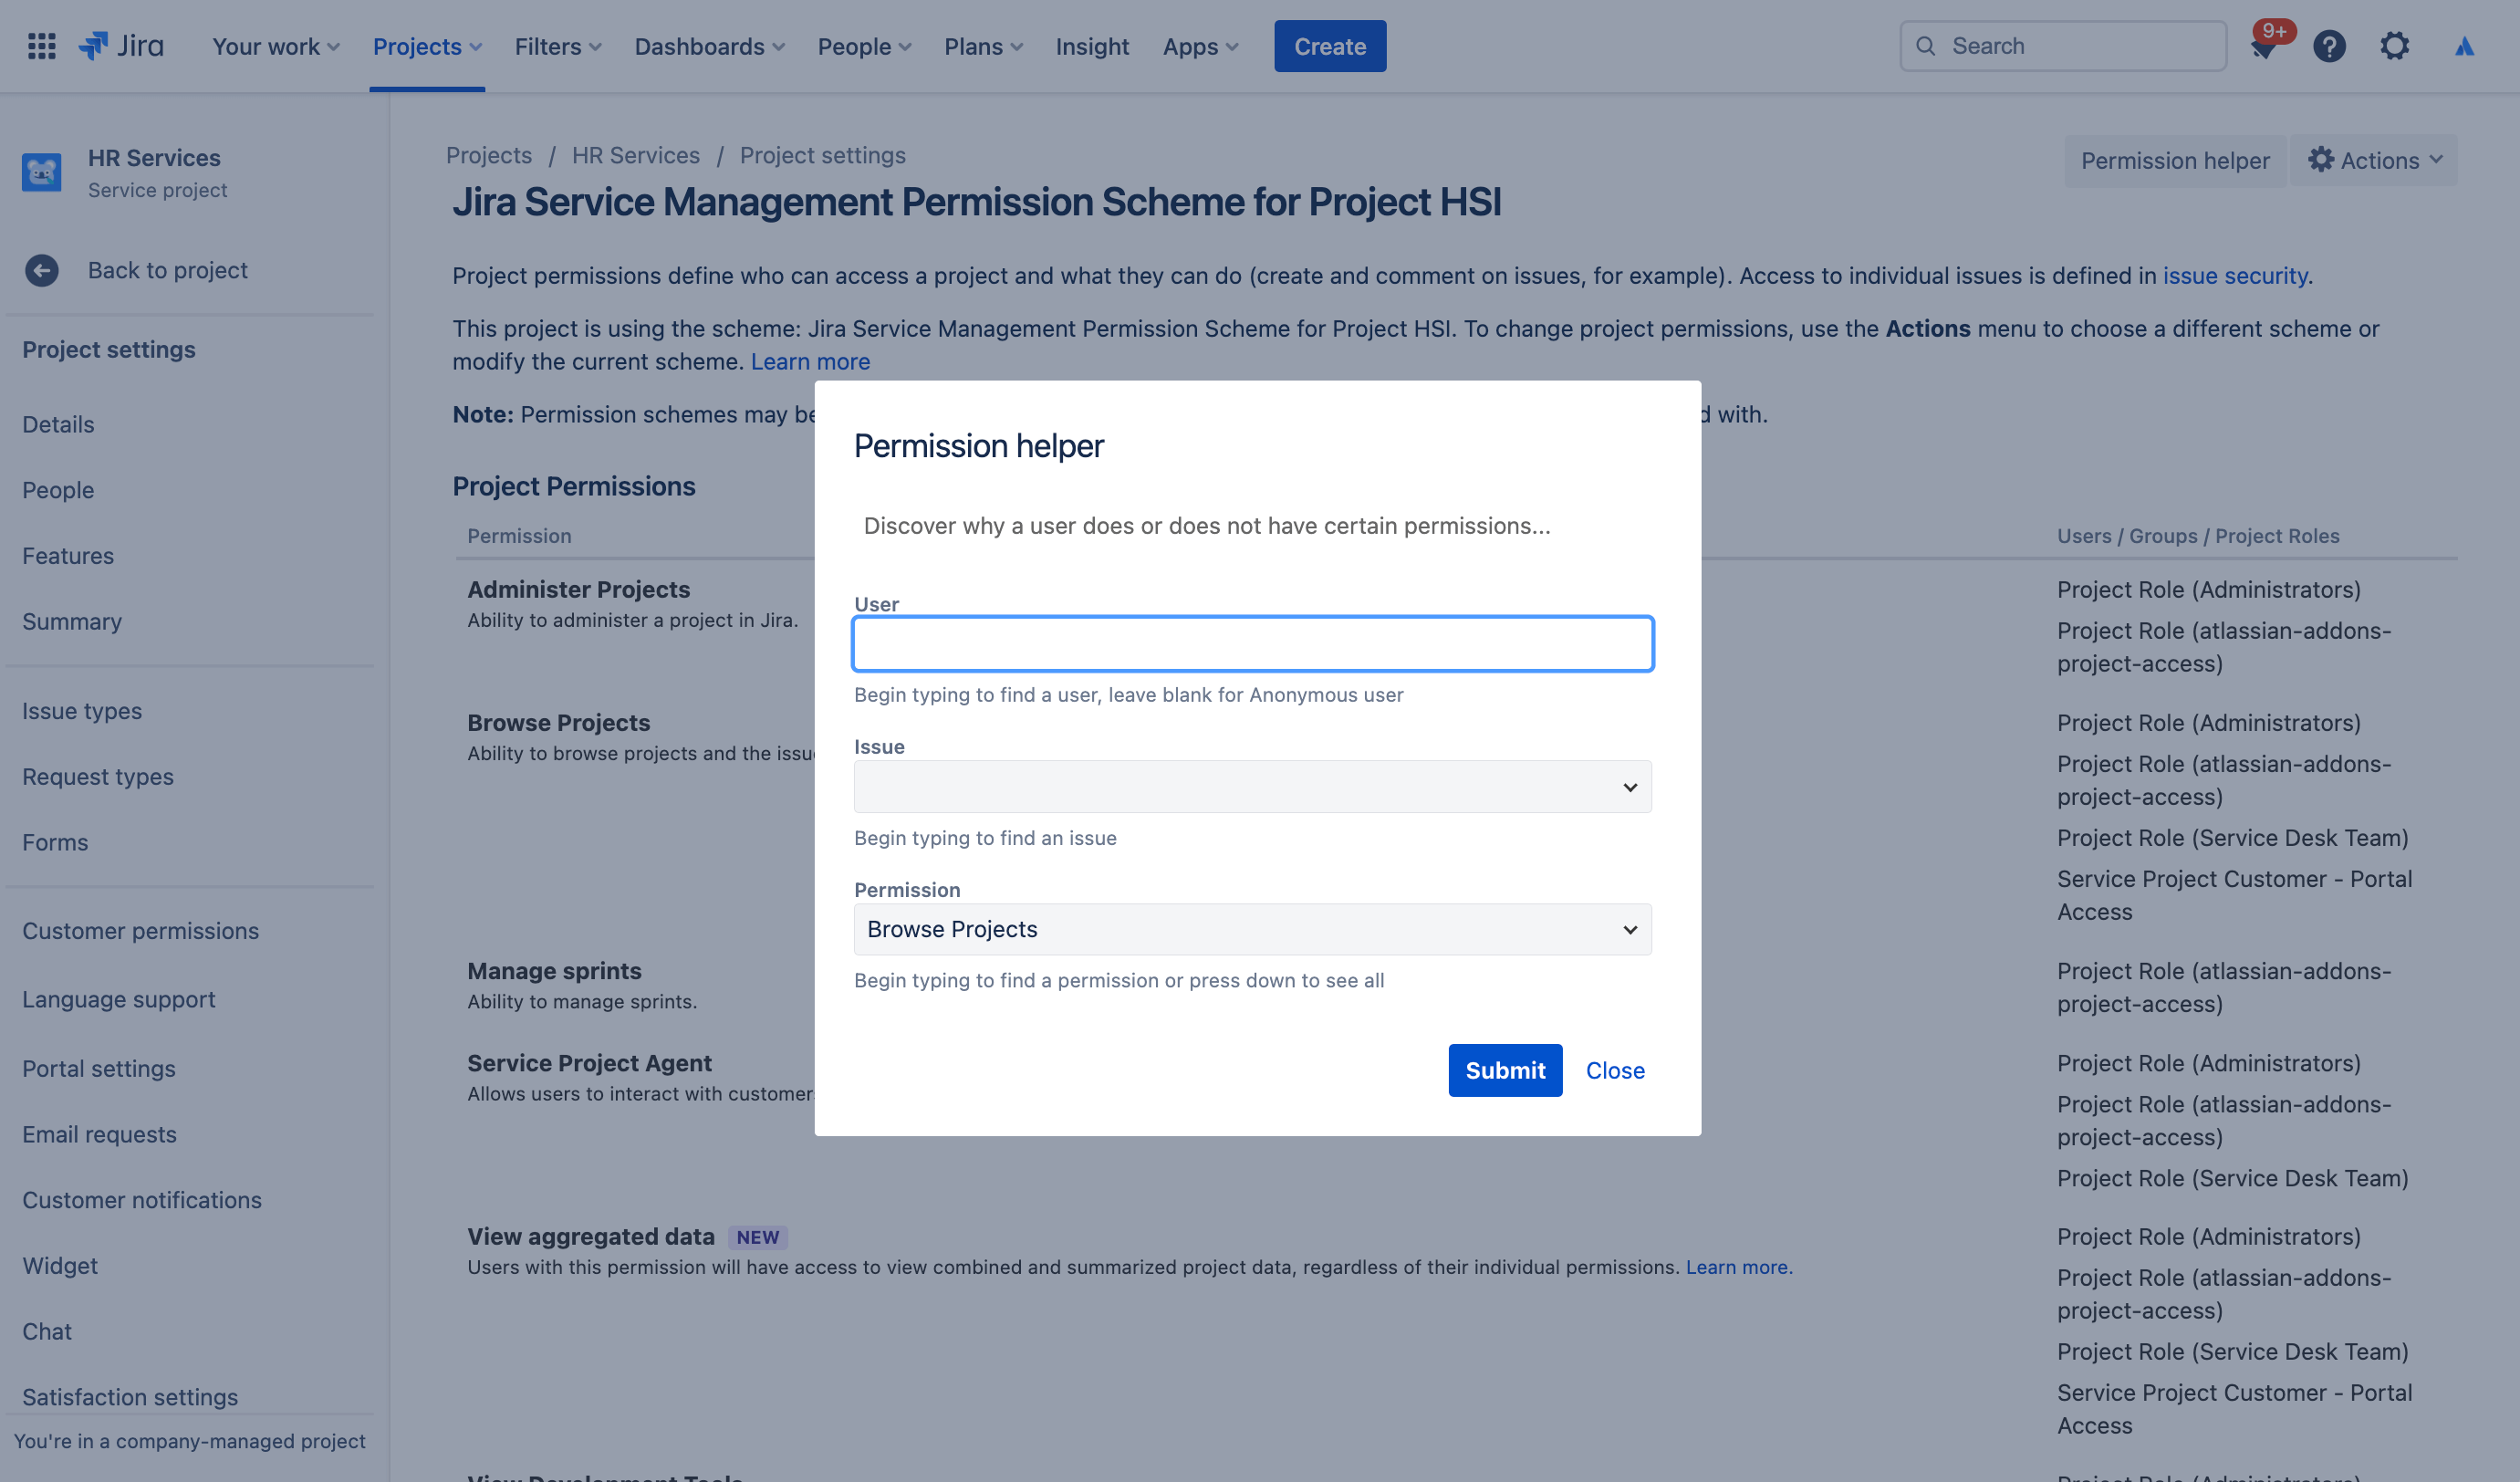
Confidentiality is critical for many HR matters. While public-facing service desks may make sense for matters of payroll, onboarding, and more general HR services, we recommend you create a separate confidential service desk for sensitive requests. To manage security and maintain confidentiality, you can use permissions to control who can view, find, and comment on requests.
To access permissions:
1. From your HR service management project, select Project settings in the left-hand menu.
2. Select Permissions.
Spotlight: how Atlassian uses Jira Service Management for HR
Streamlining new employee onboarding
At Atlassian, our HR team created more efficiency by feeding data from Workday- our human resources information system (HRIS)- into Jira Service Management via Workato.
Now when we hire someone and add them to Workday, that action automatically creates a request in Jira Service Management. That request then initiates a catalog of requests from the onboarding checklist that our People Team follows, including laptop and account provisioning, accessory requests, and orientation scheduling.

The results? We’ve:
- Increased the bandwidth of our HR teams
- Saved time and money by making workflows simpler and speedier
- Added workflow measurability to improve oversight and process
- Created an intuitive and enjoyable experience for employees that use the system
- Made onboarding tasks significantly easier to manage (as they are now centrally trackable)
For the full story, check out our blog post or watch this special session below:

Getting Started
Enterprise Service Management
Tips and Tricks
Form design
Webinar
Learn how Atlassian’s HR team delivers excellent service in the world of distributed work.